Handstand ActionsLEAN, GRIP, PUSHHANDSTAND ACTIONS Handstand isn’t something we conquer in a single class, it’s a layered process that demands repetition and refinement. There are certain key handstand actions that are non-negotiable: lifting the shoulders up to the...
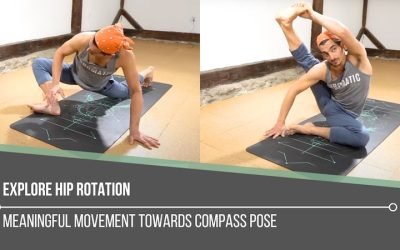
Explore Hip Rotation
Explore Hip Rotation
SURYA YANTRASANA
EXPLORE HIP ROTATION
Hip rotation isn’t just an anatomical concept—it’s an open invitation to become more intimate with our body’s story. In yoga, we often live in lateral (external) rotation, especially in hip-opening postures. While this is common, Matt reminds us that over-relying on one movement pattern can lead to discomfort or even injury. We may not find perfection in our hip structure, but we can always pursue balanced functionality. Some bodies may default to internal rotation, but most of us benefit from exploring what lies outside our default setting. In Chromatic Yoga, this is called contrast teaching, the act of exploring an action, and then its opposite, to better understand our personal needs. To explore hip rotation is to be both student and teacher of our own practice. When we shift focus from how a pose looks to how it feels at the joint level, we begin practicing with purpose, presence, and integrity.

ALIGNED VINYASA
REGISTRATION NOW OPEN
- 10 Chromatic Yoga practices with founder Matt Giordano
- Full length 75 minute classes
- 10 Peak Postures: The Most Essential Poses of the Vinyasa Practice
- Meticulously Crafted Experiences to Enhance Your Postural Practice
- Non-dogmatic, Anatomy informed Alignment
- The Perfect Blend of Knowledge and Practice
- A Heavy Emphasis on Technique for the Poses Everyone Expects You to Know but No One Teaches
- 12 Continuing Education hours with Yoga Alliance
- 12 Accredited Hours with the Chromatic School of Yoga
- Step-by-Step instruction for increased accessibility
- Sweat, Breath, Strengthen, Stretch and Feel Amazing!
THE ADVANTAGE OF THE OPPOSITE
True depth in practice doesn’t come from forcing range, it comes from creating stability within it. When we explore the opposite action in the hips (for example, activating external rotation while positioned in internal rotation), we relieve pressure on the joint’s end range. This not only stabilizes the hip but also protects the labrum and surrounding tissues like the bursa, both of which can become inflamed or pinched with overextension. These isometric contractions allow us to stay deep in the posture without compromising joint health. They also offer psychological clarity: when we explore both directions, we gain insight into our boundaries and build trust in our own choices. Learning opposition trains us to listen more attentively to the body’s feedback and adjust accordingly. Yoga becomes less about the aesthetic of a posture and more about the conscious refinement of our movement patterns. The longer we practice like this, the safer and more sustainable our bodies feel.
WATCH THE VIDEO
EXPLORE HIP ROTATION: MEANINGFUL MOVEMENT TOWARDS COMPASS POSE
PRASARITTA PADOTTANASANA ALIGNMENT
From the outside, Prasarita Padottanasana looks simple: wide legs, folded torso. But inside the hip joints, a nuanced dance unfolds. The posture’s alignment encourages internal rotation of the thighs, creating an anterior tilt of the pelvis. But here’s where Matt’s cue changes everything—we engage the external rotators by isometrically tucking the tailbone under. This creates a subtle back-and-forth of effort that pulls us away from the end range of internal rotation and recruits muscles that stabilize the hip socket. The result? More space, more support, and a lot more awareness. These muscular conversations may not be visible to others, but they are deeply felt by the practitioner. The lesson? Even in poses that seem straightforward, we can discover hidden work that makes all the difference. This quiet effort reminds us that subtlety is powerful, and that exploring hip rotation isn’t about doing more, it’s about feeling deeper.

200 HOUR ONLINE TEACHER TRAINING
GET CERTIFIED & DEEPEN YOUR YOGA PRACTICE
- Deepen your yoga practice
- Build confidence speaking in front of groups in person and online
- Learn foundational class structures and templates
- Learn techniques for a wide range of yoga postures
- Get certified and highly qualified to teach yoga
- Yoga Alliance Globally Recognized Certification Program
THE HIP ROTATION DRILL
Matt’s drill in a Lizard-like setup provides a dynamic entry into understanding hip rotation in motion. Actively rotating the thigh inward, then outward, we begin to educate the joint on its full range, not by forcing it, but by showing it what’s possible. Pain is our guidepost here: if there’s discomfort, especially where the hamstrings roll over tendons, we dial it back. The goal is to feel space and control, not to conquer a range. Holding the internal rotation at the end of the drill helps the brain and body recognize the alignment and safely sustain it. This sets the stage for more complex postures, such as Compass. As Matt reminds us, movement is the gateway to understanding stillness. And when we explore hip rotation through mindful drills, we train not just muscles, but our ability to listen, refine, and move from a place of true embodiment.

300 HOUR ONLINE TEACHER TRAINING
GET 500 HOUR CERTIFIED AS A MASTER TEACHER
Master your skill set as a teacher through refined techniques, anatomy, biomechanics, sequencing, philosophy, meditation techniques, theming, yoga business, and much more!
- Get 500 hour certified
- Learn anatomy, biomechanics, asana techniques
- Expand your teaching skills
- Masterful sequencing and verbal delivery
- Learn meditation and breathwork techniques
- Transformative tools: theming, dharma talks, satsang
COMPASS POSE: LAYER BY LAYER
Compass Pose can become a rushed end goal, but Matt reframes it as a culmination of choices, each one building on the last. Instead of grabbing the foot and yanking the leg behind the head, we take a moment. Pelvis tilts forward. If it’s the right leg lifting, we root through the left and lift the right hip, threading the arm under the thigh to create a shelf. Then, with the shelf secured, we internally rotate the lifted leg before extending. This internal rotation stabilizes the hip and distributes the effort. We pull the left shoulder back to anchor the posture. Each step is intentional, layered, and adaptable based on what we feel—not what we expect to see. This is the heart of the practice: a space between action and awareness where we decide how far to go. Explore hip rotation, and we discover how to progress with wisdom instead of force.
You can go further into this exploration in Matt’s current 10 class online immersion Aligned Vinyasa.
The 200 Hr. Teacher Training: Click Here to See the Next Start Date
The 300 Hr. Advanced Teacher Training: Click Here to See the Next Start Date
Article by Trish Curling
Video Extracted From: Aligned Vinyasa Immersion

ONLINE ANATOMY COURSE
- Accessible, exciting, and easy to learn
- Anatomy and biomechanics for yoga
- Appropriate for both teachers and students
- Learn joint alignment vs pose alignment
- Demystify yoga poses and transitions
- Release aches and pains
- Learn how to avoid common injuries
- Caters to all levels with modifications and props
- 20 hours Continued Education Credits with Yoga Alliance
- 20 hours toward Chromatic Yoga Certification and 300 Hour
- Lifetime access
Continue Learning
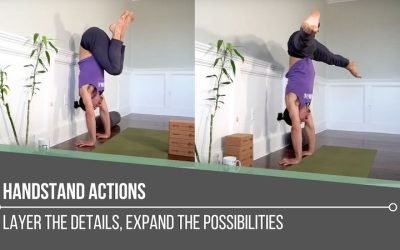
Handstand Actions
read more
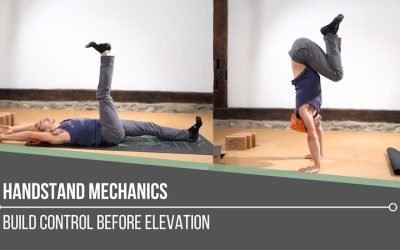
Handstand Mechanics
Handstand MechanicsINVERSIONHANDSTAND MECHANICS Stability, strength, and coordination come together in the pursuit of mastering handstand mechanics. One of the most critical foundations is internal rotation at the hip joints, which can aid with certain entries and...
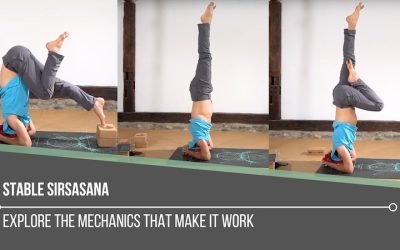
Stable Sirsasana
Stable SirsasanaHEADSTANDSTABLE SIRSASANA Creating a stable Sirsasana is less about the final pose and more about the mechanics that lead us there. From weight transfer and spinal alignment to hamstring flexibility and shoulder engagement, each layer matters. Unlike...
Explore Hip Rotation
Explore Hip RotationSURYA YANTRASANAEXPLORE HIP ROTATION Hip rotation isn’t just an anatomical concept—it’s an open invitation to become more intimate with our body’s story. In yoga, we often live in lateral (external) rotation, especially in hip-opening postures....
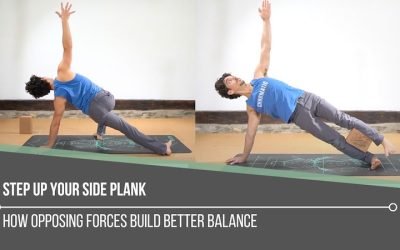
Step Up Your Side Plank
Step Up Your Side PlankVASISTHASANASTEP UP YOUR SIDE PLANK Side Plank might look simple, but true proficiency starts in the details. One of the keys to refining the posture is learning how opposing muscle groups create an isometric contraction—a subtle engagement that...
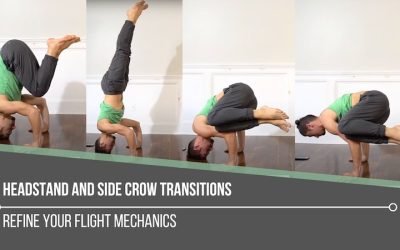
Headstand and Side Crow Transitions
Headstand and Side Crow TransitionsPARSVA BAKASANAHEADSTAND AND SIDE CROW TRANSITIONS Mastery begins with mechanics, especially when it comes to headstand and side crow transitions. Each posture on its own demands control, coordination, and a deep understanding of...
THE FREE TECHNIQUE PACK
When You Subscribe, You Will Get Instant Access to
- the Technique Pack: 15 yoga pose breakdowns
- exclusive online course discounts
- exclusive blogs and videos