The SI JointalignmentTHE SI JOINT What is the SI Joint? To understand what it is, we must discuss all that surrounds it. First, the Sacrum is a triangular-like shaped bone that sits between the two sides of the pelvis (the left Ilium and right Ilium). Now each Ilium...
The SI Joint
The SI Joint
alignment
THE SI JOINT
What is the SI Joint? To understand what it is, we must discuss all that surrounds it. First, the Sacrum is a triangular-like shaped bone that sits between the two sides of the pelvis (the left Ilium and right Ilium). Now each Ilium has the ability to move independently. They are able to move because they are fused together by both the pubic symphysis (the joint where the pubic bone is located) and the ligaments of the Sacroiliac joint. There are two sacroiliac (SI) joints, one on each side of the sacrum, connecting the spine to the pelvis and supporting weight transfer. The SI joint acts like a shock absorber for the body. It provides stability while we walk, stand, and move. Though it has very little movement, when it becomes too tight or too loose, it can cause discomfort or pain in the lower back and hips.

THERAPEUTIC'S
REGISTRATION NOW OPEN
- 10 Chromatic Yoga practices with founder Matt Giordano
- Full length 75 minute classes
- Each Yoga class explore’s how to maintain optimal health in areas of the body that are prone to injury and chronic pain.
- Highly informative and educational classes for both practitioners and teachers.
- Each class includes warm ups, sun salutations, standing postures and cool down
- How to use props to modify or enhance benefits of each asana.
- Technique, biomechanics, and alignment at the forefront
- 12 Continuing Education hours with Yoga Alliance
- 12 Accredited Hours with the Chromatic School of Yoga
- Step-by-Step instruction for increased accessibility
- Improve strength, balance, flexibility, and proprioception
- Disclaimer #1: This is not designed as “Yoga Therapy” and will not diagnose or treat any specific ailments or injuries.
- Disclaimer #2: The purpose of this immersion is for education, exploration and understanding your options: there are no hard and fast solutions to injury’s that can be solved solely by practicing yoga
- Disclaimer #3: If you have an acute injury, be sure you have a doctors approval prior to practicing this immersion
PROBLEMS THAT MAY ARISE
When the sacroiliac (SI) joint becomes too loose or too rigid, it can lead to significant discomfort. One side of the pelvis may tilt forward (anterior) while the other tilts back (posterior), or one side may rotate inward while the other rotates outward. This imbalance can cause pelvic misalignment, leading to strain in the SI joint, especially when walking or completing other daily activities. Strengthening and activating the inner and outer hip muscles can help stabilize the joint and alleviate discomfort. However, we are all different, and finding the right approach requires mindful exploration. Within our yoga practice, we can experiment with different postures to discover what best supports SI joint stability. Gentle engagement, and a balance of mobility and strength are key to maintaining a healthy SI joint. With consistent practice, we can develop greater awareness of pelvic alignment and movement, helping to reduce pain and improve overall function.
WATCH THE VIDEO
THE SI JOINT: UNDERSTAND & IMPROVE THE IMBALANCES
WORK ON THE OUTER HIPS
When we strengthen the outer hip muscles, they can help to widen the SI joint by pulling the ilium away from the sacrum, providing space and potentially some relief.
Table Top Drill
Some of the most important cues in this drill are hugging the hip of the base leg in towards the midline. It’s not uncommon for the tendency to let the hip sag out to the side. Also, Matt cues us specifically, to lift the other leg out to the side while leading with the foot and not the knee (helping to keep the shin parallel to the ground).
Ardha Chandrasana Drill
In this drill, we are also lowering and lifting one leg. We are targeting Gluteus maximus, medius, minimus, and TFL.
Again, it’s all about finding what works. Not all movements and/or postures may be appropriate. What is it that helps us reduce pain? This is where the pursuit exists.

200 HOUR ONLINE TEACHER TRAINING
GET CERTIFIED & DEEPEN YOUR YOGA PRACTICE
- Deepen your yoga practice
- Build confidence speaking in front of groups in person and online
- Learn foundational class structures and templates
- Learn techniques for a wide range of yoga postures
- Get certified and highly qualified to teach yoga
- Yoga Alliance Globally Recognized Certification Program
INNER & OUTER HIP DRILLS
In the latter portion of today’s video, Matt takes us through different ways of exploring inner and outer thigh activation with a strap. Here are the main steps for each variation:
Variation I (Outer hips)
- Tie the strap around the mid-thigh
- Pull the legs apart
- Create an anterior tilt of the pelvis
- Alternate balancing on one foot while pulling the strap apart
Variation II (Outer Hip & Inner Thigh)
- Bend the knees while squeezing a block between the the calves
- Alternate balancing on one foot
The standing leg will help to activate the outer hip muscles, while squeezing the block activates the inner thigh muscles (adductors).
Variation III
- Tie the strap around mid-thigh
- Pull the strap apart (from the backs of the legs)
- Walk without rotating legs
- Walk forward and backward
Activating the inner thighs can help to stabilize the pelvis when we walk. It may also help to level out the pelvis.

300 HOUR ONLINE TEACHER TRAINING
GET 500 HOUR CERTIFIED AS A MASTER TEACHER
Master your skill set as a teacher through refined techniques, anatomy, biomechanics, sequencing, philosophy, meditation techniques, theming, yoga business, and much more!
- Get 500 hour certified
- Learn anatomy, biomechanics, asana techniques
- Expand your teaching skills
- Masterful sequencing and verbal delivery
- Learn meditation and breathwork techniques
- Transformative tools: theming, dharma talks, satsang
TO BE, OR NOT TO BE BALANCED
It’s nice to imagine this perfect equilibrium within our bodies, but the truth is, we may never achieve that. This fact is perfectly alright. Perhaps a better goal is understanding. If we understand how to properly navigate and explore drills and asana that work best for our bodies, then we actually will find more “balance” in our everyday lives.
Diving deeper into this idea is available in Matt’s current online Therapeutics Immersion. Register now to get lifetime access to the plethora of knowledge Matt shares about pain, injury, discomfort, and most importantly, about how to traverse through these challenges.
The 200 Hr. Teacher Training: Click Here to See the Next Start Date
The 300 Hr. Advanced Teacher Training: Click Here to See the Next Start Date
Article by Trish Curling
Video Extracted From: Therapeutics Immersion

ONLINE ANATOMY COURSE
- Accessible, exciting, and easy to learn
- Anatomy and biomechanics for yoga
- Appropriate for both teachers and students
- Learn joint alignment vs pose alignment
- Demystify yoga poses and transitions
- Release aches and pains
- Learn how to avoid common injuries
- Caters to all levels with modifications and props
- 20 hours Continued Education Credits with Yoga Alliance
- 20 hours toward Chromatic Yoga Certification and 300 Hour
- Lifetime access
Continue Learning

The SI Joint
read more
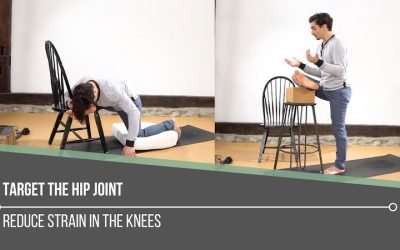
Target The Hip Joint
Target The Hip JointalignmentTARGET THE HIP JOINT Unlike the hip joint, the movement available at the knee is primarily meant for flexion and extension. When we engage in hip opening postures in our yoga practice, there can be a great impact on both the hip and the...
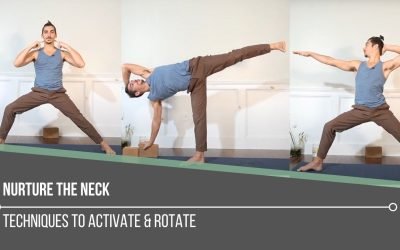
Nurture The Neck
Nurture The NeckalignmentNURTURE THE NECK The neck is not often the shining star of our yoga practice, yet it is an integral part. Too often, we may only offer more attention if we’re feeling pain in a particular posture. It’s important however, for us to be...
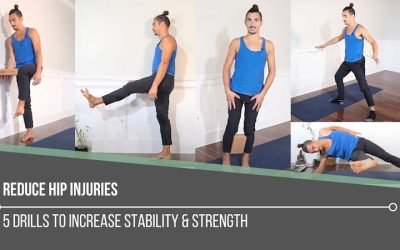
Reduce Hip Injuries
Reduce Hip InjuriesmobilityREDUCE HIP INJURIES The hip joint carries a great deal of responsibility. It supports many of our key movements in our daily lives. With all of its responsibility and involvement with how we move, it can act as a protector, while still...
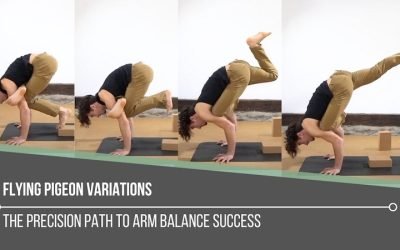
Flying Pigeon Variations
Flying Pigeon Variationseka pada galavasanaFLYING PIGEON VARIATIONS When we think of different variations of postures, it’s easy to think that we should practice either “this on, or that one”. What we may not entertain is the magnitude of focus we must place on the...
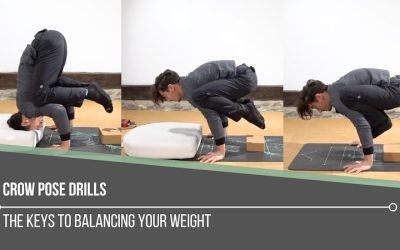
Crow Pose Drills
Crow Pose DrillsbakasanaCROW POSE DRILLS If we’re attempting to balance in a posture like Crow pose, then the understanding of the way in which we balance our weight is crucial. When we achieve this, not only will we find more confidence and comfort in executing the...
THE FREE TECHNIQUE PACK
When You Subscribe, You Will Get Instant Access to
- the Technique Pack: 15 yoga pose breakdowns
- exclusive online course discounts
- exclusive blogs and videos
