Weightless InversionssirsasanaWEIGHTLESS INVERSIONS Weightless inversions are not about removing effort. They are about redistributing it with awareness. Matt reminds us that when we refine how we place weight through the hands, shoulders, and core, the body begins to...
Dancer Pose
Dancer Pose
The Chromatic Way
natarajasana
DANCER POSE
Dancer Pose is the kind of posture that embodies both grace and strength. In order to integrate these two things into your practice of this posture, there are quite a number of pieces of the puzzle to consider. You might argue that the “grace” portion of the pose comes from its heart-opening shape, while the strength comes from all that goes into finding balance. There are other components that comprise both. The journey of discovering these elements becomes quite profound and rewarding when you follow Matt’s Chromatic approach. In today’s video, you’ll witness techniques that support your development and observe how the “Chromatic way” is implemented to create deeper awareness and transformation. Dancer Pose, along with other “preparatory postures,” becomes more accessible in your practice.

CHROMATIC YOGA
OCTOBER 2023 15Hr. Immersion
- 12 Chromatic Yoga practices with founder Matt Giordano
- Full-spectrum immersion covering all posture categories
- Improve your body awareness and advance your practice
- Technique, biomechanics, and alignment at the forefront
- Life-enhancing and inspirational Chromatic philosophy woven through each class
- 15 Continuing Education hours with Yoga Alliance
- 15 Accredited Hours with the Chromatic School of Yoga
- Step-by-step instruction for increased accessibility
- Improve strength, balance, flexibility, and proprioception
- Appropriate variations and modifications for all levels
$168.00 $138.00
WHAT IS CHROMATIC YOGA?
Before we look at Dancer Pose, let’s delve into what Chromatic Yoga actually means: “Chromatic Yoga is a systematic approach to teaching that provides a highly intentional and purposeful experience for students to cultivate awareness of their body and mind.” (Extracted from Matt’s 300 Hr. Teacher Training)
What does this look like in your physical yoga practice? In a well-developed class or practice, you’ll start by laying a foundation. This can be done by focusing on specific actions in “foundational postures” and/or shapes. This sets the stage and prepares your body for a “peak posture.” Each movement is executed with a specific intention. Remaining focused on these intentions helps you create more awareness of how you move and where you may need to add or edit a particular action. Everything is broken down, simplified, and repeated to support you in realizing your fullest potential.
WATCH THE VIDEO
DANCER POSE: THE CHROMATIC WAY
START HERE
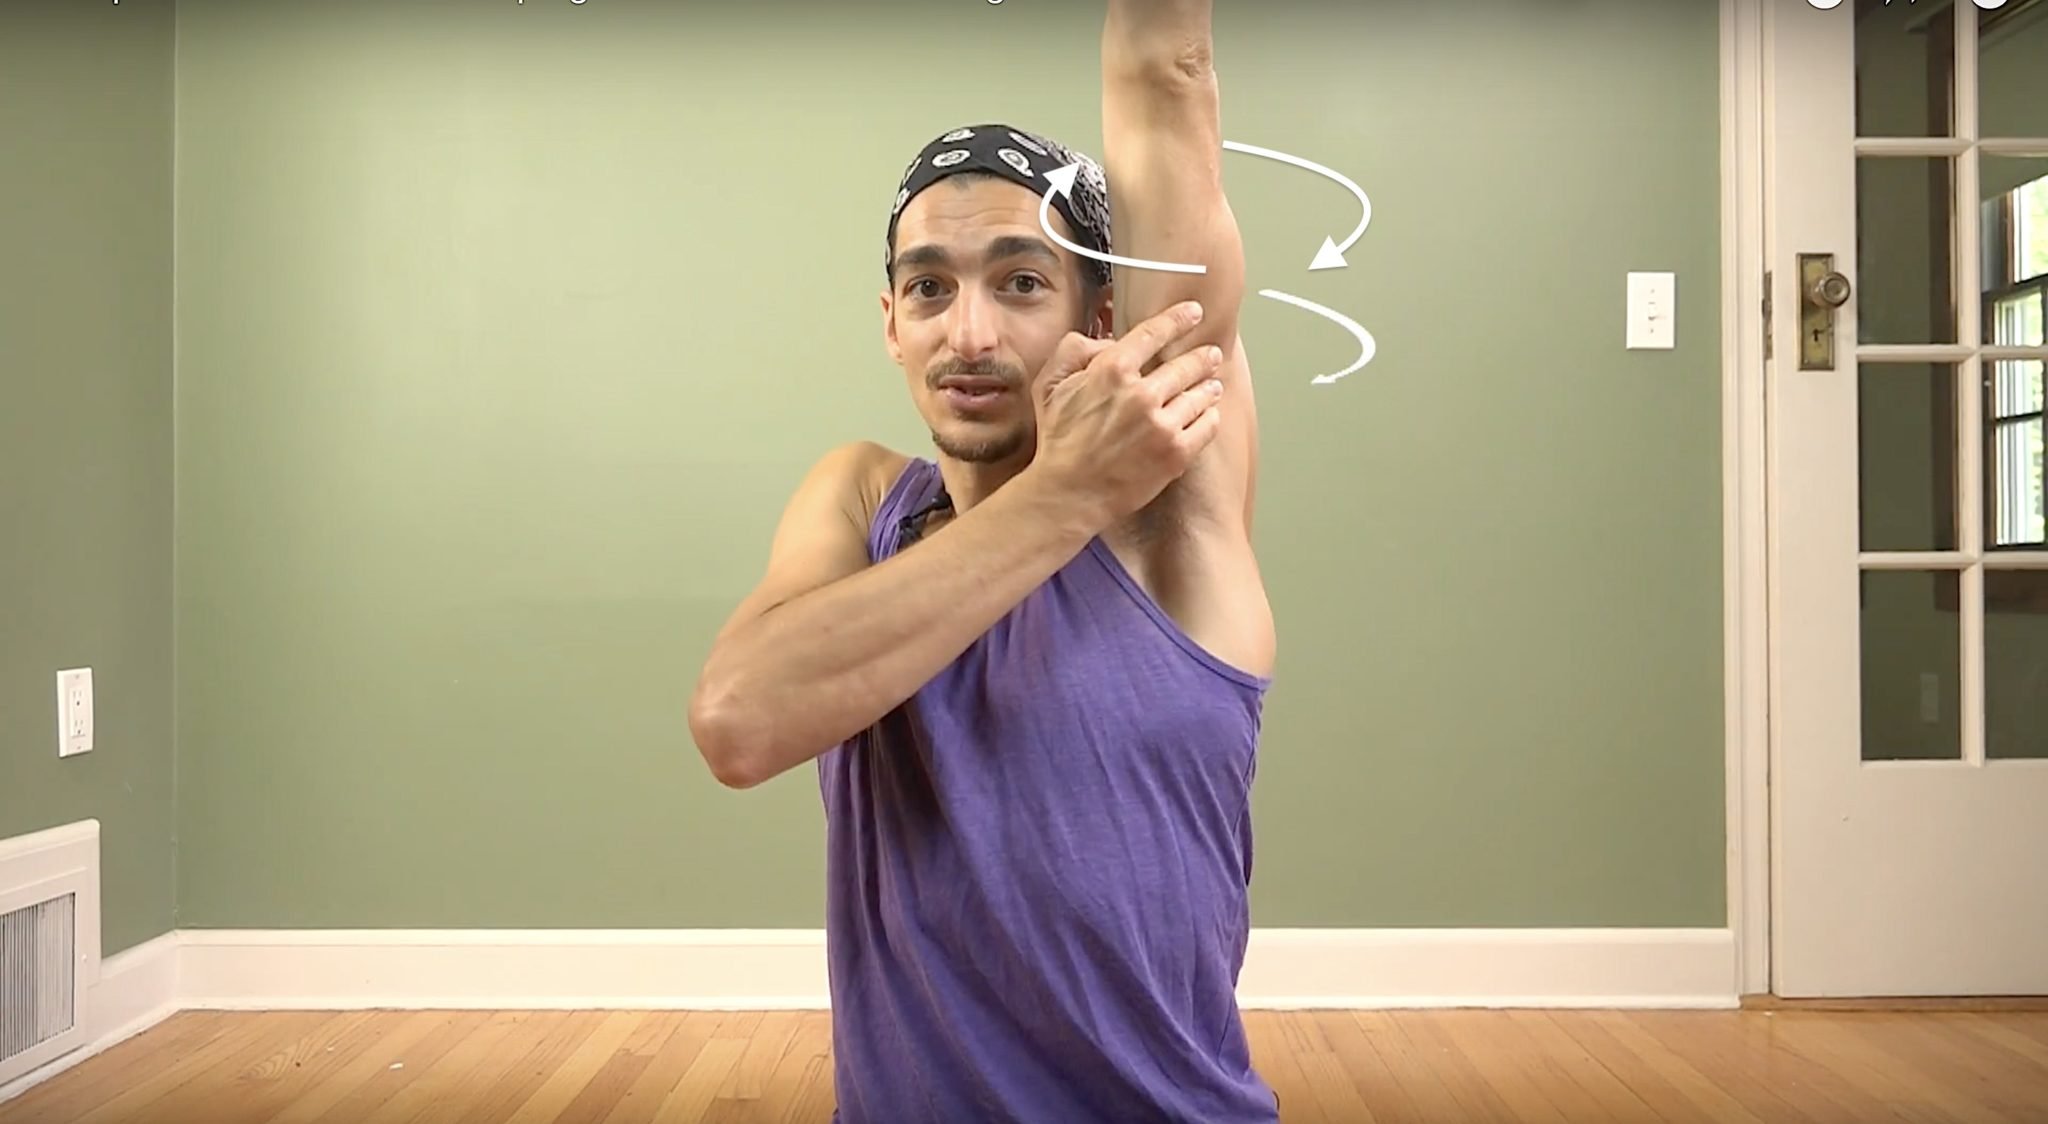
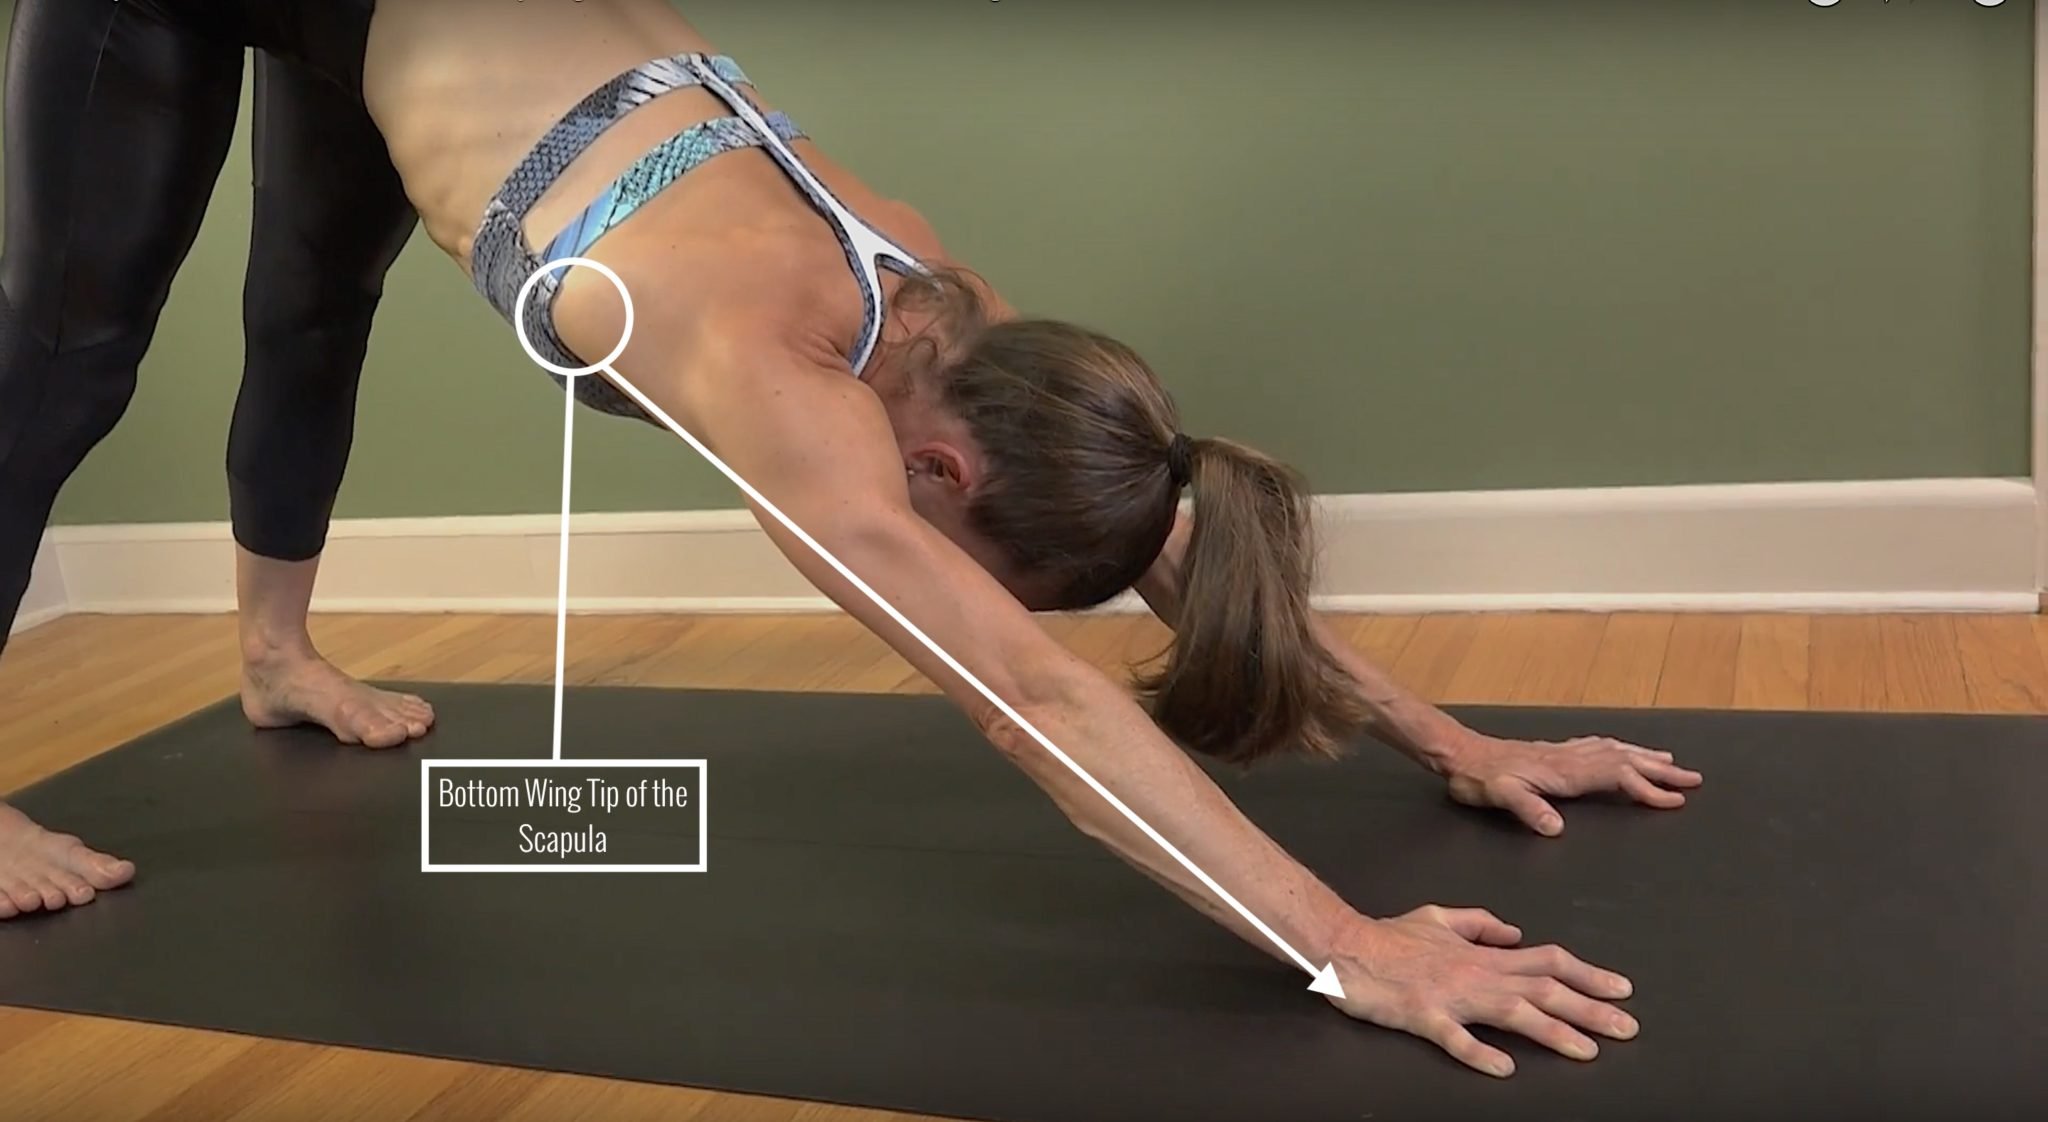
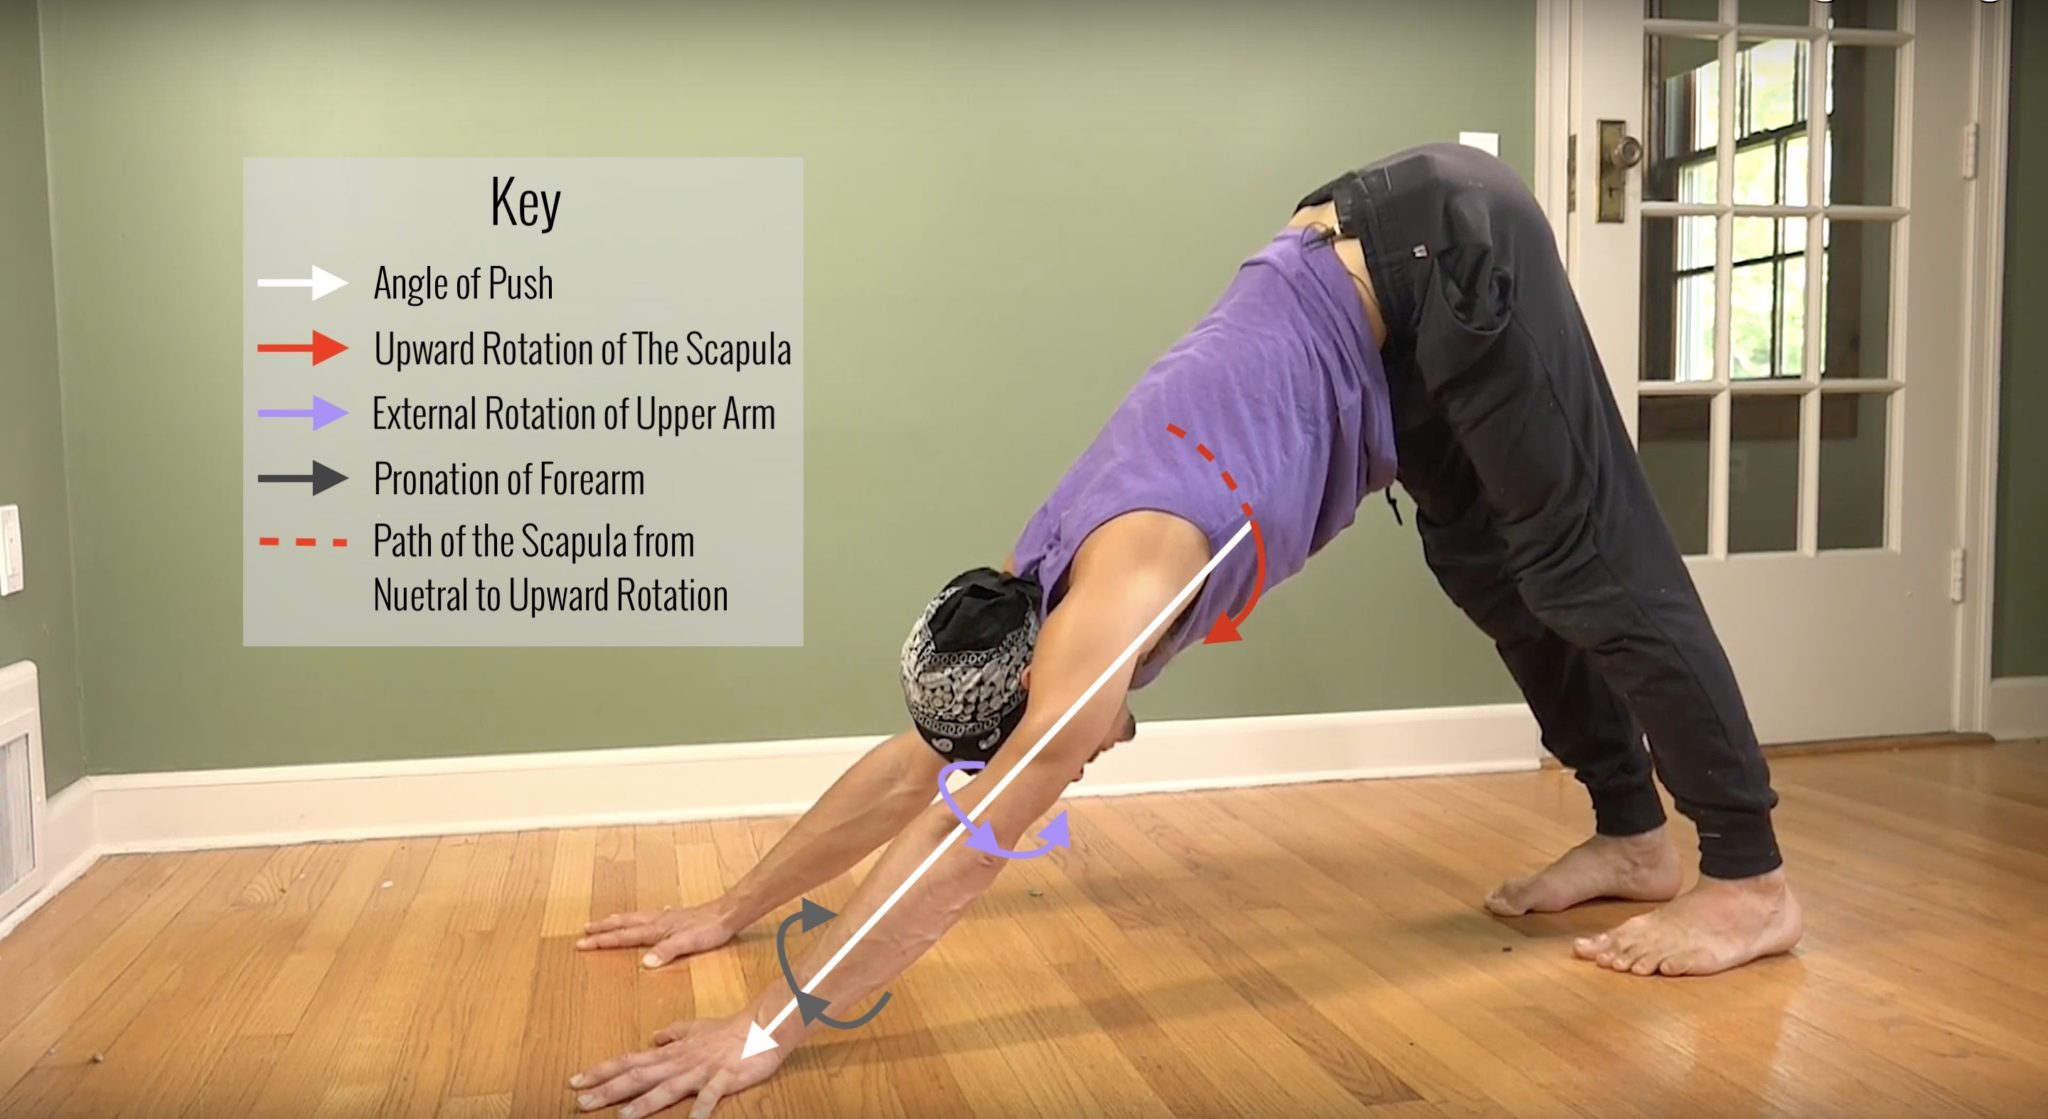
Dancer Pose is a heart opener and a balance posture all in one. Creating the shape of a heart opener requires that you create the action of retracting the scapulae; when done with well-placed effort, this will activate the rhomboids and lower trapezius. Matt demonstrates how to pattern this activation in Upward-Facing Dog. In today’s video, you’ll see that after retracting your scapulae and externally rotating the humerus on each side, you create more space for your chest to move forward. When you lift your rib cage up and out, you create more length and opening in your front body. These are all key actions to start with in order to find more heart space in Dancer Pose. This patterning continues in Twisted Monkey and in Tiger Pose. What you also see are the necessary actions in the pelvis and the activations that promote the lengthening required in the hip flexors and quadriceps.

200 HOUR ONLINE TEACHER TRAINING
GET CERTIFIED & DEEPEN YOUR YOGA PRACTICE
- Deepen your yoga practice
- Build confidence speaking in front of groups in person and online
- Learn foundational class structures and templates
- Learn techniques for a wide range of yoga postures
- Get certified and highly qualified to teach yoga
- Yoga Alliance Globally Recognized Certification Program
DANCER POSE AT THE WALL
If you’ve worked through these progressions, your body is more physically prepared for the next steps. This variation of Dancer Pose is great because it reduces the effort required to stay balanced if you want to be more focused on the backbend and the movement of the pelvis. Here, Matt demonstrates the dance (pun intended) between the movement of the pelvis (more anterior tilt), which assists in lifting the back leg further up, and the action of increased external rotation of the shoulder. Once you have tipped forward with more anterior tilt, Matt advises you to lift your chest up on an inhale in order to expand through your front body. Going back and forth between these actions promotes greater opening altogether. The activation of the quadriceps and hip flexors is continued by pressing your foot into your hand and vice versa.

300 HOUR ONLINE TEACHER TRAINING
GET 500 HOUR CERTIFIED AS A MASTER TEACHER
Master your skill set as a teacher through refined techniques, anatomy, biomechanics, sequencing, philosophy, meditation techniques, theming, yoga business, and much more!
- Get 500 hour certified
- Learn anatomy, biomechanics, asana techniques
- Expand your teaching skills
- Masterful sequencing and verbal delivery
- Learn meditation and breathwork techniques
- Transformative tools: theming, dharma talks, satsang
FIND YOUR BALANCE
The repetition of the actions created throughout the previous postures boosts your ability to find more balance in Dancer Pose. The same exchange between tipping forward and lifting up the chest, plus a greater awareness of the internal rotation of the lifted leg, will assist in cultivating more stability.
The definition of finding your balance goes beyond just taking Dancer Pose away from the wall. From a Chromatic Yoga perspective, it also means that in the process of exploring the biomechanics of a posture, you are learning more about your body and mind. Maybe there are vast differences between one side of the body and the other, or maybe there is room for a shift in your thought process during your practice. This can go in multiple directions! Ultimately, the relationship you build with yourself and your practice as a whole is completely transformed when you adopt the Chromatic way.
Sign up for Matt’s next Online Chromatic Yoga Immersion to deepen your understanding of this approach.
The 200 Hr. Teacher Training: Click Here to See the Next Start Date
The 300 Hr. Advanced Teacher Training: Click Here to See the Next Start Date
Article by Trish Curling
Video Extracted From: Vinyasa Immersion

The Teachers' Toolkit
- Advance your practice
- Learn masterful teaching techniques
- Acquire business-building skills
- Attract the right students
- Learn about social media, marketing, and business structure
- Catapult your teaching and career
Continue Learning
Weightless Inversions
read more
Opening The Heart Chakra
Opening The Heart ChakrabackbendOPENING THE HEART CHAKRA Opening the heart chakra is not simply about reaching deeper into a backbend. Matt reminds us that this space is rooted in love, balance, and connection, both with ourselves and with others. It reflects how we...
5 Visual Demonstration Techniques for Yoga Teachers
5 Visual Demonstration Techniques for Yoga TeachersYoga TeachersVisual Demonstration This is often confused with “teaching from the mat.” Teaching at the front of the room can be useful at the right time and place, but that is not what we are referring to here. In...
Awakening Solar Plexus Strength
Awakening Solar Plexus Strengththird chakraAWAKENING SOLAR PLEXUS STRENGTH Awakening solar plexus strength invites us into the centre of transformation. Matt reminds us that this third chakra, Manipura, is our fire, our willpower, and our ability to take action. It...
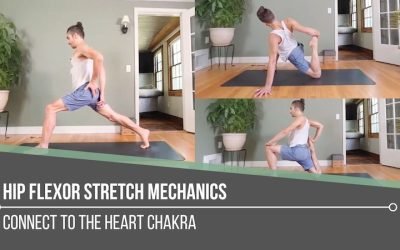
Hip Flexor Stretch Mechanics
Hip Flexor Stretch MechanicsALIGNMENTHIP FLEXOR STRETCH MECHANICS Hip flexor stretch mechanics begins with understanding that stability and length often come from opposing actions. In the first demonstration, Matt cues the back inner thigh to lift upward, which tips...
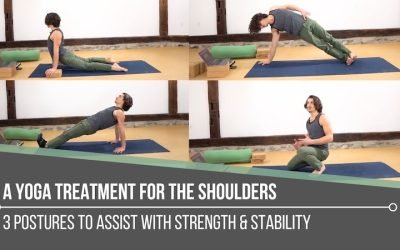
A Yoga Treatment For The Shoulders
A Yoga Treatment For The ShouldersSTABILITYA YOGA TREATMENT FOR THE SHOULDERS Shoulders tend to speak up when stability is missing. Matt reminds us that building strength isn’t about aesthetics, it’s about support, resilience, and keeping the body working as one...
THE FREE TECHNIQUE PACK
When You Subscribe, You Will Get Instant Access to
- the Technique Pack: 15 yoga pose breakdowns
- exclusive online course discounts
- exclusive blogs and videos