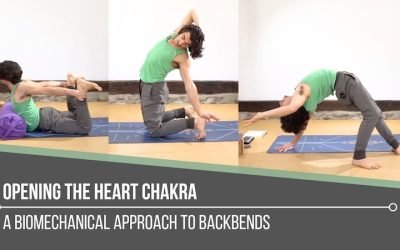
Opening The Heart ChakrabackbendOPENING THE HEART CHAKRA Opening the heart chakra is not simply about reaching deeper into a backbend. Matt reminds us that this space is rooted in love, balance, and connection, both with ourselves and with others. It reflects how we...
Urdhva Dhanurasana Unknowns
Urdhva Dhanurasana Unknowns
ALIGNMENT
URDHVA DHANURASANA UNKNOWNS
Let’s take a pause from what we think we know about Wheel Pose and consider the Urdhva Dhanurasana unknowns. Often, we hear the cue, “Just press up into Wheel,” and we do—without questioning the subtle patterns that lead us there. But what if there’s more? What if the smallest details—the angle of the elbows, the pressure in the feet, or the position of the scapula—are actually the keys to depth, safety, and control? In today’s blog, we explore the perhaps lesser-known layers of Urdhva Dhanurasana as taught by Matt, who offers a step-by-step breakdown of the posture. It’s through this layered understanding that we uncover not just a shape, but a method. When we’re open to unlearning what we’ve always done, we create space for new patterns to emerge, and in that space, our backbends can truly evolve

ALIGNED VINYASA
REGISTRATION NOW OPEN
- 10 Chromatic Yoga practices with founder Matt Giordano
- Full length 75 minute classes
- 10 Peak Postures: The Most Essential Poses of the Vinyasa Practice
- Meticulously Crafted Experiences to Enhance Your Postural Practice
- Non-dogmatic, Anatomy informed Alignment
- The Perfect Blend of Knowledge and Practice
- A Heavy Emphasis on Technique for the Poses Everyone Expects You to Know but No One Teaches
- 12 Continuing Education hours with Yoga Alliance
- 12 Accredited Hours with the Chromatic School of Yoga
- Step-by-Step instruction for increased accessibility
- Sweat, Breath, Strengthen, Stretch and Feel Amazing!
THE SECRET IS IN THE ARMPITS
One of the most surprising Urdhva Dhanurasana unknowns lies in the armpits. In the wall-supported version of Wheel Pose that Matt demonstrates in the video, gravity helps ease the body into the shape. It offers a gentler way to understand and pattern the posture. The real secret, as Matt explains, is in the lift of the armpits and the ability to maintain that lift even once the arms are straight. This small but powerful action opens the door to greater scapular retraction, a key component in safe and effective backbending. When we retract the scapula properly, we shift the emphasis from the lower back to the upper thoracic spine, reducing compression and enhancing spaciousness in the posture. This armpit lift may not be a cue we’ve heard often, but it has the potential to completely reshape our experience of Wheel. It’s not just about pressing up—it’s about preparing our bodies to hold the shape with intention.
WATCH THE VIDEO
URDHVA DHANURASANA UNKNOWNS: FILL IN THE BLANKS TO MASTER TECHNIQUE
APPLY THESE IN BRIDGE PRACTICE
To uncover the Urdhva Dhanurasana unknowns, we also start with the foundations in Bridge Pose. In the video, Matt offers a three-step process that primes the body for full wheel. First, we focus on glute activation and spinal extension, keeping feet wider than the hips and arms in cactus shape. Shoulder blades move together, the heels press down, and the knees reach forward as the chest lifts back. Second, attention turns to hand and elbow placement—wider than we may be used to. This challenges scapular retraction but sets us up for better alignment and strength. Third, if there’s no neck concern, we move to the top of the head, maintaining scapular retraction as the chest pushes through the shoulders. These steps help re-pattern how we access the pose—engaging the transversus abdominis, stabilizing the back, and leading from strength, not strain. Without them, we risk muscling through the pose without long-term sustainability.

200 HOUR ONLINE TEACHER TRAINING
GET CERTIFIED & DEEPEN YOUR YOGA PRACTICE
- Deepen your yoga practice
- Build confidence speaking in front of groups in person and online
- Learn foundational class structures and templates
- Learn techniques for a wide range of yoga postures
- Get certified and highly qualified to teach yoga
- Yoga Alliance Globally Recognized Certification Program
WHEEL AND A WALL
Now, we put it all together—this time, without gravity’s assistance. In the earlier wall-supported version, gravity helped guide the body upward. When we return to a traditional Urdhva Dhanurasana on the mat however, we work against gravity, which increases the demand on the body. This is where all the refined actions come into play. The armpit lift, scapular retraction, glute activation, and core support must now be actively recreated without external support. Matt demonstrates how the body integrates these elements in real time, reinforcing the strength, control, and alignment needed for a sustainable wheel pose. This stage reveals the true complexity of the pose and helps us recognize the contrast between supported preparation and unsupported execution. When practiced consciously, these layers don’t just build the posture, they build trust in our bodies. Through this, we redefine our limits and reshape our relationship with the backbend.

300 HOUR ONLINE TEACHER TRAINING
GET 500 HOUR CERTIFIED AS A MASTER TEACHER
Master your skill set as a teacher through refined techniques, anatomy, biomechanics, sequencing, philosophy, meditation techniques, theming, yoga business, and much more!
- Get 500 hour certified
- Learn anatomy, biomechanics, asana techniques
- Expand your teaching skills
- Masterful sequencing and verbal delivery
- Learn meditation and breathwork techniques
- Transformative tools: theming, dharma talks, satsang
DISCOVERY
Discovery doesn’t always come with a big reveal—it often arrives through the quiet work of exploration, curiosity, and conscious repetition. As we unravel the Urdhva Dhanurasana unknowns, we begin to understand that this posture isn’t just about flexibility or strength—it’s about integration. Each variation, each technique, each subtle action reveals something new about how our body moves and how we engage with it. What once felt inaccessible starts to unfold when we stop pushing and start observing. Through Matt’s layered approach, we don’t just learn how to do Wheel Pose—we learn how to understand it. We discover the muscles we’ve overlooked, the habits we’ve built, and the space that’s available when alignment replaces effort. In this way, discovery becomes the heart of the practice—not the end point, but the process itself. Within that process, we meet the deeper version of the posture—and of ourselves.
Register for Matt’s next online immersion Aligned Vinyasa to delve deeper into the inner workings of the practice.
The 200 Hr. Teacher Training: Click Here to See the Next Start Date
The 300 Hr. Advanced Teacher Training: Click Here to See the Next Start Date
Article by Trish Curling
Video Extracted From: Strength Immersion

ONLINE ANATOMY COURSE
- Accessible, exciting, and easy to learn
- Anatomy and biomechanics for yoga
- Appropriate for both teachers and students
- Learn joint alignment vs pose alignment
- Demystify yoga poses and transitions
- Release aches and pains
- Learn how to avoid common injuries
- Caters to all levels with modifications and props
- 20 hours Continued Education Credits with Yoga Alliance
- 20 hours toward Chromatic Yoga Certification and 300 Hour
- Lifetime access
Continue Learning
Opening The Heart Chakra
read more
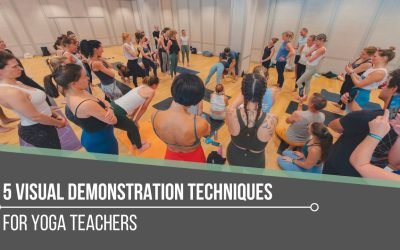
5 Visual Demonstration Techniques for Yoga Teachers
5 Visual Demonstration Techniques for Yoga TeachersYoga TeachersVisual Demonstration This is often confused with “teaching from the mat.” Teaching at the front of the room can be useful at the right time and place, but that is not what we are referring to here. In...
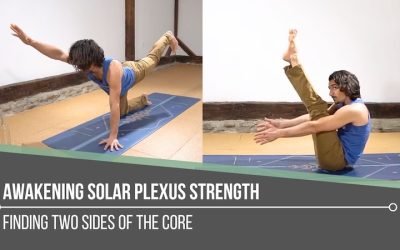
Awakening Solar Plexus Strength
Awakening Solar Plexus Strengththird chakraAWAKENING SOLAR PLEXUS STRENGTH Awakening solar plexus strength invites us into the centre of transformation. Matt reminds us that this third chakra, Manipura, is our fire, our willpower, and our ability to take action. It...
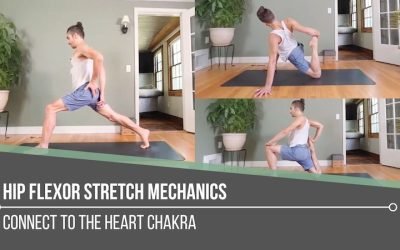
Hip Flexor Stretch Mechanics
Hip Flexor Stretch MechanicsALIGNMENTHIP FLEXOR STRETCH MECHANICS Hip flexor stretch mechanics begins with understanding that stability and length often come from opposing actions. In the first demonstration, Matt cues the back inner thigh to lift upward, which tips...
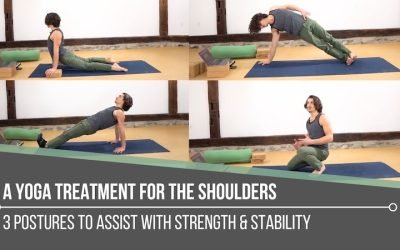
A Yoga Treatment For The Shoulders
A Yoga Treatment For The ShouldersSTABILITYA YOGA TREATMENT FOR THE SHOULDERS Shoulders tend to speak up when stability is missing. Matt reminds us that building strength isn’t about aesthetics, it’s about support, resilience, and keeping the body working as one...
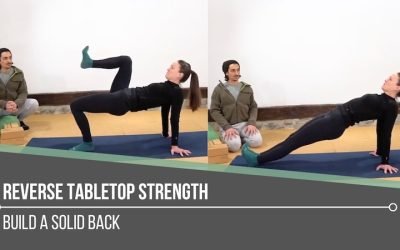
Reverse Tabletop Strength
Reverse Tabletop StrengthMECHANICSREVERSE TABLETOP STRENGTH “Solid” implies strength, yet in yoga, we can easily lose sight of how intentionally building the back body supports everything we do. Reverse Tabletop may look simple, but it asks a lot from the posterior...
THE FREE TECHNIQUE PACK
When You Subscribe, You Will Get Instant Access to
- the Technique Pack: 15 yoga pose breakdowns
- exclusive online course discounts
- exclusive blogs and videos


