BOW POSE—WHERE TO BREATHE YOGA ANATOMY • BIOMECHANICS • TECHNIQUEBOW POSEThe Challenge of breathing in backbendsEver feel short of breath in a backbend? You aren't the only one. Where to breathe in a backbend is a popular question, and rightfully so. If you look at...
Build Strength & Endurance
Build Strength and Endurance
Infuse Calisthenics Into Your Yoga Practice
resilience
STRENGTH AND ENDURANCE WITH CALISTHENICS
There are both simple and more complex ways of infusing calisthenics into your yoga practice, especially as you get stronger and build upon various skills. First of all, movements associated with “basic” calisthenic exercises are already woven in many ways into asana practices such as Vinyasa and Ashtanga styles of yoga. What we need to understand, however, is that alongside the more traditional approaches, there are creative and innovative ways of incorporating calisthenics into our physical practice. Ultimately, what we are building over time is strength and endurance.
Matt breaks down exactly how to do this in the clips that you’ll see in today’s video, from his current MOVE Immersion. What is the reason for wanting to increase strength and endurance? Well, key components of overall health include both. If you consistently practice calisthenic exercises and/or incorporate them into your yoga practice, it’s inevitable that you’ll develop increased strength and endurance both physically and mentally.

MOVE
- Access your movement potential
- Sweat and raise your heart rate
- Master your breath/movement coordination
- Increase mobility at all major joints
- Learn to gracefully transition between postures
- Improve your flexibility
- Strengthen your hips, back, shoulders, and core
- Improve your balance
- Each class will raise your heart rate, bring you to a sweat, and return you back to a relaxed state of mind and body
- 12 Classes: All levels appropriate
- Lifetime unlimited access to all
- Attend the livestream OR practice the replays any time that's convenient for you
$168.00
WHAT ARE CALISTHENICS?
When you hear the term calisthenics, I wouldn’t be surprised if what comes to mind are some seriously strong folks doing pull-ups, chin-ups, a rude amount of push-ups or some “crazy” complicated movements requiring what may appears to be an obscene amount of coordination. You wouldn’t be wrong. The idea of incorporating calisthenics into your movement practice can be quite intimidating. The good news is that there are entry points, and they may be more accessible than you think.
Essentially, calisthenics are defined as a form of exercise where you’re using your own body weight for resistance. Exercises often associated with calisthenics are pull-ups, chin-ups, squats, lunges, planks, and push-ups, to name a few. How many times have you done chaturanga “yoga push-ups” in your practice? How many times have you moved in and out of Malasana? Runner’s Lunge? Can you see the crossover? There is a great deal of benefit both physically and mentally. Let’s have a look.
WATCH THE VIDEO
BUILD STRENGTH AND ENDURANCE: INFUSE CALISTHENICS INTO YOUR YOGA PRACTICE
PHYSICAL STRENGTH & ENDURANCE
Without a doubt, calisthenics are going to help you to build a solid and strong foundation. Incorporating them into your asana practice means that your approach on your mat will be an intense one. To acquire the benefits of muscle strength and/or cardiovascular endurance, there must be repetition and vigor in your output of each drill or exercise, with minimal rest in between.
Although calisthenics have an impact on all muscle fibers, they are said to primarily work the slow-twitch fibers (type 1 fibers). These muscle fibers are associated with endurance. Because exercises like push-ups, lunges, and squats typically involve repetition, you can see how they are easily incorporated in the context of an asana practice. The physical demand and strain on your muscle tissues creates the stimulus for them to break down and therefore adapt and ultimately grow. In your yoga practice, the capacity at which you are working does not equate to muscular hypertrophy but to a remarkable amount of strength and integrity in your body.

200 HOUR ONLINE TEACHER TRAINING
GET CERTIFIED & DEEPEN YOUR YOGA PRACTICE
- Deepen your yoga practice
- Build confidence speaking in front of groups in person and online
- Learn foundational class structures and templates
- Learn techniques for a wide range of yoga postures
- Get certified and highly qualified to teach yoga
- Yoga Alliance Globally Recognized Certification Program
MENTAL STRENGTH & ENDURANCE
The attention to skill and technique requires a great deal of focus and concentration. Depending on the level of coordination and difficulty involved in a particular exercise, you’re also building resilience and mental toughness. The drive to complete and “push through” various calisthenic exercises means that you’re also fueling yourself with confidence. You’re actually proving to yourself that you can confront the opposition in your mind that may be telling you that you can’t possibly go any further. As long as you are free from injury and pain, taking action and pushing through is what actually allows you to experience benefits like increased focus, confidence, and tenacity. The resilience you build on your mat will ultimately lead to the same type of resilience in other areas of your life.

300 HOUR ONLINE TEACHER TRAINING
GET 500 HOUR CERTIFIED AS A MASTER TEACHER
Master your skill set as a teacher through refined techniques, anatomy, biomechanics, sequencing, philosophy, meditation techniques, theming, yoga business, and much more!
- Get 500 hour certified
- Learn anatomy, biomechanics, asana techniques
- Expand your teaching skills
- Masterful sequencing and verbal delivery
- Learn meditation and breathwork techniques
- Transformative tools: theming, dharma talks, satsang
FIVE WAYS TO INFUSE CALISTHENICS INTO YOUR YOGA PRACTICE
In today’s video, Matt outlines 5 ways to infuse calisthenics into your yoga practice. He includes both simplified and more complex options.
First, Chaturanga Dandasana is great for strengthening your core, chest, triceps, shoulders, and the muscles in your lower body. In the clip, Matt demonstrates the transition from Downward-Facing Dog to Plank (on knees or on toes), then he doubles the Chaturanga before coming all the way down to the ground. This may be a “simpler” way to increase intensity and muscle strength, but if you are not used to using this transition, it will take some time to feel stronger and more confident in your execution.
Second, Matt demonstrates a Boat Pose to Chaturanga transition. He breaks this one down into stages in which you can slowly build your way up to a full jump back into Chaturanga. This exercise will undoubtedly challenge your cardiovascular system and build more heat in your body. It also requires more coordination and timing as you progress into the jump back.
Third are the Adductor Slides With Socks and Blocks. This one is particularly innovative: Not only do you get the cardiovascular benefit, but you also build strength in your adductors (a muscle group that can often be neglected). In the full class from which this clip is extracted, Matt repeats the drill with a timer. He encourages you to perform it quickly while paying attention to very precise articulations in the hips and feet.
The fourth calisthenic exercise involves Plank—you might call this one a Side Plank (Vasisthasana) Crunch. Here, the focus is on strengthening your oblique muscles. It requires a great deal of muscle strength to balance while holding up your body weight and performing the “crunch” in the side body with control. This exercise definitely creates fire in the body! You will feel the elevation of your heart rate.
Lastly, Matt demonstrates another Plank variation. This one might be referred to as Side Plank (Vasisthasana) With Adductor Leg Lift. In this exercise, you are again strengthening your oblique muscles but adding in the strengthening of your adductor muscles. If you’re looking for a challenge, THIS—IS—THE—ONE! Again, the movements may appear to be quite innocent, but there is always more than meets the eye.
TRANSFORM YOUR PRACTICE
You can see that the intricacy of all of these exercises requires mindfulness, focus, and physical intensity on your part.
When you watch the video, you’ll see how Matt specifically outlines the techniques for each drill in order for you to gain the maximum benefit. This is important because what might appear to be a minor change in body positioning (e.g., the articulation of the feet as they move in and out in the Adductor Slides) can have a drastic impact on the experience within the exercises and the actual muscle groups you’re affecting.
All of the clips are from Matt’s MOVE Immersion. In each and every class, there are so many ways that Matt teaches how to incorporate calisthenics, for strength and endurance, into your yoga practice.
If you want to practice with more strength and grace, then this is definitely the immersion to sign up for.
See you on the mat!
The 200 Hr. Teacher Training: Click Here to See the Next Start Date
The 300 Hr. Advanced Teacher Training: Click Here to See the Next Start Date
Article by Trish Curling
Video Clips Extracted From: Move Immersion
MOVE
- Access your movement potential
- Sweat and raise your heart rate
- Master your breath/movement coordination
- Increase mobility at all major joints
- Learn to gracefully transition between postures
- Improve your flexibility
- Strengthen your hips, back, shoulders, and core
- Improve your balance
- Each class will raise your heart rate, bring you to a sweat, and return you back to a relaxed state of mind and body
- 12 Classes: All levels appropriate
- Lifetime unlimited access to all
- Attend the livestream OR practice the replays any time that's convenient for you
$168.00
Continue Learning
Bow Pose: Where to Breathe in a Backbend
read more
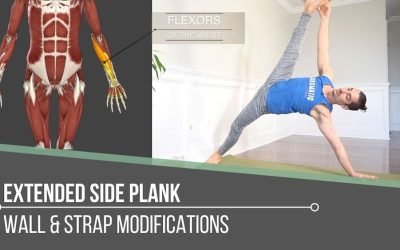
side plank variations
Side Plank Variations VASHISTASANA • MODIFICATIONS • TUTORIALSIDE PLANKExtended Side plank variations [Click Below to listen to the Audio Version of "Extended Side Plank"]There are definitely more ways than one to access a yoga posture. Not only that, but Matt is...
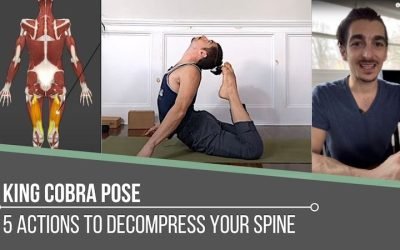
King Cobra Pose Tutorial
KING COBRA POSE YOGA ANATOMY • BIOMECHANICS • TECHNIQUEKING COBRA5 Key Actions to Decompress Your Spine in King Cobra PoseNot all that glitters is gold, and without the right approach, this glorious backbend may not be a shining example of spinal health. King Cobra...
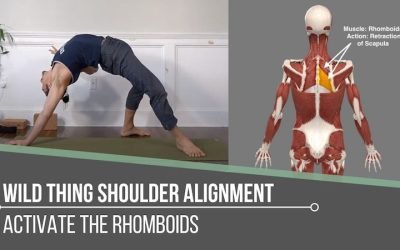
Wild Thing Shoulder Alignment
WILD THING SHOULDER ALIGNMENT ANATOMY • BIOMECHANICS • TECHNIQUEShoulder AlignmentWILD THING SHOULDER ALIGNMENTWhat is the correct shoulder alignment for the pose we call Wild Thing? To answer this, we would first have to define the guidelines for "right" and "wrong."...
hyperextension of the knee in pyramid pose
KNEE HYPEREXTENSION HOW TO SOLVE HYPERMOBILITY IN PYRAMID POSEKNEE HYPEREXTENSIONKNEE HYPEREXTENSION: PROTECT YOUR KNEES IN PARSVOTTANASANA, PYRAMID POSEWhen it comes to our asana practice, more often than not, the subject of our knees is a hot topic. Typically, we’re...
deeper twists and spinal mobility with the fire line
DEEPER TWISTS INCREASE SPINAL MOBILITY WITH THE FIRE LINEDEEPER TWISTSDEEPER TWISTS & SPINAL MOBILITY: "FIRE LINE"Do you correlate strength with twisting postures in your yoga practice, or is it flexibility that comes to mind first? There’s no doubt that both...
THE FREE TECHNIQUE PACK
When You Subscribe, You Will Get Instant Access to
- the Technique Pack: 15 yoga pose breakdowns
- exclusive online course discounts
- exclusive blogs and videos

