Reinvent Revolved TriangleTRIKONASANAREINVENT REVOLVED TRIANGLE “Now twist!” Sounds easy enough—until we realize the complexity hidden within the cue. Revolved Triangle is far more than just a twist. It’s a balance challenge, a hamstring and IT band stretch, a spinal...
Eagle Pose technique how to double wrap the legs
GARUDASANA – EAGLE POSE
How to Double Wrap the Legs
Eagle Pose
GARUDASANA – EAGLE POSE
Why is it hard to double wrap the leg?
Garudasana, known as Eagle Pose, is a challenging hip opener and hip strengthener. It’s useful in developing balance, but for many people, double wrapping the leg is not accessible. For sure, some people have no trouble at all, but others are completely perplexed.
There are three reasons why it would be challenging for you or your students to double wrap:
- Lack of flexibility of the abductor muscles (outer hip muscles). These are the muscles that are lengthened when we cross our legs.
- Lack of strength of the standing hip abductor muscles. This is a bit confusing unless you watch the video below. The standing hip abductors help to elevate the opposite side of the pelvis, making it more possible to cross the top leg over the bottom leg.
- Lack of technique and timing. In most cases, if you are not applying deliberate technique while moving into a pose, you will be entering the pose the hard way, which means you will only be able to do the postures that match your set of physical muscular patterns. This is a disservice, not because you will miss out on the poses but because you will miss out on the opportunity to change your muscle patterns. In the video below, you will see the timing and techniques for getting into Eagle Pose with double-wrapped legs.
![yoga backbend techniques: 12 classes [backbend technique to relieve back pain "bowing the spine']](https://www.theyogimatt.com/wp-content/uploads/2021/05/JULY-IMMERSION-14.jpg "JULY IMMERSION")
HIPS & HAMSTRINGS IMMERSION
- Increase range of motion of your hips and hamstrings
- Learn techniques such as facilitated stretching
- Release stress patterns, discomfort, or pain in your hips, back, and knees
- Twelve 75-minute classes, all levels appropriate
- Learn postures: Pigeon, Lizard Variations, Lotus, Eagle, Hanuman, Fire Log, Seated Straddle Splits, and more!
- Lifetime unlimited access to all
How to Increase Flexibility of the Abductors — Outer Hips
If flexibility is inhibiting you from accessing Garudasana and you want to find ways to access your greater range of motion of the outer hip muscles, there are a couple postures you can work with. Any posture that includes crisscrossed legs will be useful and effective in increasing abductor flexibility. Although there aren’t many traditional postures, aside from Eagle Pose itself, one that comes to mind is Gomukhasana, Cow-Faced Pose. However, I would say that Eagle Pose should usually precede Gomukhasana because Eagle Pose requires less flexibility. The posture that I use in the Hips and Hamstrings immersion to prepare for Eagle is a straight single-leg forward fold with crisscrossed legs.
How to Get into the Straight-Leg Crisscrossed Forward Fold
- Start in Lunge Pose with your right foot forward.
- Heel-toe (move) your right foot to the left side of the mat.
- Step your back left foot to the right side of the mat so that both legs are crisscrossed.
- I suggest using block under both hands prior to the last step.
- Straighten your legs to a degree where you are stretching without strain.
IMPORTANT KEY ACTION: Wag your tail bone to the left to increase the stretch along the outer hip and IT band. If that’s too intense, wag your tail to the right to decrease the outer-hip stretch.

300 HOUR ONLINE TEACHER TRAINING
GET 500 HOUR CERTIFIED AS A MASTER TEACHER
Master your skillset as a teacher through refined techniques, anatomy, biomechanics, sequencing, philosophy, meditation techniques, theming, yoga business, and much more!
WHY LACK OF ABDUCTOR STRENGTH HOLDS YOU BACK IN EAGLE POSE
Strength of the abductor group (outer hip muscles) is super important for two reasons. First, the standing hip abductors are what lift the opposite side of your pelvis, which allows you to cross your top leg over. Second, without outer hip strength on the standing leg, you would struggle to balance the pose! Outer hip muscles play a major role in balancing any single leg pose. If you find it challenging to balance Garudasana, then you will want to start with a strength-training routine for the abductors. We focus in on strengthening these muscles in the Hips and Hamstrings Immersion
FREE VIDEO TUTORIAL: HOW TO DOUBLE WRAP LEGS IN GARUDASANA, EAGLE POSE
This video clip was taken from Class #3 in the Hips and Hamstrings: 12 Class Immersion
HOW TO DOUBLE WRAP THE LEGS
- Notice in the video that I am focused on squeezing the outer standing hip inward and lifting the opposite side of the pelvis upward as a result. This allows the thigh bone to more easily cross the midline of the body. You will also notice that my thighs are significantly rotated inward; this helps to access the wrapping of the legs as well. In the class leading up to this tutorial, we used a wall to eliminate the necessity to balance while working with these actions. In this video, I joke about the use of a wall, but I highly recommend you try it that way.
![yoga backbend techniques: 12 classes [backbend technique to relieve back pain "bowing the spine']](https://www.theyogimatt.com/wp-content/uploads/2020/09/200-hour-horizontal.jpg "200 hour horizontal")
GET CERTIFIED & HIGHLY QUALIFIED TO TEACH
- Deepen your practice of yoga
- Learn to share the practice with others
- Build your confidence in speaking
- Learn postures, biomechanics, alignment, and techniques
- Learn how to structure a class and sequence postures
HOW DO I INCREASE FLEXIBILITY OF MY HIPS FOR OTHER YOGA POSTURES?
The easy answer to this is to practice in such a way that you are deliberately strengthening each muscle group around the hips. To learn more about what muscle groups are involved in hip opening, check out the article I wrote on The 4 Quadrants of The Hips, where I share my methodology and approach for my personal practice and in my teaching. Once you understand which muscles surround the hip joints, the next step is to begin strengthening each muscle group. Strengthening one muscle group through range of motion will increase the flexibility of the opposing muscle group. This is the magic of an educated and deliberate practice — we take the guesswork out, and efforts are more effective in achieving intended results.
To increase your strength and flexibility of the hips, you can join the Hips and Hamstrings Immersion,which will take you through twelve 75-minute online yoga classes, each focused on a different pose and the relevant muscle group(s). I take you through creative ways of strengthening, then I provide you with effective techniques for stretching and accessing various yoga postures.
HIPS & HAMSTRINGS IMMERSION
- Increase range of motion of your hips and hamstrings
- Learn techniques such as facilitated stretching
- Release stress patterns, discomfort, or pain in your hips, back, and knees
- Twelve 75-minute classes, all levels appropriate
- Learn postures: Pigeon, Lizard Variations, Lotus, Eagle, Hanuman, Fire Log, Seated Straddle Splits, and more!
- Lifetime unlimited access to all
Continue Learning
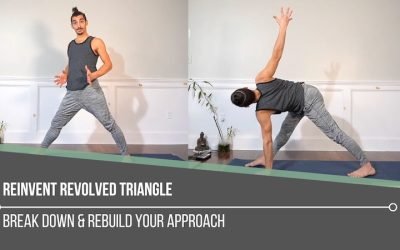
Reinvent Revolved Triangle
read more
Urdhva Dhanurasana Unknowns
Urdhva Dhanurasana UnknownsALIGNMENTURDHVA DHANURASANA UNKNOWNS Let’s take a pause from what we think we know about Wheel Pose and consider the Urdhva Dhanurasana unknowns. Often, we hear the cue, “Just press up into Wheel,” and we do—without questioning the subtle...
Redefine Chaturanga
Redefine ChaturangaALIGNMENTREDEFINE CHATURANGA To redefine Chaturanga, we first have to be willing to challenge what we think we already know. Many of us were taught a narrow-hand, elbows-tight variation of the pose—elbows hugging the ribs, hands close beneath the...
Tight Hips
Tight HipsHIP MOBILITYTIGHT HIPS When working to release tight hips, most people instinctively go straight for deep stretches. But one often overlooked area that holds a surprising amount of tension is the adductorS (the inner thigh muscles) that connect to the...
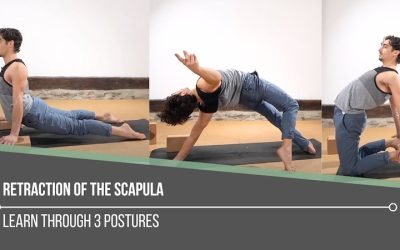
Retraction Of The Scapula
Retraction Of The ScapulaSHOULDER ACTIONSRETRACTION OF THE SCAPULA It may appear that scapular retraction holds less weight in finding deeper backbends, but this action can be quite significant in what we experience when it comes to strength, stability, and...
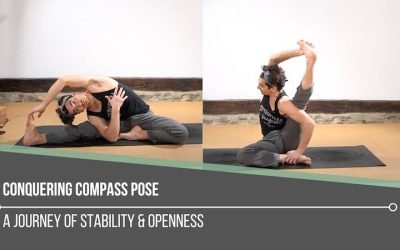
Conquering Compass Pose
Conquering Compass PoseSURYA YANTRASANACONQUERING COMPASS POSE Conquering Compass Pose isn’t about forcing your leg behind your shoulder—it’s about understanding and participating in the muscular coordination that makes the posture possible. The real power comes from...
THE FREE TECHNIQUE PACK
When You Subscribe, You Will Get Instant Access to
- the Technique Pack: 15 yoga pose breakdowns
- exclusive online course discounts
- exclusive blogs and videos
![yoga backbend techniques: 12 classes [backbend technique to relieve back pain "bowing the spine']](https://www.theyogimatt.com/wp-content/uploads/2020/07/10.jpeg "10")