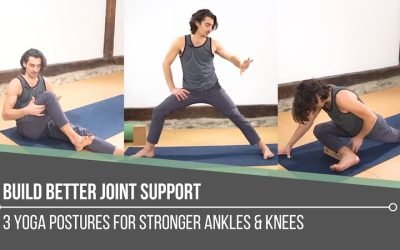
Build Better Joint Supportankle & kneeBUILD BETTER JOINT SUPPORT Sometimes we focus so heavily on flexibility that we forget our joints also need intelligent strength surrounding them. Matt reminds us that stability is not rigidity. It is the body’s ability to...
Hip Opening Without Knee Pain
Hip Opening Without Knee Pain
hip mobility
HIP OPENING WITHOUT KNEE PAIN
“Hip opening” in a yoga class just sounds glorious if we feel confined or constricted in this area of the body and our intention is to transform this experience. The term may not sound glorious, however, if we know that knee pain will accompany hip-opening yoga postures. In this scenario, it can be quite daunting to try to move across the spectrum from having tight to more open hips. On the other hand, if we’re hypermobile in this area, it may also feel a little nerve-wracking to delve into the action of hip opening. The good news, whether we are hypermobile, hypomobile, and/or dealing with knee pain in hip-opening postures, is that we can explore similar techniques when it comes to creating increased range of motion without knee pain.
In today’s video, Matt provides us with a roadmap to mitigate knee pain in 6 essential hip-opening postures.

THE POSE FACTORY
WAITLIST NOW OPEN
- Dogmatic alignment versus functional alignment
- Learn popular postural pitfalls
- Myths versus truth
- Formulaic approach for comprehensive learning
- Excellent guide for yoga enthusiasts
- Must-have for yoga teachers
- Joint-health awareness
- Muscle integrity, range of motion
- Props for accessibity
- Alignment alterations in the case of injuries
THE IMPORTANCE OF EXTERNAL ROTATION
Nursing knee pain while engaging in our asana practice can be a point of frustration. We may associate it with fear of reinjury or with memories of “what we used to be able to do without pain.” This is why education and exploration are vital—they help reignite possibility.
When learning about knee pain and its connection to hip-opening postures, we must further comprehend what’s involved with external rotation at the hip. When practicing with Matt and learning the Chromatic way, we quickly find out that such rotation involves much more than just rotating the upper thigh. There are detailed steps that promote both activation and stretch of the muscles that surround the hip, which helps us more safely engage with external rotation and ultimately assists in reducing knee pain. We can apply what we learn in the following postures.
WATCH THE VIDEO
HIP OPENING WITHOUT KNEE PAIN: 6 POSTURES FOR INCREASED RANGE OF MOTION
ACTIVATE WITH INTENTION
One of the best ways to prepare our bodies and increase both flexibility and mobility is to activate/strengthen our muscles. When we do this, we have better control to independently move our joints through a broader spectrum of range of motion. We benefit from having more confidence and power during physical activity.
Warrior II variation
In the first posture (a variation of Warrior II), we’re strengthening the buttocks and outer hips. Here are some key steps:
- Pull the feet towards one another
- Tuck the tail under
- Push down through the front heel
- Rotate the toes and shin out slightly while pulling the outer front foot back—this will activate the biceps femoris (external rotator of the knee joint)
Dragonfly variation
This variation includes a specific technique and also targets the biceps femoris, which closes the knee joint, helping reduce pain in hip-opening postures.

200 HOUR ONLINE TEACHER TRAINING
GET CERTIFIED & DEEPEN YOUR YOGA PRACTICE
- Deepen your yoga practice
- Build confidence speaking in front of groups in person and online
- Learn foundational class structures and templates
- Learn techniques for a wide range of yoga postures
- Get certified and highly qualified to teach yoga
- Yoga Alliance Globally Recognized Certification Program
DRILL AND STRETCH
Pigeon Pose
Here, we explore a more passive stretch. The trick to getting a little deeper into the stretch (particularly into the piriformis muscle) is to twist and to push the hips back. If knee pain is still present, Matt demonstrates how to further externally rotate the thigh to take the pressure off.
Goddess Pose
This time, we learn a drill to incorporate into our practice.
Once again, pulling the feet towards one another will activate the outer hamstring muscles. Instead of remaining static, we pulse or move side to side in order to engage the muscles while we’re stretching.
Skandasana
The target here is the adductor muscles, simply to experience the stretch. It’s not about how low we can take the posture. Keep in mind that by the time we reach this point in the practice, our muscles are already prepared for the stretch.

300 HOUR ONLINE TEACHER TRAINING
GET 500 HOUR CERTIFIED AS A MASTER TEACHER
Master your skill set as a teacher through refined techniques, anatomy, biomechanics, sequencing, philosophy, meditation techniques, theming, yoga business, and much more!
- Get 500 hour certified
- Learn anatomy, biomechanics, asana techniques
- Expand your teaching skills
- Masterful sequencing and verbal delivery
- Learn meditation and breathwork techniques
- Transformative tools: theming, dharma talks, satsang
THE ULTIMATE HIP OPENER
If we’re experiencing knee pain in hip-opening postures, Lotus Pose might be the farthest thing from our minds. Once we have incorporated the techniques into the postures discussed, the potential for this posture may become a reality. However, we still approach Lotus safely and in phases.
Preparation I
In a Baddha Konasana position, the cue Matt offers—pulling the knees back and out—is key to getting the proper placement of the foot in Lotus.
Executing these actions, we find out just how much they assist in providing us the ability to stack the feet or to access Half Lotus. The two actions result in the closing of the knee joint. If we are still experiencing knee pain in Half Lotus, turning the calf muscles can help release the strain.
Matt’s next online course, The Pose Factory, is full of these extra gems to help us to foster health in our muscles and support our ability to enjoy postures we may have had to put aside.
The 200 Hr. Teacher Training: Click Here to See the Next Start Date
The 300 Hr. Advanced Teacher Training: Click Here to See the Next Start Date
Article by Trish Curling
Video Extracted From: Hip Release Online Workshop

ONLINE ANATOMY COURSE
- Accessible, exciting, and easy to learn
- Anatomy and biomechanics for yoga
- Appropriate for both teachers and students
- Learn joint alignment vs pose alignment
- Demystify yoga poses and transitions
- Release aches and pains
- Learn how to avoid common injuries
- Caters to all levels with modifications and props
- 20 hours Continued Education Credits with Yoga Alliance
- 20 hours toward Chromatic Yoga Certification and 300 Hour
- Lifetime access
Continue Learning
Build Better Joint Support
read more
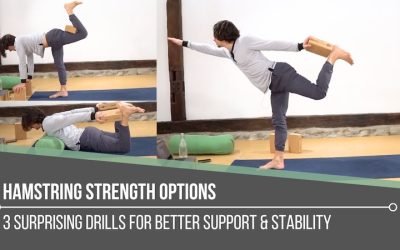
Hamstring Strength Options
Hamstring Strength Optionship extensorsHAMSTRING STRENGTH OPTIONS When we think about hamstrings in yoga, most of us immediately think about stretching. Matt reminds us that this powerful muscle group is rarely celebrated for what it is also designed to do: create...
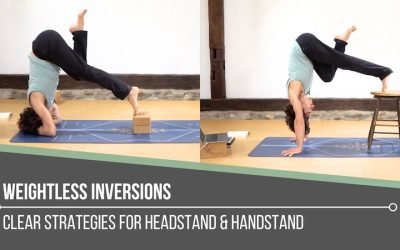
Weightless Inversions
Weightless InversionssirsasanaWEIGHTLESS INVERSIONS Weightless inversions are not about removing effort. They are about redistributing it with awareness. Matt reminds us that when we refine how we place weight through the hands, shoulders, and core, the body begins to...
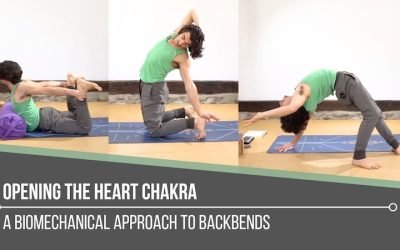
Opening The Heart Chakra
Opening The Heart ChakrabackbendOPENING THE HEART CHAKRA Opening the heart chakra is not simply about reaching deeper into a backbend. Matt reminds us that this space is rooted in love, balance, and connection, both with ourselves and with others. It reflects how we...
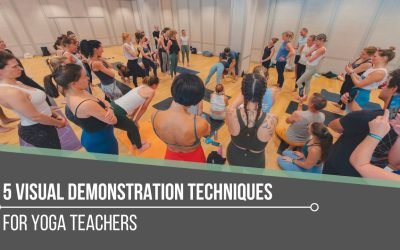
5 Visual Demonstration Techniques for Yoga Teachers
5 Visual Demonstration Techniques for Yoga TeachersYoga TeachersVisual Demonstration This is often confused with “teaching from the mat.” Teaching at the front of the room can be useful at the right time and place, but that is not what we are referring to here. In...
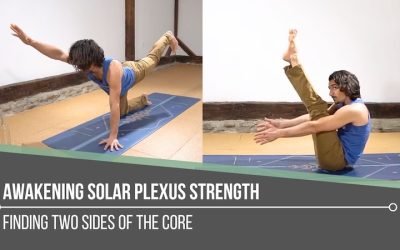
Awakening Solar Plexus Strength
Awakening Solar Plexus Strengththird chakraAWAKENING SOLAR PLEXUS STRENGTH Awakening solar plexus strength invites us into the centre of transformation. Matt reminds us that this third chakra, Manipura, is our fire, our willpower, and our ability to take action. It...
THE FREE TECHNIQUE PACK
When You Subscribe, You Will Get Instant Access to
- the Technique Pack: 15 yoga pose breakdowns
- exclusive online course discounts
- exclusive blogs and videos


![yoga backbend techniques: 12 classes [backbend technique to relieve back pain "bowing the spine']](https://www.theyogimatt.com/wp-content/uploads/2021/10/Archna-Mohan-chromatic-5.jpg "Archna Mohan chromatic")
