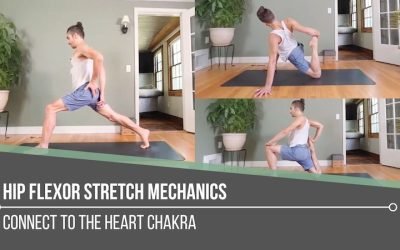
Hip Flexor Stretch MechanicsALIGNMENTHIP FLEXOR STRETCH MECHANICS Hip flexor stretch mechanics begins with understanding that stability and length often come from opposing actions. In the first demonstration, Matt cues the back inner thigh to lift upward, which tips...
Inversion Success
Inversion Success
handstand
INVERSION SUCCESS
We all have different definitions of success. Success in our yoga practice could look anything like effortlessly engaging in inversions, being able to participate in breathwork techniques, and/or simply showing up for a class. We’re all engaging in the practice for our own reasons and in our own ways at any given stage of our lives.
If we are at a point where we are exploring inversions in our asana practice, there are many different ways we can perceive to have achieved inversion success. What we actually acquire is knowledge, confidence, self awareness, and a solid physical foundation for the postures themselves, not to mention a stronger physical capacity for other activities off of the mat.
An important aspect of inversion success is knowing exactly how to prepare. In today’s video, Matt guides us through techniques and drills for a successful foundation in handstand.

HANDSTAND AND ARM BALANCES
REGISTRATION NOW OPEN
- 10 Chromatic Yoga practices with founder Matt Giordano
- Full length 75 minute classes
- Each Yoga class includes handstand drills and 1 arm balance breakdown
- Each class includes warm ups, sun salutations, standing postures and preparatory postures for the selected arm balance of the day
- Improve your body awareness and advance your practice
- Technique, biomechanics, and alignment at the forefront
- 12 Continuing Education hours with Yoga Alliance
- 12 Accredited Hours with the Chromatic School of Yoga
- Step-by-Step instruction for increased accessibility
- Improve strength, balance, flexibility, and proprioception
- Appropriate variations and modifications for all levels
TAKE THE FIRST STEP
If we have a goal in mind, it’s no secret that we’ll never get there if we don’t take the first step. For handstands, Matt teaches us how to get the proper vertical alignment of our forearms by using blocks as a guide. In his demonstration, he teaches us that we must get the weight out of our feet. Shifting forward towards the hands will straighten the line of the forearms.
Now, it doesn’t stop there. There are some specific actions we need to take if we are truly setting up inversion success. After shifting our weight forward, we must grip our fingers into the ground, while the blocks stay in place as a guide. Next, we lift our shoulders up towards the ears. Finally, looking at the thighs or belly button while here, trains the body to access a more flexed position in the spine. This is known as Handstand Preparation I.
WATCH THE VIDEO
INVERSION SUCCESS: ALIGNMENT, DRILLS & PREPARATION
SECOND STEP IN PREP
The next step in preparation for inversion success is a “Supported Warrior III drill”. This particular drill adds the element of momentum. Here, we get an opportunity to build on the previous foundation. Since we are actively shifting our weight back & forth in this drill, we nurture the response in the body to be more automated in our implementation of the necessary actions. The pattern of gripping the fingers into the ground, aligning the forearms, straightening the elbows, and lifting the shoulders up to the ears each time we shift our weight forward becomes more deeply ingrained.
This drill not only sharpens coordination but also fosters a sense of trust in our ability to catch and hold our weight as we prepare for inversion. Once this foundation feels solid, we can go even further.

200 HOUR ONLINE TEACHER TRAINING
GET CERTIFIED & DEEPEN YOUR YOGA PRACTICE
- Deepen your yoga practice
- Build confidence speaking in front of groups in person and online
- Learn foundational class structures and templates
- Learn techniques for a wide range of yoga postures
- Get certified and highly qualified to teach yoga
- Yoga Alliance Globally Recognized Certification Program
TUCK IN
Next, Matt takes us through a seated drill designed to deepen our ability to create spinal flexion—an essential component in building the strength and awareness needed for handstand preparation and inversion success overall.
Matt explains that it’s the flexed position in this drill that teaches us how to do a straight handstand. In the drill, we start off by tucking the knees in, flexing the spine for counter balance and sending one leg straight out at a time. He then builds upon that by changing the direction of where we send the legs. In the next stage, we kick one foot up to the sky at a time.
This progression not only strengthens the core and reinforces spinal awareness but also mimics the mechanics required to enter a controlled handstand. Once we’ve honed these movements, we’re ready to combine elements from Handstand Preparation 1 with the tucked positions from the drill.

300 HOUR ONLINE TEACHER TRAINING
GET 500 HOUR CERTIFIED AS A MASTER TEACHER
Master your skill set as a teacher through refined techniques, anatomy, biomechanics, sequencing, philosophy, meditation techniques, theming, yoga business, and much more!
- Get 500 hour certified
- Learn anatomy, biomechanics, asana techniques
- Expand your teaching skills
- Masterful sequencing and verbal delivery
- Learn meditation and breathwork techniques
- Transformative tools: theming, dharma talks, satsang
GET LIGHT
In the final demonstration for handstand preparation, we combine the elements and actions of each drill. Here, we begin to tease the idea of almost lifting the legs up. It’s not that the legs actually do lift off, but the idea is to get the leg that’s closest to the ground gets extremely light.
Once we’ve gone through the techniques and actions that are available to us in this process, we come to understand what our definition of inversion success truly is.
To build upon these skills and become more masterful in your approach, register for Matt’s next online immersion Handstand & Arm Balances.
The 200 Hr. Teacher Training: Click Here to See the Next Start Date
The 300 Hr. Advanced Teacher Training: Click Here to See the Next Start Date
Article by Trish Curling
Video Extracted From: Revelation Immersion

ONLINE ANATOMY COURSE
- Accessible, exciting, and easy to learn
- Anatomy and biomechanics for yoga
- Appropriate for both teachers and students
- Learn joint alignment vs pose alignment
- Demystify yoga poses and transitions
- Release aches and pains
- Learn how to avoid common injuries
- Caters to all levels with modifications and props
- 20 hours Continued Education Credits with Yoga Alliance
- 20 hours toward Chromatic Yoga Certification and 300 Hour
- Lifetime access
Continue Learning
Hip Flexor Stretch Mechanics
read more
A Yoga Treatment For The Shoulders
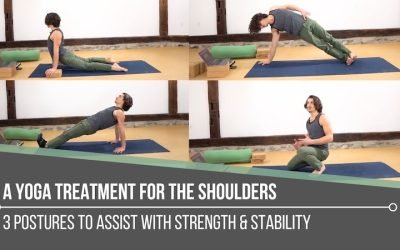
A Yoga Treatment For The ShouldersSTABILITYA YOGA TREATMENT FOR THE SHOULDERS Shoulders tend to speak up when stability is missing. Matt reminds us that building strength isn’t about aesthetics, it’s about support, resilience, and keeping the body working as one...
Reverse Tabletop Strength
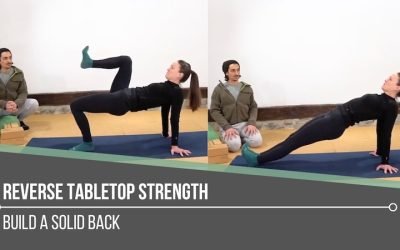
Reverse Tabletop StrengthMECHANICSREVERSE TABLETOP STRENGTH “Solid” implies strength, yet in yoga, we can easily lose sight of how intentionally building the back body supports everything we do. Reverse Tabletop may look simple, but it asks a lot from the posterior...
Focus On Eagle Pose Legs
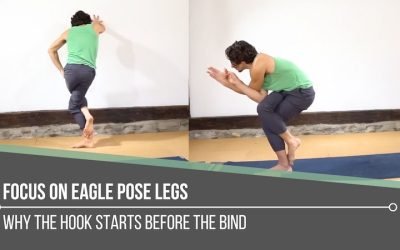
Focus On Eagle Pose LegsMECHANICSFOCUS ON EAGLE POSE LEGS When we focus on Eagle Pose legs, it’s tempting to assume the bind is a flexibility test. But this posture quietly reveals something more nuanced: timing, joint mechanics, and how efficiently the legs organize...
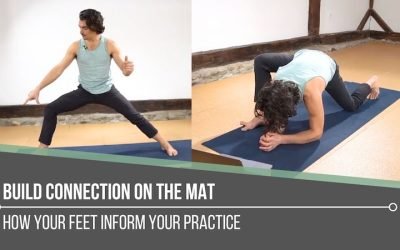
Build Connection On The Mat
Build Connection On The MatGROUNDINGBUILD CONNECTION ON THE MAT Building connection on the mat starts at the place we tend to overlook: our feet. If we only practice the “shape” of a posture, we can miss the biomechanics that change how the whole pose feels from the...
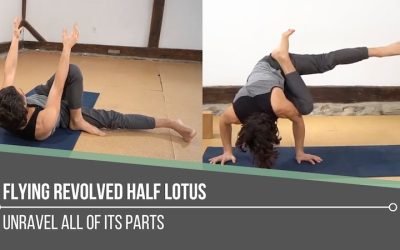
Flying Revolved Half Lotus
Flying Revolved Half LotusARM BALANCEFLYING REVOLVED HALF LOTUS Some postures don’t arrive through imitation; they arrive through investigation. Flying Revolved Half Lotus is one of those shapes. It borrows familiar ingredients like Side Crow mechanics, hip opening,...
THE FREE TECHNIQUE PACK
When You Subscribe, You Will Get Instant Access to
- the Technique Pack: 15 yoga pose breakdowns
- exclusive online course discounts
- exclusive blogs and videos


