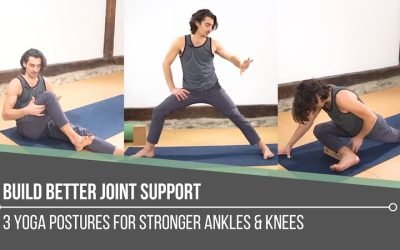
Build Better Joint Supportankle & kneeBUILD BETTER JOINT SUPPORT Sometimes we focus so heavily on flexibility that we forget our joints also need intelligent strength surrounding them. Matt reminds us that stability is not rigidity. It is the body’s ability to...
Strengthen Your Ankles
Strengthen Your Ankles
foot health
STRENGTHEN YOUR ANKLES
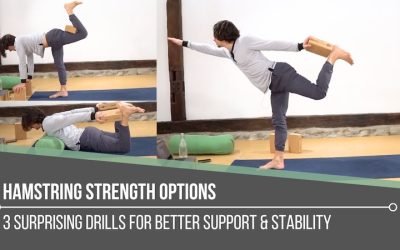
Our feet are the foundation of our bodies. Placing great emphasis on creating ankle stability and mobility during our asana practice should be obvious; unfortunately, this is not always the case. Maintaining a regular practice can help us greatly benefit in this area of the body, even when we’re not specifically focusing on our feet. The simple nature of the practice exposes us to a variety of movements in the ankle joints. It’s up to us, however, to be intentional about incorporating specific actions to strengthen our ankles.
The question is how we can incorporate these actions and techniques. What we’ll see in today’s video is how Matt seamlessly integrates techniques into common postures. These techniques not only translate into a more challenging arm balance but also serve to help us to minimize ankle injuries.

THE POSE FACTORY
WAITLIST NOW OPEN
- Dogmatic alignment versus functional alignment
- Learn popular postural pitfalls
- Myths versus truth
- Formulaic approach for comprehensive learning
- Excellent guide for yoga enthusiasts
- Must-have for yoga teachers
- Joint-health awareness
- Muscle integrity, range of motion
- Props for accessibity
- Alignment alterations in the case of injuries
ANATOMY OF THE ANKLES
In order to strengthen our ankles and create a “corset of support,” it’s helpful to understand the muscles we are affecting with each action. There are 4 actions of the ankle: dorsiflexion, plantar flexion, inversion, and eversion. Although Matt touches on each one of these, our focus for today is on inversion and eversion. Everting the ankle helps activate the fibularis muscles (outer shin). There are 3 fibularis muscles (2 that attach into the outer foot and 1 that is more towards the front of the outer ankle).
The tibialis posterior (along the back side of the calf) helps invert the ankle. This muscle runs along the back of the shinbone, or tibia, and opposes the fibularis muscles. Matt refers to these two muscles as the “bootstrap” muscles, which help stabilize the ankle.
WATCH THE VIDEO
STRENGTHEN YOUR ANKLES TO MINIMIZE INJURY: IMPLEMENT KEY TECHNIQUES IN FAMILIAR YOGA POSTURES
PREVENTING POTENTIAL INJURIES
If you’ve ever experienced an ankle sprain or the pain of plantar fasciitis, you’ll be glad to know that the techniques from this video can be extremely helpful in preventing these types of injuries.
The outer ligaments of the ankles are smaller and less powerful compared to the ligaments on the inside of the ankle. Due to the increased vulnerability of the outer ankle, more sprains happen here. There are 2 tendons that run under the ligaments that help the ligaments keep the ankle in place. To make sure the ligaments have the support they need, it’s imperative to strengthen the muscles of fibularis. It is equally important to strengthen the muscles that support inversion, to help prevent the collapsing of the inner arch.
If plantar fasciitis is an issue, we want to work on the sole of the foot, in order to reduce strain.

200 HOUR ONLINE TEACHER TRAINING
GET CERTIFIED & DEEPEN YOUR YOGA PRACTICE
- Deepen your yoga practice
- Build confidence speaking in front of groups in person and online
- Learn foundational class structures and templates
- Learn techniques for a wide range of yoga postures
- Get certified and highly qualified to teach yoga
- Yoga Alliance Globally Recognized Certification Program
ANKLE ACTIONS
What are the techniques and how can we implement them?
In the video, Matt takes us through exactly how to evert and invert the ankles via a supported Forward Fold. What we gain here is the understanding of how the actions of simultaneously pressing into the big toe (and big toe mound) and the pinky toe create inversion, activating the targeted muscle groups. The band of stability that is created is what strengthens our ability to balance our side-to-side movement. Matt goes on to demonstrate how this can be applied to familiar postures. In Warrior II, for example, we see how the articulation of the toes can have a greater impact on the external rotation of the hip, which supports the journey towards Flying Pigeon. He also includes the articulations of the ankles in a Pyramid Pose variation, a Figure Four preparation, and an Ardha Chandrasana drill.

300 HOUR ONLINE TEACHER TRAINING
GET 500 HOUR CERTIFIED AS A MASTER TEACHER
Master your skill set as a teacher through refined techniques, anatomy, biomechanics, sequencing, philosophy, meditation techniques, theming, yoga business, and much more!
- Get 500 hour certified
- Learn anatomy, biomechanics, asana techniques
- Expand your teaching skills
- Masterful sequencing and verbal delivery
- Learn meditation and breathwork techniques
- Transformative tools: theming, dharma talks, satsang
INTENTION
Ultimately, it’s up to us to engage in movements on our mat that may be “less enticing.” The result of the actions described above is that we benefit from an expanded exploration on our yoga mats and from increased foot health and strength for our everyday activities. It’s up to us to be very intentional about our actions. This connects well to a lesson Matt teaches in his 300 Hour Teacher Training about Abhyasa (well-placed effort). The precise movements of the ankles and toes require well-placed thought and effort when focusing on them in a given yoga posture.
Overall, we can also take time to consider the intention of our asana practice. What is our intention in a given practice? What are our intentions overall? These are concepts that will be explored in Matt’s upcoming Pose Factory and Yoga Teacher Trainings.
The 200 Hr. Teacher Training: Click Here to See the Next Start Date
The 300 Hr. Advanced Teacher Training: Click Here to See the Next Start Date
Article by Trish Curling
Video Extracted From: Mobility Immersion

ONLINE ANATOMY COURSE
- Accessible, exciting, and easy to learn
- Anatomy and biomechanics for yoga
- Appropriate for both teachers and students
- Learn joint alignment vs pose alignment
- Demystify yoga poses and transitions
- Release aches and pains
- Learn how to avoid common injuries
- Caters to all levels with modifications and props
- 20 hours Continued Education Credits with Yoga Alliance
- 20 hours toward Chromatic Yoga Certification and 300 Hour
- Lifetime access
Continue Learning
Build Better Joint Support
read more
Hamstring Strength Options
Hamstring Strength Optionship extensorsHAMSTRING STRENGTH OPTIONS When we think about hamstrings in yoga, most of us immediately think about stretching. Matt reminds us that this powerful muscle group is rarely celebrated for what it is also designed to do: create...
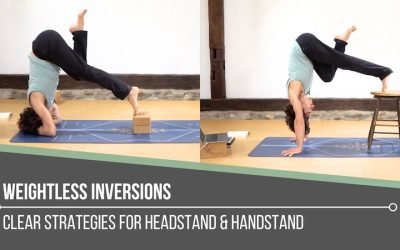
Weightless Inversions
Weightless InversionssirsasanaWEIGHTLESS INVERSIONS Weightless inversions are not about removing effort. They are about redistributing it with awareness. Matt reminds us that when we refine how we place weight through the hands, shoulders, and core, the body begins to...
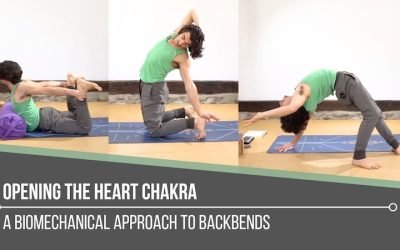
Opening The Heart Chakra
Opening The Heart ChakrabackbendOPENING THE HEART CHAKRA Opening the heart chakra is not simply about reaching deeper into a backbend. Matt reminds us that this space is rooted in love, balance, and connection, both with ourselves and with others. It reflects how we...
5 Visual Demonstration Techniques for Yoga Teachers
5 Visual Demonstration Techniques for Yoga TeachersYoga TeachersVisual Demonstration This is often confused with “teaching from the mat.” Teaching at the front of the room can be useful at the right time and place, but that is not what we are referring to here. In...
Awakening Solar Plexus Strength
Awakening Solar Plexus Strengththird chakraAWAKENING SOLAR PLEXUS STRENGTH Awakening solar plexus strength invites us into the centre of transformation. Matt reminds us that this third chakra, Manipura, is our fire, our willpower, and our ability to take action. It...
THE FREE TECHNIQUE PACK
When You Subscribe, You Will Get Instant Access to
- the Technique Pack: 15 yoga pose breakdowns
- exclusive online course discounts
- exclusive blogs and videos


