Chin Stand

Chin Stand

ganda bherundasana

CHIN STAND

Without a doubt, Chin Stand requires preparation. This posture must be approached with the utmost humility, essential in order to respect the potential risk. If this pose is not explored regularly in our physical practice, it may be quite challenging. At the same time, it’s a rewarding journey! Chin Stand requires an exceptional amount of back and upper body strength, along with a generous amount of front body flexibility. That being said, this posture provides us an opportunity to go more deeply into those areas of the body. We can examine what requires development and attention.  

Taking that approach covers the physical, but what is often lacking is the mental fortitude to let go of the outcomes and simply delight in the process. We are capable of taking actions to develop while challenging ourselves.

chromatic yoga 15 hour immersion

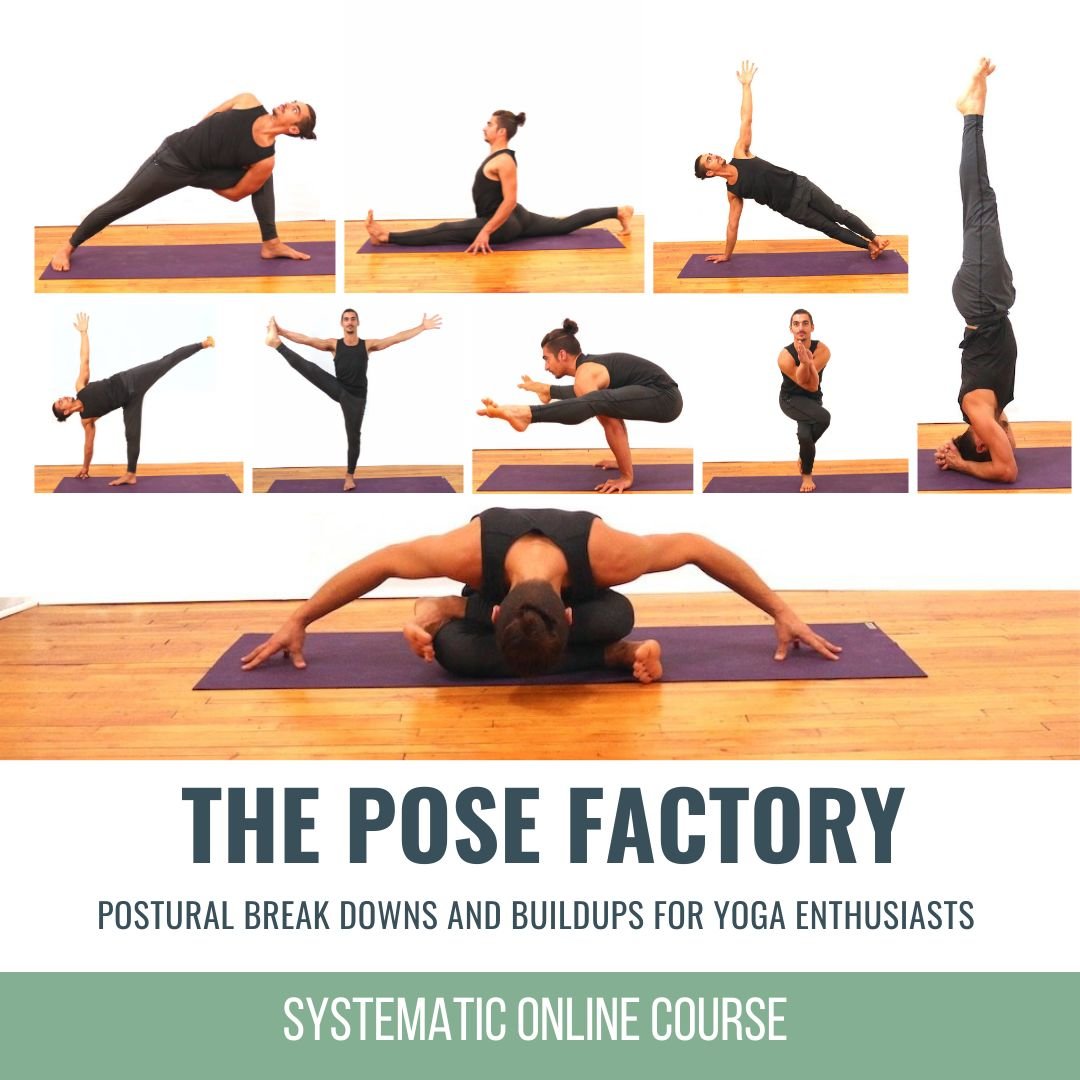
THE POSE FACTORY

WAITLIST NOW OPEN

  • Dogmatic alignment versus functional alignment
  • Learn popular postural pitfalls
  • Myths versus truth
  • Formulaic approach for comprehensive learning
  • Excellent guide for yoga enthusiasts
  • Must-have for yoga teachers
  • Joint-health awareness
  • Muscle integrity, range of motion
  • Props for accessibity
  • Alignment alterations in the case of injuries

POSTERIOR CHAIN FOCUS

Establishing a strong base is the key to preparation, especially when approaching a posture like Chin Stand. We need to be confident while progressing through each step on the roadmap towards the pose. As Matt says in today’s video, the posture is “all about the posterior chain.”  

While prone on his mat, Matt demonstrates a drill for Chin Stand that strengthens the hamstrings, buttocks, and lower back. The drill is designed to teach us how to isolate the strength of these areas of the body on each side. Exploring in this way provides the opportunity to find where there may be gaps we need to fill in terms of strength. If we notice that it is more challenging on one side, we can devote more time to that particular area.

What also happens is that we begin to play with the shape that’s created in Chin Stand.

WATCH THE VIDEO

CHIN STAND: TAKE FLIGHT FROM THESE FOUNDATIONS

PREPARE YOUR NECK LIKE A BACKBEND

Clearly, the neck muscles are in the spotlight in Chin Stand. Flexibility is required along with strength and stability to reduce the risk of injury. 

When stretching the neck, the approach is similar to what we’ve learned about backbends with Matt. In backbends, we first send the rib cage forward. In Chin Stand preparation, Matt demonstrates how to send the chin forward, after creating a support under the occiput (the back part of the skull). We then lift the chin to stretch the muscles in the front of the neck. This mimics the lift of the lower ribs up in order to stretch the abdominals in backbends. One of the last similarities is the exit. Just like in backbends, we take care to maintain the shape we’ve created in the neck while we slowly lower the chin. Keep the jaw closed in order to feel the stretch.

200 Hour Online Teacher Training Certification

200 HOUR ONLINE TEACHER TRAINING

GET CERTIFIED & DEEPEN YOUR YOGA PRACTICE

  • Deepen your yoga practice
  • Build confidence speaking in front of groups in person and online
  • Learn foundational class structures and templates
  • Learn techniques for a wide range of yoga postures
  • Get certified and highly qualified to teach yoga
  • Yoga Alliance Globally Recognized Certification Program

CHIN STAND VARIATIONS

Matt sets himself up with a wall, yoga blocks, a bolster, and a chair. With these props, he delves into various positions with the legs. He offers “stag” positions with either a foot or a knee on the chair. A knee, he suggests, is far more accessible, but placing the foot on a chair more closely resembles the experience in Chin Stand.  

Another variation is placing the arms back behind us. We can still explore the same stag options of the legs with this change in the arms.

Matt emphasizes that one of the key points, as we continue with our quest, is that we use our hand grip along with more of our upper body strength in order to keep the neck safe.  

When selecting the option in which we turn away from the wall, we MUST have a partner educated in how to support us.

300 hour teacher training online

300 HOUR ONLINE TEACHER TRAINING

GET 500 HOUR CERTIFIED AS A MASTER TEACHER

Master your skill set as a teacher through refined techniques, anatomy, biomechanics, sequencing, philosophy, meditation techniques, theming, yoga business, and much more!

  • Get 500 hour certified
  • Learn anatomy, biomechanics, asana techniques
  • Expand your teaching skills
  • Masterful sequencing and verbal delivery
  • Learn meditation and breathwork techniques
  • Transformative tools: theming, dharma talks, satsang

YOU’RE ALLOWED TO CHEAT

If we do go to the point of doing Chin Stand without any props, we can view “cheating” as part of the humility previously mentioned. Matt discusses rolling the elbows more inward as a way of protecting the shoulder girdle and providing stability. Cheating or not, we are better off keeping safety as our first priority rather than attempting to achieve some “aesthetic.” This is an example of choosing to embrace the process and value our discernment when attempting a posture as complex as this one. It’s not about the outcome as much as it is about the experience and journey. It’s the learning that is most valuable.

Matt’s online course The Pose Factory is the perfect platform to expand our learning. The course offers the keys to creating the foundations we desire in our asana practice. Register today to access the building blocks of maximum potential.

The 200 Hr. Teacher Training: Click Here to See the Next Start Date

The 300 Hr. Advanced Teacher Training: Click Here to See the Next Start Date

Article by Trish Curling

Video Extracted From: Inversion Immersion 

lotus pose online yoga classes

ONLINE ANATOMY COURSE

  • Accessible, exciting, and easy to learn
  • Anatomy and biomechanics for yoga
  • Appropriate for both teachers and students
  • Learn joint alignment vs pose alignment
  • Demystify yoga poses and transitions
  • Release aches and pains
  • Learn how to avoid common injuries
  • Caters to all levels with modifications and props
  • 20 hours Continued Education Credits with Yoga Alliance
  • 20 hours toward Chromatic Yoga Certification and 300 Hour
  • Lifetime access

Continue Learning

Eka Pada Koundinyasana I

Eka Pada Koundinyasana I

Eka Pada Koundinyasana IArm BalanceEKA PADA KOUNDINYASANA I If Side Crow is already part of our practice, then we can understand that Eka Pada Koundinyasana I is like adding on another layer to that posture, due to the fact that they are quite similar.  The added...

read more
Achieve Flying Balance

Achieve Flying Balance

Achieve Flying BalanceArm BalanceACHIEVE FLYING BALANCE Achieving an arm balance is quite extraordinary when you consider all that’s involved. And when we refer to an arm balance as a “flying balance,” there is even more involved. The “flying” in Eka Pada...

read more
Virasana

Virasana

VirasanaHip ExtensionVIRASANA For some of us, postures like Virasana and Lotus can be uncomfortable or even painful for the knees, so we avoid them altogether. Depending on what we’re dealing with, this may be the best decision. If there is room for safe exploration,...

read more
Get Bendy

Get Bendy

Get BendySpinal MobilityGET BENDY In the yoga context, getting bendy can conjure up images of postures that may seem far-fetched or unattainable. What we should set our sights on instead is not an end result but rather all the things we learn while we're exploring...

read more
Wall Drills To Progress In Handstand

Wall Drills To Progress In Handstand

Wall Drills to Progress in HandstandAdho Mukha VrksasanaWALL DRILLS TO PROGRESS IN HANDSTAND Wall drills for Handstand are an excellent way to master the mechanics required to go upside down with confidence. Using the wall as a support to refine alignment, rather than...

read more
Mountain Pose Mechanics

Mountain Pose Mechanics

Mountain Pose MechanicstadasanaMOUNTAIN POSE MECHANICS How often do we go back to refine the “basics”?  Revisiting a posture like Mountain Pose (Tadasana) is like pruning a tree. We may have already developed a foundation, but it’s important to continue to clip away...

read more

THE FREE TECHNIQUE PACK

When You Subscribe, You Will Get Instant Access to

  • the Technique Pack: 15 yoga pose breakdowns
  • exclusive online course discounts
  • exclusive blogs and videos
  • This field is for validation purposes and should be left unchanged.

Compass Pose

Compass Pose

Variations to Challenge Balance and Flexibility

balance & flexibility

COMPASS POSE VARIATIONS

Compass Pose, especially the variations Matt offers today, will challenge you, and not necessarily in the ways you might think. Most obviously, it will challenge you in the lateral flexion of the spine and the extensive amount of shoulder and hamstring flexibility required, but even more than that are all the lifts, drops, and turns, or maybe better said, the articulations and/or actions in the joints, that make it that much more challenging. However, with challenge comes reward. You’ll see that both variations provide an opportunity to deepen your understanding of the posture because of the step-by-step techniques you’ll follow and because of how your body responds within the posture. After reviewing today’s video clip, you’ll be empowered with 2 variations of Compass Pose that will test your ability to stay present while increasing strength, balance, and flexibility.

lotus pose online yoga classes

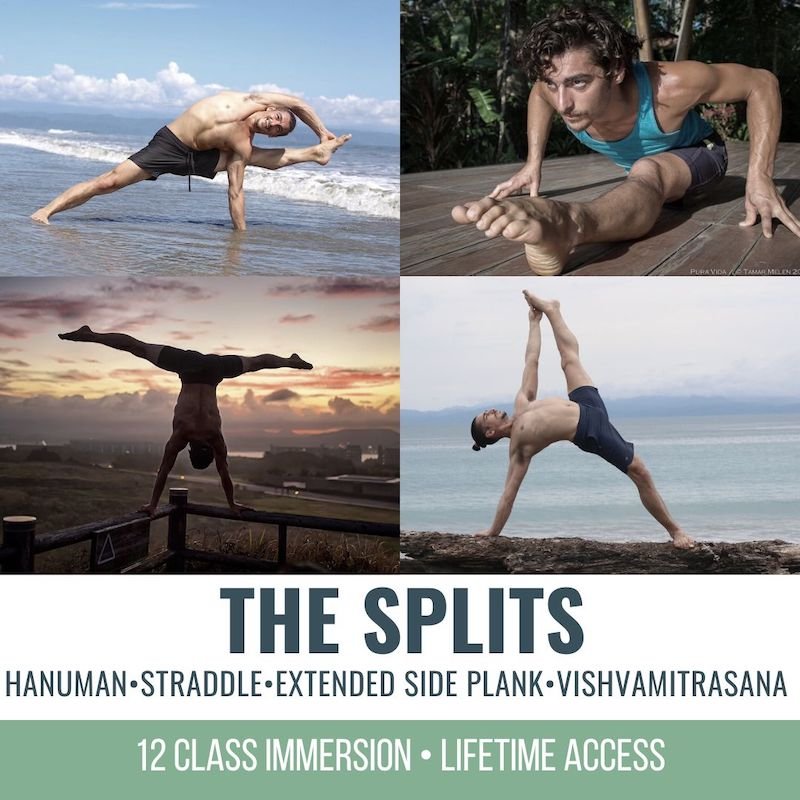
THE SPLITS

  • Improve flexibility of hamstrings, adductors, hip flexors, and glutes
  • Hanumanasana Splits
  • Center Splits
  • Vishvamitrasana
  • Standing Splits / Ekapadasana
  • Extended Side Plank / Vashisthasana
  • Straddle entries for inversions, with modifications for all levels
  • Moderate Vinyasa style with alignment, technique, and biomechanics
  • Sequences are anatomically informed and carefully crafted
  • 12 Classes: All levels appropriate
  • Lifetime unlimited access to all
  • Attend the livestream OR practice the replays any time that’s convenient for you

$148.00

ANATOMY OF COMPASS POSE

Although Compass Pose is a seated posture, it does require balance. After all, one leg is lifted while the other is grounded to the floor. Lifting the top leg requires strength in the outer hip muscles (gluteus medius & minimus).  Because you grab hold of the foot of the top leg, you might argue that Compass Pose is both a passive and an active stretch. A healthy approach to this lifting and opening is to activate those outer hip muscles to create more abduction, rather than relying solely on the flexibility of the adductors and the hamstrings. Next up are your shoulders and back muscles. Gaining access to grabbing hold of the foot requires an engagement of the rhomboids to create more opening in the shoulders. In addition, there are 2 actions that are key to putting it all together.

WATCH THE VIDEO

COMPASS POSE: 2 VARIATIONS TO CHALLENGE BALANCE AND FLEXIBILITY

COMPASS POSE VARIATION 1

It’s the 2 additional actions we’ll see now that bring the pose together.

In this variation, the bottom knee is bent. Matt shows you how to “snuggle” into your lifted leg while leaning and putting your weight into the bent (or seated) leg, seting you up for success. Leaning your weight to the side allows for a hike of the hip—the first action. This lifting, along with the activation of the rhomboids to pull your shoulder back, allows you to more easily guide your foot. Matt explains that keeping the hike of the hip means that your pelvis is at an angle in which your leg doesn’t have to fight against the hip joint, ultimately making it easier for shoulder opening. The second action is the internal rotation of the hip as you lift the leg. Internal rotation helps maintain the lift. 

200 Hour Online Teacher Training Certification

200 HOUR ONLINE TEACHER TRAINING

GET CERTIFIED & DEEPEN YOUR YOGA PRACTICE

  • Deepen your yoga practice
  • Build confidence speaking in front of groups in person and online
  • Learn foundational class structures and templates
  • Learn techniques for a wide range of yoga postures
  • Get certified and highly qualified to teach yoga
  • Yoga Alliance Globally Recognized Certification Program

COMPASS POSE VARIATION 2

In this 2nd variation of Compass Pose, the bottom leg is straight and mimics Center Splits early in the setup. Once you’re in the posture, extending the bottom leg all the way out further challenges your balance and flexibility. In order to maintain better balance, you can emphasize internally rotating through both legs for more stability in your base.  

Now, remember when I mentioned that Compass Pose can be viewed as both an active and a passive stretch? In the full class, Matt takes the pose to the next level and offers the option of letting go of the foot and relying on both the active flexion of the hip and the activation of the outer hips. Do these actions remind you of anything?  If you said Vishvamitrasana, then you’re right. So much of what Matt offers here is exactly what you need to prepare for Vishvamitrasana (also known, among other names in English, as Flying Compass Pose).

300 hour teacher training online

300 HOUR ONLINE TEACHER TRAINING

GET 500 HOUR CERTIFIED AS A MASTER TEACHER

Master your skill set as a teacher through refined techniques, anatomy, biomechanics, sequencing, philosophy, meditation techniques, theming, yoga business, and much more!

  • Get 500 hour certified
  • Learn anatomy, biomechanics, asana techniques
  • Expand your teaching skills
  • Masterful sequencing and verbal delivery
  • Learn meditation and breathwork techniques
  • Transformative tools: theming, dharma talks, satsang

WITH CHALLENGE COMES REWARD

The challenges you encounter might be in those finer details (hiking up and internally rotating the hip), or perhaps the inability to balance on one side is preventing you from utilizing the flexibility available to you. If you do find balance, incorporating the internal rotation may either throw off your balance or make it hard to maintain. The truth is that building on one step at a time while honoring the current state of your body will help you reap the rewards over time.  

Matt’s current Splits Immersion will both challenge you and guide you toward the mastery of these techniques.

See you on the mat!

The 200 Hr. Teacher Training: Click Here to See the Next Start Date

The 300 Hr. Advanced Teacher Training: Click Here to See the Next Start Date

Article by Trish Curling

Video Extracted From: The Splits

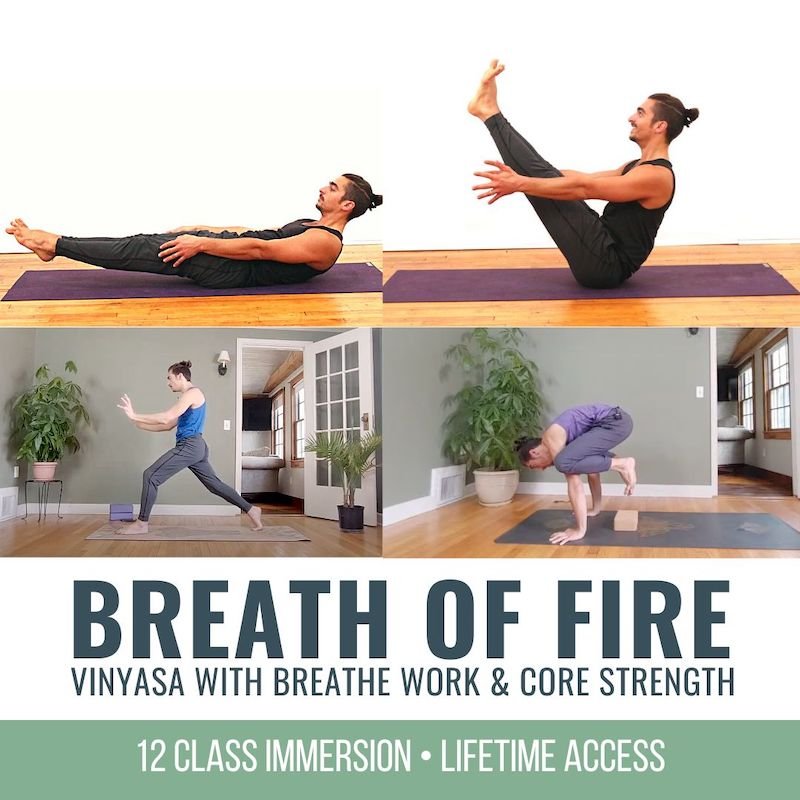
Yoga for Core and Breathwork

BREATH OF FIRE

  • Moderate Vinyasa-style classes
  • Core strengthening & integration
  • Master your breath with pranayama practices
  • Access your core in arm balances, heart openers, twists, forward folds, inversions, and more
  • Learn where and how to breathe in challenging postures
  • Each class will include one pranayama (breathwork practice) and several core strengtheners
  • Access your core muscles: deep, superficial, anterior, posterior, and lateral 
  • 12 Classes: All levels appropriate
  • Lifetime unlimited access to all
  • Attend the livestream OR practice the replays any time that’s convenient for you

$148.00

Continue Learning

Eka Pada Koundinyasana I

Eka Pada Koundinyasana I

Eka Pada Koundinyasana IArm BalanceEKA PADA KOUNDINYASANA I If Side Crow is already part of our practice, then we can understand that Eka Pada Koundinyasana I is like adding on another layer to that posture, due to the fact that they are quite similar.  The added...

read more
Achieve Flying Balance

Achieve Flying Balance

Achieve Flying BalanceArm BalanceACHIEVE FLYING BALANCE Achieving an arm balance is quite extraordinary when you consider all that’s involved. And when we refer to an arm balance as a “flying balance,” there is even more involved. The “flying” in Eka Pada...

read more
Virasana

Virasana

VirasanaHip ExtensionVIRASANA For some of us, postures like Virasana and Lotus can be uncomfortable or even painful for the knees, so we avoid them altogether. Depending on what we’re dealing with, this may be the best decision. If there is room for safe exploration,...

read more
Get Bendy

Get Bendy

Get BendySpinal MobilityGET BENDY In the yoga context, getting bendy can conjure up images of postures that may seem far-fetched or unattainable. What we should set our sights on instead is not an end result but rather all the things we learn while we're exploring...

read more
Wall Drills To Progress In Handstand

Wall Drills To Progress In Handstand

Wall Drills to Progress in HandstandAdho Mukha VrksasanaWALL DRILLS TO PROGRESS IN HANDSTAND Wall drills for Handstand are an excellent way to master the mechanics required to go upside down with confidence. Using the wall as a support to refine alignment, rather than...

read more
Mountain Pose Mechanics

Mountain Pose Mechanics

Mountain Pose MechanicstadasanaMOUNTAIN POSE MECHANICS How often do we go back to refine the “basics”?  Revisiting a posture like Mountain Pose (Tadasana) is like pruning a tree. We may have already developed a foundation, but it’s important to continue to clip away...

read more

THE FREE TECHNIQUE PACK

When You Subscribe, You Will Get Instant Access to

  • the Technique Pack: 15 yoga pose breakdowns
  • exclusive online course discounts
  • exclusive blogs and videos
  • This field is for validation purposes and should be left unchanged.

Hip Flexor Strength

Hip Flexor Strength

Access Deeper Forward Folds

uttanasana

HIP FLEXOR STRENGTH OVER HAMSTRING FLEXIBILITY?

Hip flexor strength for deeper forward folds over hamstring flexibility? It’s not a matter of one or the other; it’s about how one can inform the other. It’s also about how, through the process of connecting with developing strength in your hip flexors, you not only learn and discover more about your body, but you also build a deeper, more intimate connection with your body’s potential. In today’s video, you’ll get a glimpse into one of the formulas Matt utilizes to gain access to a deeper forward fold. The method is very specific and intentional. You’ll learn to execute how you have the potential to strengthen and articulate specific movements of the pelvis and spine. Within specific techniques that Matt breaks down, you’ll witness the evolution of your new approach to accessing deeper forward folds.

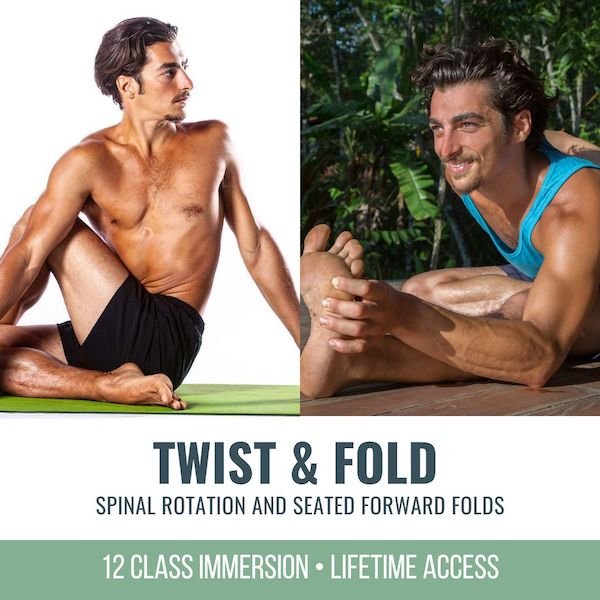
TWISTS & FOLDS

TWISTS & FOLDS

  • Strengthen core muscles of rotation and side bends
  • Improve spinal mobility
  • Improve spinal flexion for seated postures
  • Strengthen your back and deep core
  • Access greater flexibility of the hips for seated postures
  • Classes will bring you to a sweat and back down to a relaxed state
  • 12 Classes: All levels appropriate
  • Lifetime unlimited access to all
  • Attend the livestream OR practice the replays any time that's convenient for you

$168.00 $138.00

REVERSE YOUR BACKBEND

Coming into a forward fold position, whether seated or standing, can be an almost “effortless” action if that’s your intention. This may be all that is necessary in a specific scenario, but there is so much more available to you. It’s funny how you would never take this “effortless” approach going backwards into a backbend. It’s easy to conceive and appreciate how calculated and thoughtful you must be to safely execute a backbend like Wheel, for example. Folding forward, however, presents opportunities to be just as deliberate. Matt compares the approach to a forward fold as almost the “reversal of a backbend.” If you’ve practiced with Matt before, then you’ll be familiar with the concept of bowing the spine (lifting the belly in and up while flaring the ribcage forward) in order to reduce spinal compression by creating increased length between each vertebra.

A similar approach is taken in a forward fold. In this case, it’s important to be aware of finding more of an anterior tilt of your pelvis—this may require sitting up on blankets—and then drawing the mid-section back to find more flexion of the spine. There is much more involved in the approach, but reversing a backbend is probably one of the most accessible visuals.

WATCH THE VIDEO

HIP FLEXOR STRENGTH:  ACCESS DEEPER FORWARD FOLDS

SPINAL FLEXION & DISC INJURIES

It’s extremely important to note that spinal flexion is not advisable if you’re experiencing any disc injuries—a herniated disc, for example. Aggravating this condition with spinal flexion may cause further compression of the nerves or spinal cord, causing more pain and/or dysfunction. When you practice with Matt, however, you’ll learn very quickly that there are always ways and opportunities to transform the experience in your body. Focusing on hip flexor strength for deeper forward folds might be the only aspect you work on, if that is all that’s possible in your body at a given time.

200 Hour Online Teacher Training Certification

200 HOUR ONLINE TEACHER TRAINING

GET CERTIFIED & DEEPEN YOUR YOGA PRACTICE

  • Deepen your yoga practice
  • Build confidence speaking in front of groups in person and online
  • Learn foundational class structures and templates
  • Learn techniques for a wide range of yoga postures
  • Get certified and highly qualified to teach yoga
  • Yoga Alliance Globally Recognized Certification Program

THE ROLE OF THE HIP FLEXORS

Focusing on hip flexor strength for deeper forward folds is integral to your practice because it both informs the articulation of the pelvis and helps increase flexibility in the hamstrings. This happens via a technique called reciprocal inhibition: activating the muscles that oppose the muscles that are stretching. Yes, hamstring flexibility is necessary, but it can be challenging, and if that is an area of tension for you, it can be extremely vulnerable to injury.  

In today’s video, Matt demonstrates (from an Ardha Uttanasana, or Halfway Lift, position) that when you push your heels out (causing internal rotation of the upper thighs) and lift up through your sit bones, you will activate the tensor fasciae latae (TFL) muscle. In addition, Matt explains that if you lift your kneecaps up, it will also activate the rectus femoris, a quadricep muscle that is also a hip flexor. A bonus effort is to pull your big toes towards one another to activate the pectineus, a deep adductor muscle; as mentioned, it will support bringing the pelvis into anterior tilt. Activating these muscle groups while the hamstrings are lengthening is in fact reciprocal inhibition. These steps offer an essential foundation to help you intelligently move into a forward fold, safely and deeply.

300 hour teacher training online

300 HOUR ONLINE TEACHER TRAINING

GET 500 HOUR CERTIFIED AS A MASTER TEACHER

Master your skill set as a teacher through refined techniques, anatomy, biomechanics, sequencing, philosophy, meditation techniques, theming, yoga business, and much more!

  • Get 500 hour certified
  • Learn anatomy, biomechanics, asana techniques
  • Expand your teaching skills
  • Masterful sequencing and verbal delivery
  • Learn meditation and breathwork techniques
  • Transformative tools: theming, dharma talks, satsang

THE FINAL STEPS

Once you’ve implemented the above steps, and if spinal flexion is a safe shape for you to explore, following these next steps will offer deeper access:

  1. Bow forward
  2. Lean more into your fingers and toes
  3. Pull your front ribs back to round the spine and create more spinal flexion (with a focus on the thoracic region)
  4. Think about the back of your skull reaching towards the ground
  5. Lean more into your toes and fingers once again to support your balance
  6. Pull your front ribs in and look towards your belly button

Finally, stay there to breathe and enjoy the new sensations and patterns you’re creating for your body and your nervous system.

Working on hip flexor strength for deeper forward folds will actually offer a gateway to a vast number of other yoga postures. You can continue to explore the possibilities in Matt’s current Twist & Folds immersion.

See you on the mat!

The 200 Hr. Teacher Training: Click Here to See the Next Start Date

The 300 Hr. Advanced Teacher Training: Click Here to See the Next Start Date

Article by Trish Curling

Video Extracted From: Mobility Immersion

UPCOMING TEACHER TRAININGS

NEXT TRAINING BEGINS FEBRUARY 2024 ENROLLMENT NOW OPEN!

Continue Learning

Eka Pada Koundinyasana I

Eka Pada Koundinyasana I

Eka Pada Koundinyasana IArm BalanceEKA PADA KOUNDINYASANA I If Side Crow is already part of our practice, then we can understand that Eka Pada Koundinyasana I is like adding on another layer to that posture, due to the fact that they are quite similar.  The added...

read more
Achieve Flying Balance

Achieve Flying Balance

Achieve Flying BalanceArm BalanceACHIEVE FLYING BALANCE Achieving an arm balance is quite extraordinary when you consider all that’s involved. And when we refer to an arm balance as a “flying balance,” there is even more involved. The “flying” in Eka Pada...

read more
Virasana

Virasana

VirasanaHip ExtensionVIRASANA For some of us, postures like Virasana and Lotus can be uncomfortable or even painful for the knees, so we avoid them altogether. Depending on what we’re dealing with, this may be the best decision. If there is room for safe exploration,...

read more
Get Bendy

Get Bendy

Get BendySpinal MobilityGET BENDY In the yoga context, getting bendy can conjure up images of postures that may seem far-fetched or unattainable. What we should set our sights on instead is not an end result but rather all the things we learn while we're exploring...

read more
Wall Drills To Progress In Handstand

Wall Drills To Progress In Handstand

Wall Drills to Progress in HandstandAdho Mukha VrksasanaWALL DRILLS TO PROGRESS IN HANDSTAND Wall drills for Handstand are an excellent way to master the mechanics required to go upside down with confidence. Using the wall as a support to refine alignment, rather than...

read more
Mountain Pose Mechanics

Mountain Pose Mechanics

Mountain Pose MechanicstadasanaMOUNTAIN POSE MECHANICS How often do we go back to refine the “basics”?  Revisiting a posture like Mountain Pose (Tadasana) is like pruning a tree. We may have already developed a foundation, but it’s important to continue to clip away...

read more

THE FREE TECHNIQUE PACK

When You Subscribe, You Will Get Instant Access to

  • the Technique Pack: 15 yoga pose breakdowns
  • exclusive online course discounts
  • exclusive blogs and videos
  • This field is for validation purposes and should be left unchanged.

SHORTEN TO LENGTHEN YOUR STANDING SPLITS

SHORTEN TO LENGTHEN YOUR STANDING SPLITS 

INCREASE FLEXIBILITY WITH THIS TECHNIQUE

HANUMANASANA

SHORTEN TO LENGTHEN

What does shorten to lengthen your standing splits even mean? Does that even make sense? At first thought it may seem counterintuitive that if you want to increase your flexibility, you need to shorten. What we’re talking about is shortening muscles in order to find greater length in your hamstrings for this posture. There is a specific technique that supports your ability to increase your flexibility, all while building strength and integrity in standing splits.

PASSIVE VS. ACTIVE STRETCHING

Any variation of splits requires a great deal of flexibility, and because lengthening muscles is non-negotiable to execute this posture, a common go-to strategy in your yoga practice may be to select postures and techniques that passively assist you in this endeavor. This passive assistance might involve using a yoga strap, a wall, and/or the floor to sink into the forces of gravity. These can be effective stretching methods at various times, but if you’re interested not only in lengthening but in the overall health of the muscles that are lengthening, then please introduce yourself to the concept of a Facilitated Stretch (more on this in a bit). This technique asks you to shorten in order to lengthen. A facilitated stretch requires you to be a more active participant in creating stronger and healthier flexibility in your body.


Handstand and meditation online yoga classes

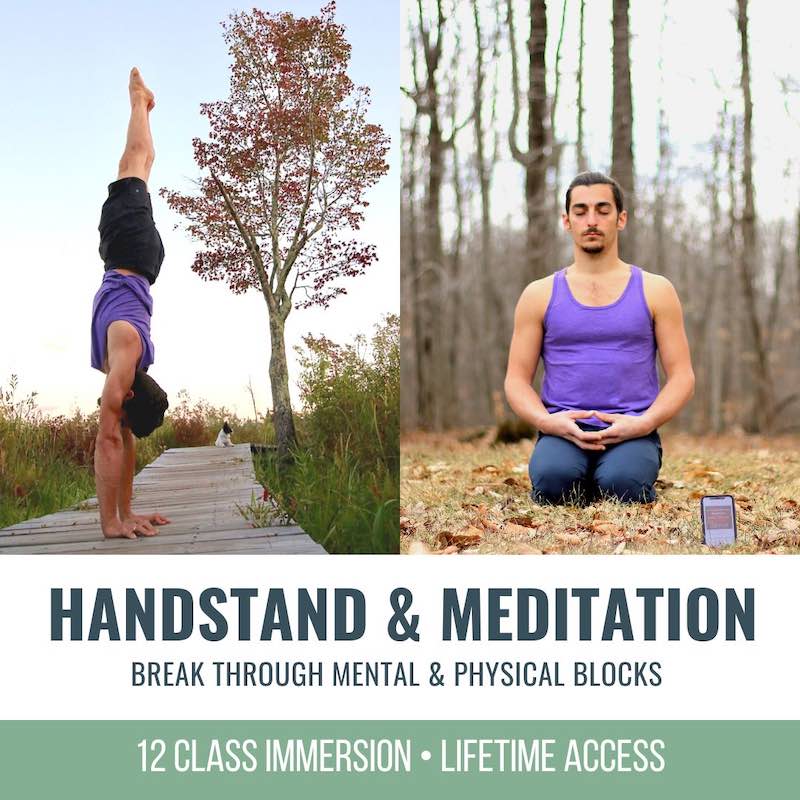
HANDSTAND & MEDITATION

ONLINE YOGA IMMERSION

BREAK THROUGH MENTAL & PHYSICAL BLOCKS

  • Learn the most effective drills to safely build your Handstand
  • Practice essential meditation techniques to break through mental barriers and build confidence
  • Improve focus and breath support right side up and upside down
  • Build strength and the necessary skills for balancing Handstand
  • 12 classes: All levels appropriate
  • Lifetime unlimited access to all
  • Attend livestream OR practice the replays any time that’s convenient for you

SALE PRICE: $168.00

MORE INFORMATION

FLEXIBILITY? STRENGTH? or BOTH?

In order to achieve standing splits, there must be a level of flexibility in your hamstrings, adductor magnus, and the hip flexors. There must also be an awareness around the movement of your pelvis. However, an element that often gets overlooked is the fact that a great deal of strength is required for the posture. 

When preparing for standing splits, Matt explains that the goal is to keep the hamstrings engaged through the entire range of motion. How is this possible? This is where the awareness of the articulation of your pelvis is key. In the video, Matt demonstrates the importance of slowing the tipping of the pelvis on the way down and also tucking the sit bone of the standing leg downwards (this will create more of a posterior tilt of the pelvis).

The rest of the body should stay in one piece to ensure that the movement is occurring from the hamstrings of the standing leg—everywhere else is stable and immobile. This may take some time, due to the patterns you may have created in your body.

WATCH THE VIDEO: SHORTEN TO LENGTHEN YOUR STANDING SPLITS

NEXT TRAINING BEGINS FEBRUARY 2024 ENROLLMENT NOW OPEN!

YOUR BODY’S TENDENCIES

Our bodies just love the familiar, so it will take an incredible amount of focus and awareness in order to go into the places in your body that require more length and strength. This is in fact how you will unlock the posture. You will not only achieve the aesthetic of the posture but also move in the direction of better balance in your body. This also means a reduced risk of injury. Matt always encourages a more intelligent and methodical approach to your practice as a whole, but this method must also be applied as you approach each posture. 

No matter your approach, Splits, Standing Splits, Hanumanasana are very demanding and deep postures that may put you at a higher risk, so the activation of muscles is key. This brings us back to the concept of a Facilitated Stretch. What is it, and how is it implemented?

Online yoga to improve mobility

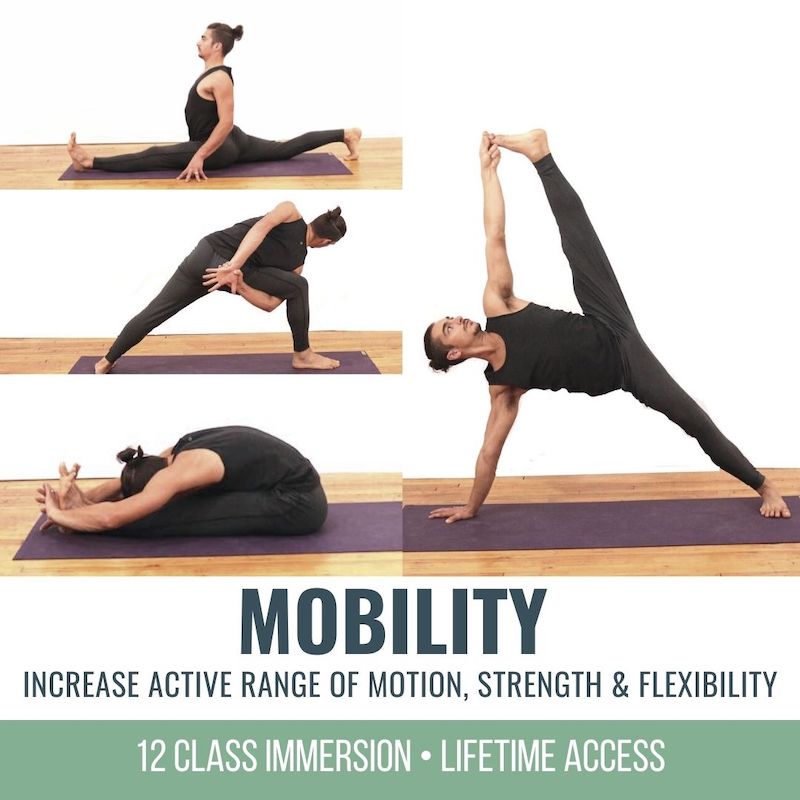
MOBILITY

ONLINE YOGA IMMERSION

  • Key techniques to increase flexibility
  • Strength development for mobility and range of motion
  • Learn postures: Hanumanasana (Splits), Extended Side Plank
  • Active and passive mobility for shoulders, hips, and spine
  • Improve spinal twists, heart openers, shoulder openers, and hip openers
  • Find greater ease in seated postures
  • Improve mobility and posture off the mat
  • When and how to do active, passive, and isometric stretching

$148.00

MORE INFORMATION

FACILITATED STRETCH

If you’re just starting your journey of practicing with Matt, please believe me when I say that you will become the best of pals with this concept. Is it challenging at times? YES, YES, and YES I said that multiple times, but is it effective? YES, YES, and YES again!

A facilitated stretch is when a muscle is engaged while it is in a lengthened position. We have something called Golgi tendon organs which communicate muscle tension back to the brain. When a muscle is both engaged and lengthened, the brain will receive that information and will in turn send a signal back to the muscle that it is safe, therefore allowing it to lengthen more. This is in fact the key to the development of increased flexibility. This is also in fact extremely effective for those of you who may be hypermobile. It creates a sense of control and awareness around your end ranges in a particular posture. We have the ability to facilitate this tension by the articulations we might create with, for example, an action of the pelvis and/or the directional pull of a particular joint against a surface, prop, or other part of our body. Staying closer to a safer amount of activation usually means placing roughly about 20% of effort (or less) into the activation. At the root of it all is your breath, so keep this in mind as we look at the steps Matt provides in order to set up Standing Splits at the wall.  

STANDING SPLITS AT THE WALL

  1. Use hands as a base of support
  2. Look towards the wall
  3. Lift right heel (shortens the back line)
  4. Turn pelvis closed and turn inner heel of the lifted leg to the sky
  5. Straighten through inner heel of the lifted leg to the sky
  6. Lower heel of the standing leg back down
  7. Lean more into fingers and toes as top leg is straightened

*Here’s the opportunity to tap into the facilitated stretch of the standing leg:

8.  Standing leg (in this case the right leg) is not passive—microtuck the sit bone down towards your heel so that the hamstrings are engaged

If it feels like you’re strengthening rather than stretching, then you’re on the right track. This is in fact the sensation of a facilitated stretch and what actually increases your flexibility. Rather than causing alarm to your body, it will feel safe to release and lengthen.

A DIRECT LINK TO HANDSTAND

Safety breeds confidence, and the beautiful thing about incorporating techniques like a facilitated stretch into your yoga practice is that you feel both prepared and confident to explore a variety of postures. This exploration allows space for you to work towards postures that may feel “intimidating” or even “inaccessible.”  

The specific techniques that Matt has demonstrated for Standing Splits create a direct link to Handstand. The direct link comes from what is required in regard to the setup. Getting into Handstand from the ground up requires a great deal of flexibility and strength. You can find out more about the crossover between these two postures in Matt’s current immersion, Handstand & Meditation.

See you on the mat!

The 200 Hr. Teacher Training: Click Here to See the Next Start Date

The 300 Hr. Advanced Teacher Training: Click Here to See the Next Start Date

Article by Trish Curling

Video Extracted From: Mobility Immersion

CHOOSE YOUR PATH

NEXT TRAINING BEGINS FEBRUARY 2024 ENROLLMENT NOW OPEN!

Continue Learning

Eka Pada Koundinyasana I

Eka Pada Koundinyasana I

Eka Pada Koundinyasana IArm BalanceEKA PADA KOUNDINYASANA I If Side Crow is already part of our practice, then we can understand that Eka Pada Koundinyasana I is like adding on another layer to that posture, due to the fact that they are quite similar.  The added...

read more
Achieve Flying Balance

Achieve Flying Balance

Achieve Flying BalanceArm BalanceACHIEVE FLYING BALANCE Achieving an arm balance is quite extraordinary when you consider all that’s involved. And when we refer to an arm balance as a “flying balance,” there is even more involved. The “flying” in Eka Pada...

read more
Virasana

Virasana

VirasanaHip ExtensionVIRASANA For some of us, postures like Virasana and Lotus can be uncomfortable or even painful for the knees, so we avoid them altogether. Depending on what we’re dealing with, this may be the best decision. If there is room for safe exploration,...

read more
Get Bendy

Get Bendy

Get BendySpinal MobilityGET BENDY In the yoga context, getting bendy can conjure up images of postures that may seem far-fetched or unattainable. What we should set our sights on instead is not an end result but rather all the things we learn while we're exploring...

read more
Wall Drills To Progress In Handstand

Wall Drills To Progress In Handstand

Wall Drills to Progress in HandstandAdho Mukha VrksasanaWALL DRILLS TO PROGRESS IN HANDSTAND Wall drills for Handstand are an excellent way to master the mechanics required to go upside down with confidence. Using the wall as a support to refine alignment, rather than...

read more
Mountain Pose Mechanics

Mountain Pose Mechanics

Mountain Pose MechanicstadasanaMOUNTAIN POSE MECHANICS How often do we go back to refine the “basics”?  Revisiting a posture like Mountain Pose (Tadasana) is like pruning a tree. We may have already developed a foundation, but it’s important to continue to clip away...

read more

THE FREE TECHNIQUE PACK

When You Subscribe, You Will Get Instant Access to

  • the Technique Pack: 15 yoga pose breakdowns
  • exclusive online course discounts
  • exclusive blogs and videos
  • This field is for validation purposes and should be left unchanged.

deeper twists and spinal mobility with the fire line

DEEPER TWISTS

INCREASE SPINAL MOBILITY WITH THE FIRE LINE

DEEPER TWISTS

DEEPER TWISTS & SPINAL MOBILITY: “FIRE LINE”

Do you correlate strength with twisting postures in your yoga practice, or is it flexibility that comes to mind first?  There’s no doubt that both strength and flexibility are required for deeper twists, but let’s shine the spotlight on strength as we take a deeper look into how we can unlock our true potential when it comes to the execution of twisting postures in our asana practice.

YOUR INTENTION FOR THE TWIST

Twisting postures in yoga are known for their multitude of benefits. Let’s understand though that our intentions behind various twisting postures and the ways in which we execute them can benefit vs. harm our bodies to varying degrees. We may also have very different reasons for incorporating twists into our asana practice. If the goal is to create more of a therapeutic experience, then gentler twists may be the appropriate approach to take. If the intent and/or purpose is to work more deeply into a twist, then there are ways to heighten the experience with proper awareness and activation (we’ll see this shortly with Matt’s unique approach). Whether there is some level of vulnerability due to injury or not, doing things like pushing through the arms or trying to force more deeply into a twist can in fact cause harm, and this is never the desired outcome.


Online yoga to improve mobility

MOBILITY

ONLINE YOGA IMMERSION

  • Key techniques to increase flexibility
  • Strength development for mobility and range of motion
  • Learn postures: Hanumanasana (Splits), Extended Side Plank
  • Active and passive mobility for shoulders, hips, and spine
  • Improve spinal twists, heart openers, shoulder openers, and hip openers
  • Find greater ease in seated postures
  • Improve mobility and posture off the mat
  • When and how to do active, passive, and isometric stretching

$148.00

MORE INFORMATION

Yes, all movements on or off the mat will indeed place varying degrees of pressure on the discs in our spine, and, outside of the body’s natural resilience, there are ways in which we can create more integrity to support these movements. Although simply by twisting, we increase the amount of pressure on the spinal discs, twisting is also the answer to the question of how to increase their health.

Our discs require nourishment, and I love the sponge analogy — the “squeeze and soak effect” — when considering how to stimulate this nourishment. An appropriate twisting action or posture can actually help to equalize the pressure in the discs by supplying them with fluid, which allows them to expand. This creates more space and shock absorption between each vertebra, allowing your spine to react with more resilience to movements that create more weight, pressure, and/or impact in your body.

Now, Matt’s approach to twists is quite unique and extremely effective. His approach asks you to bring your focus and awareness to where you can create activations with more intention in order for your body to respond with greater ease. 

WHAT IS THE FIRE LINE?

If you’ve been following Matt and/or practicing with him, then you are familiar with his Chromatic Approach to yoga. Regarding the physical practice, we understand this approach as systemic with a deep awareness of how we move our bodies and progress to a “peak posture.” Something Matt created is the  idea of  the “Fire Line,” which he describes as a kinesthetic chain of muscle activation, or a co-activated line of muscle, or a co-ordinated engagement of several muscles in order to gain greater access to balance, strength, stability, and flexibility.

MUSCLE ACTIVATION IN THE FIRE LINE

Matt starts off by explaining that we first bring our attention and awareness to the serratus anterior on one side of the body, which funnels into the external obliques through the linea alba, then traveling underneath the external obliques on the other side of the body to the internal obliques, which then go down to the opposite hip bone.  

The Fire Line branches off “like a river” in 2 directions. The 1st branch goes to the outside of the gluteus maximus down through the IT band and connects to the outer shin. The 2nd branch goes from the inside of the hipthe iliacus and/or psoas muscle, which is on the inside of the bowl of your pelvis and attaches right at the inner thigh, where it meets the pelvis inside of the femoral head (inside of thigh bone). This all travels in the same direction, where we find the adductor group, which runs at the inside of your leg; some of the muscles in this group attach down at the shin.

We draw a thread of connection all the way through. Through Matt’s dedication to practice and his experience with his own body and with teaching and observing his students, he realized that activating this line allows the yoga practitioner to execute a variety of different twisting postures with great integrity and ability.

He highlights that the “center of the fire” is right at the core. We must recognize that the fire goes inward and creates a rounding through the back of the body. The key is to bring awareness to this rounding by exaggerating a pulling back of the ribcage.

With all of this in mind, we can see why strength plays a key role. Instead of just “dumping,” or forcing our bodies into a twist, we very thoughtfully engage the muscles in this Fire Line to more safely and deeply experience a variety of twisting postures.

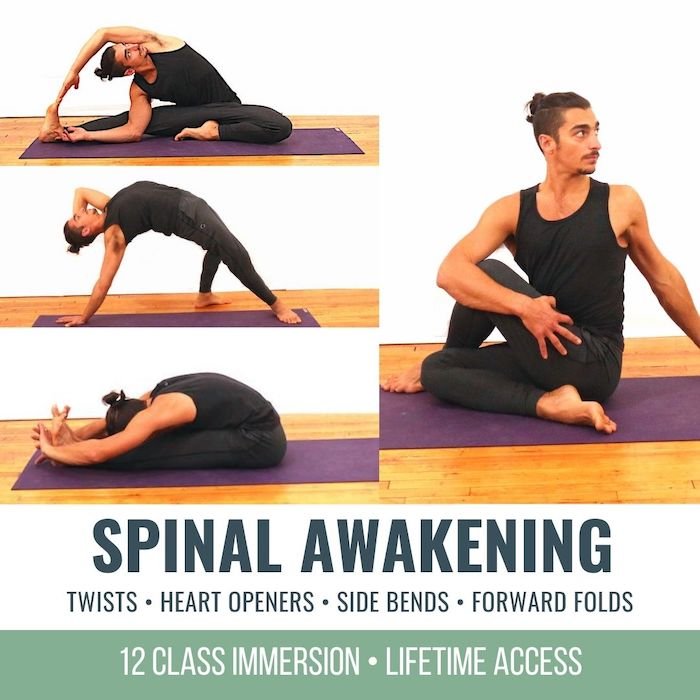
online yoga immersion for the spine

SPINAL AWAKENING

November 2021 Immersion

  • Twists • side bends • forward folds • heart openers
  • Learn techniques to strengthen & mobilize your spine
  • Release back tension and discomfort
  • Twelve 75-minute classes, all levels appropriate
  • Advance your postural practice
  • Lifetime unlimited access to all

YOUR DISCOUNT CODE: STRENGTHMEMBER

$148.00 $118.00

REVOLVED CHAIR POSE

Take a close look at Matt’s deliberate actions in today’s video.  What we see is not only the chromatic approach, the build, the preparation; but we see the activation of the fire line in order to avoid the collapse into Revolved Chair Pose.

When we approach twisting postures with strength as the anchor, not only do we execute twists with more purpose, but overall we feel more empowered in our bodies and our practice.  What a beautiful outcome.

Imagine getting this type of insight on your practice on a regular basis, and being able to integrate it into your mind and body. Online Immersions with Matt are the perfect way to get techniques like the fire line into your practice. Each immersion consists of 12 all levels classes so you can advance your body awareness and deepen your practice.

If you have been practicing with the immersions than you know exactly how powerful and effective they are.

But what if you want to share this knowledge with others? Take advantage of the opportunity to study with Matt in his upcoming teacher trainings.  His 200 and 300 Hr trainings are open for enrollment.

The 200 Hr. Teacher Training: Click Here to See The Next Start Date

This is for you if you are interested in deepening your yoga practice, building your confidence, learning how to create a class, sharing this practice with friends, family or beyond. Yes it’s for all levels, ages, etc.

The 300 Hr. Advanced Teacher Training: Click Here to See The Next Start Date

This training is definitely for you if you are already certified at the 200 or 500 hour level but want to take your teaching career and practice to the next level. In this training you will learn Anatomy, Bio-mechanics, Postural Techniques, Intelligent Sequencing, Breathwork, Meditation, Heart Centered Philosophy, Theming, Business Structure, Marketing, Social Media, Branding and how to build a sustainable and successful career!

Article by Trish Curling  @anioyoga

Video Extracted From: The 200 & 300 Hour Trainings and April 2020 Immersion “The Greatest Hits”

Online yoga to improve mobility

MOBILITY

ONLINE YOGA IMMERSION

  • Key techniques to increase flexibility
  • Strength development for mobility and range of motion
  • Learn postures: Hanumanasana (Splits), Extended Side Plank
  • Active and passive mobility for shoulders, hips, and spine
  • Improve spinal twists, heart openers, shoulder openers, and hip openers
  • Find greater ease in seated postures
  • Improve mobility and posture off the mat
  • When and how to do active, passive, and isometric stretching

$148.00

MORE INFORMATION

Continue Learning

Eka Pada Koundinyasana I

Eka Pada Koundinyasana I

Eka Pada Koundinyasana IArm BalanceEKA PADA KOUNDINYASANA I If Side Crow is already part of our practice, then we can understand that Eka Pada Koundinyasana I is like adding on another layer to that posture, due to the fact that they are quite similar.  The added...

read more
Achieve Flying Balance

Achieve Flying Balance

Achieve Flying BalanceArm BalanceACHIEVE FLYING BALANCE Achieving an arm balance is quite extraordinary when you consider all that’s involved. And when we refer to an arm balance as a “flying balance,” there is even more involved. The “flying” in Eka Pada...

read more
Virasana

Virasana

VirasanaHip ExtensionVIRASANA For some of us, postures like Virasana and Lotus can be uncomfortable or even painful for the knees, so we avoid them altogether. Depending on what we’re dealing with, this may be the best decision. If there is room for safe exploration,...

read more
Get Bendy

Get Bendy

Get BendySpinal MobilityGET BENDY In the yoga context, getting bendy can conjure up images of postures that may seem far-fetched or unattainable. What we should set our sights on instead is not an end result but rather all the things we learn while we're exploring...

read more
Wall Drills To Progress In Handstand

Wall Drills To Progress In Handstand

Wall Drills to Progress in HandstandAdho Mukha VrksasanaWALL DRILLS TO PROGRESS IN HANDSTAND Wall drills for Handstand are an excellent way to master the mechanics required to go upside down with confidence. Using the wall as a support to refine alignment, rather than...

read more
Mountain Pose Mechanics

Mountain Pose Mechanics

Mountain Pose MechanicstadasanaMOUNTAIN POSE MECHANICS How often do we go back to refine the “basics”?  Revisiting a posture like Mountain Pose (Tadasana) is like pruning a tree. We may have already developed a foundation, but it’s important to continue to clip away...

read more

THE FREE TECHNIQUE PACK

When You Subscribe, You Will Get Instant Access to

  • the Technique Pack: 15 yoga pose breakdowns
  • exclusive online course discounts
  • exclusive blogs and videos
  • This field is for validation purposes and should be left unchanged.

Pin It on Pinterest