Build Better Joint Supportankle & kneeBUILD BETTER JOINT SUPPORT Sometimes we focus so heavily on flexibility that we forget our joints also need intelligent strength surrounding them. Matt reminds us that stability is not rigidity. It is the body’s ability to...
full wheel shoulder alignment elbows in or out
FULL WHEEL POSE
STOP HUGGING THE ELBOWS IN
SHOULDER ACTIONS FOR MAXIMUM FLEXIBILITY
FULL WHEEL
SHOULDER FLEXIBILITY IN FULL WHEEL POSE
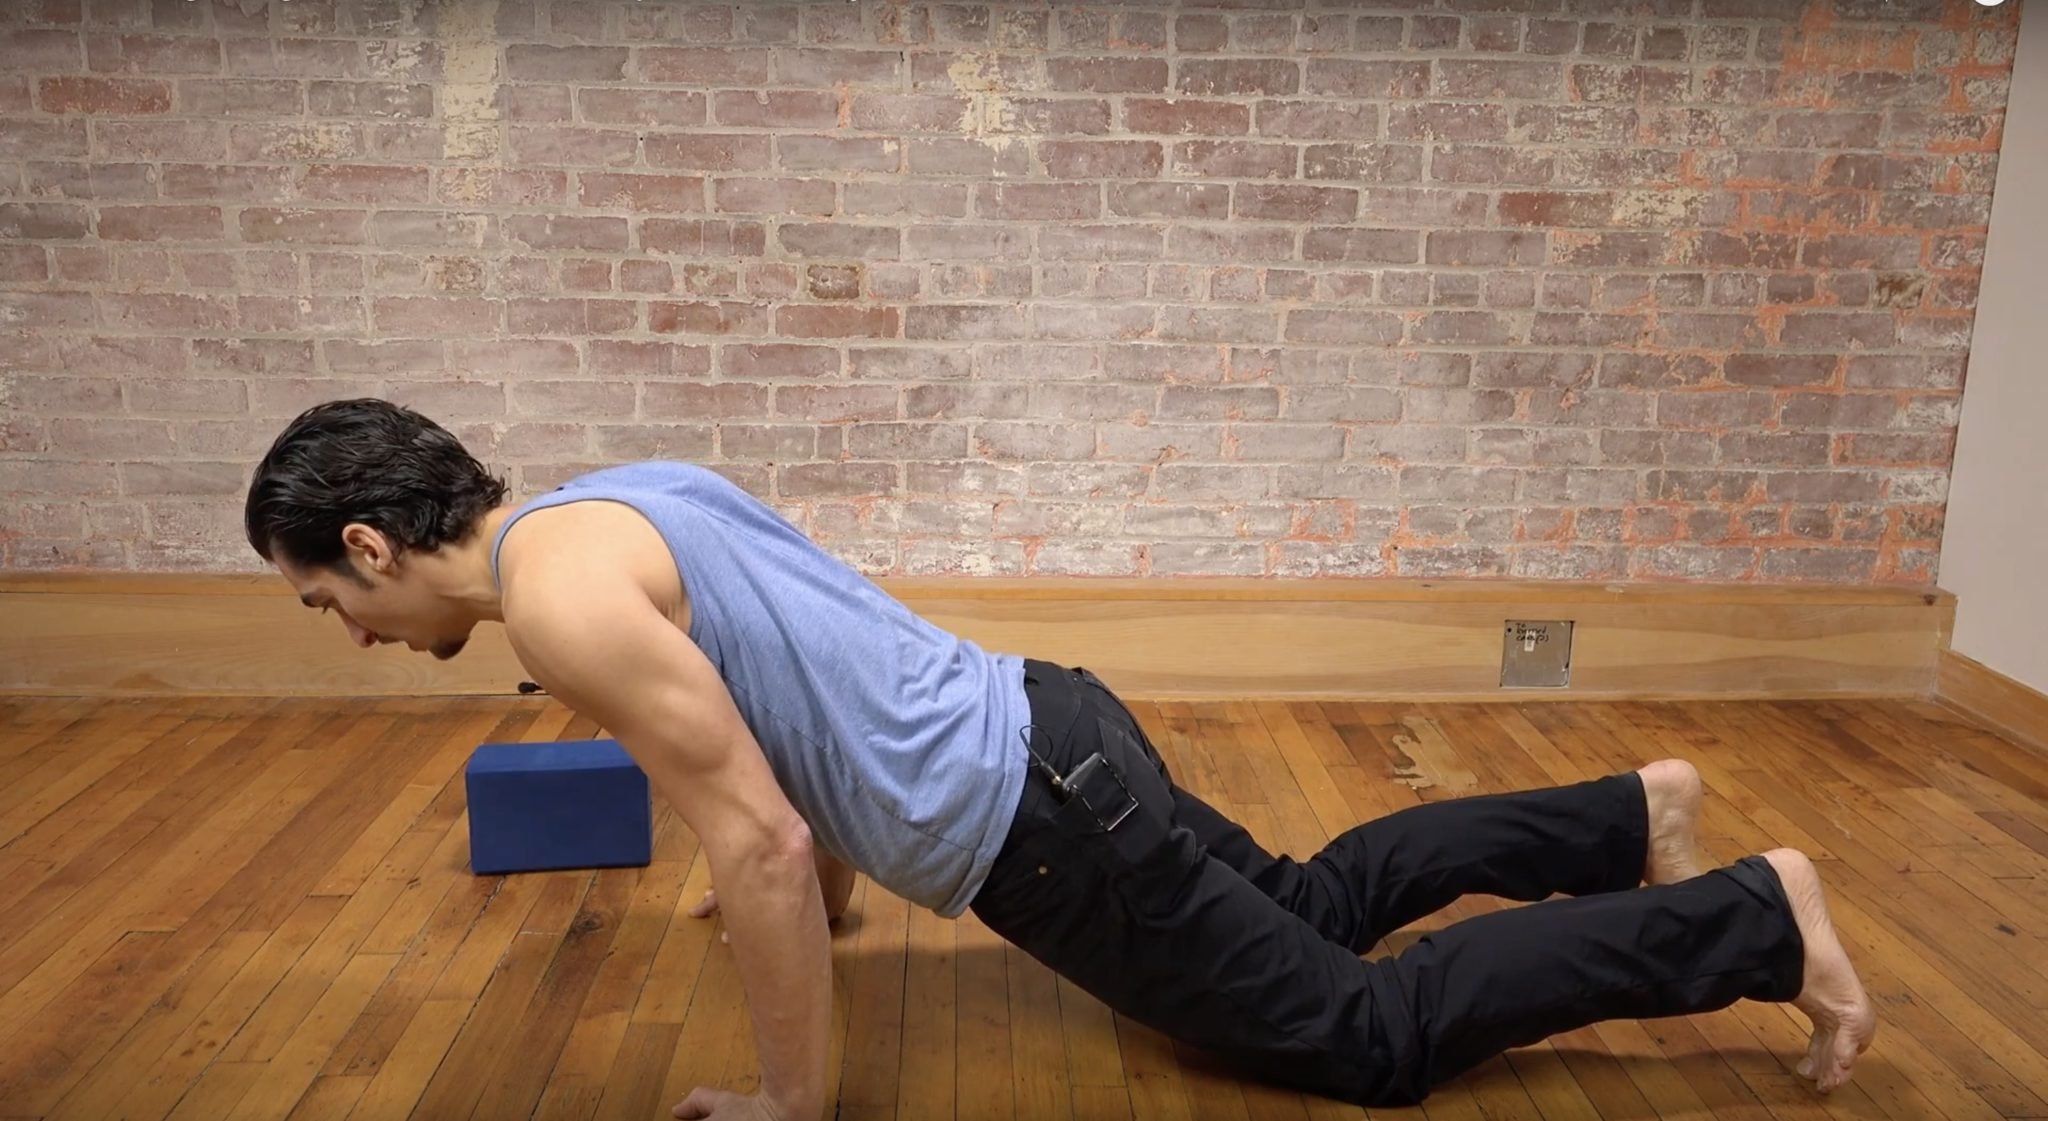
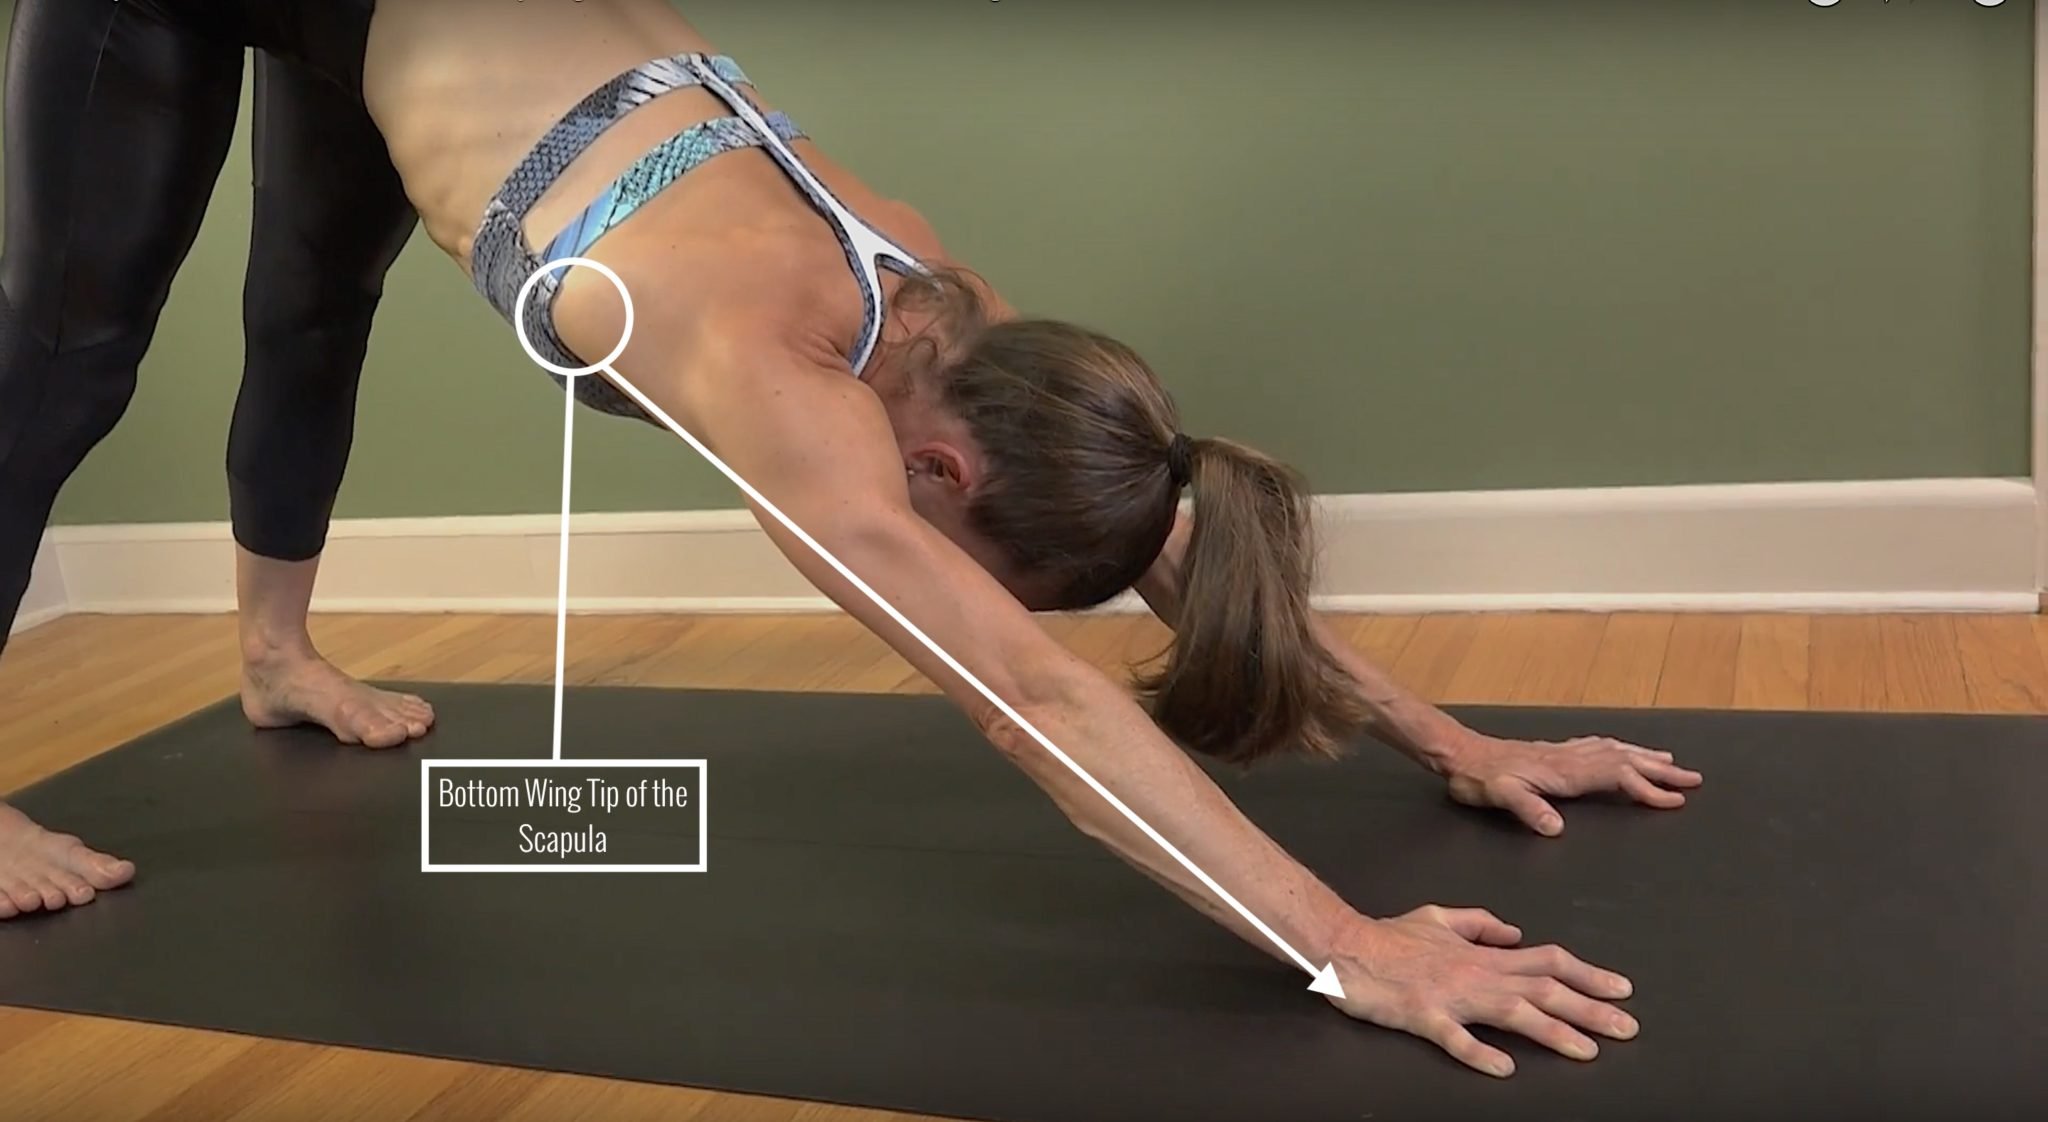
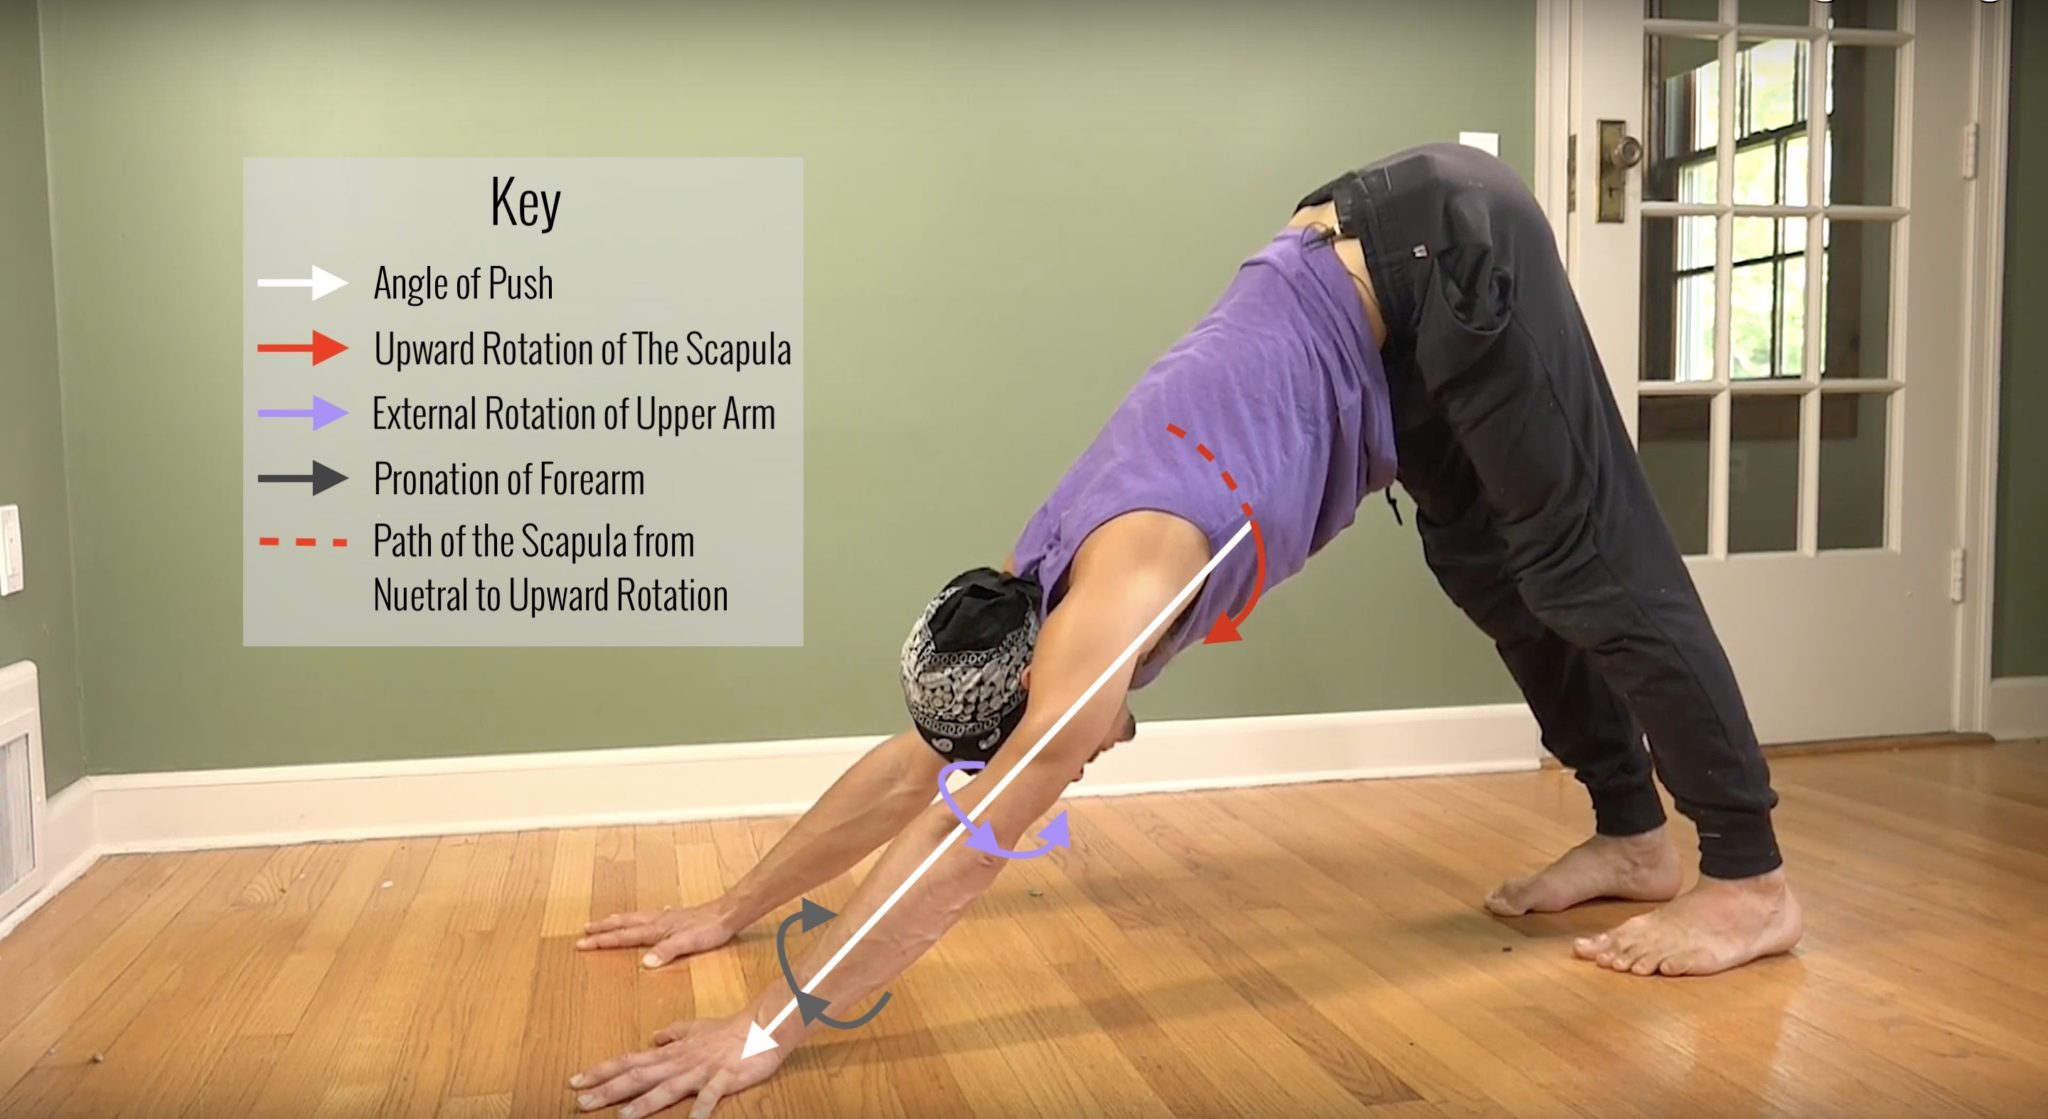
You may have noticed that Full Wheel Pose is quite challenging, and you might think the issue is your back, core, or shoulder strength. Sure, each of these plays a role, but not nearly as much as the simple technique of retracting the shoulder blades and widening the elbows. For whatever reason, there is a myth that the elbows need to be hugged in for safety. This is simply not true. Have you ever seen a weight lifter press a tremendous amount of weight above their head? If yes, then you know their elbows are not tucked in, and considering the amount of weight they are lifting, it’s pretty obvious that there is nothing wrong with this biomechanically. In my opinion, it’s not only okay to widen the elbows; it’s a much better physiological decision.
WHY DOES MY TEACHER ALWAYS SAY TO HUG THEM IN?
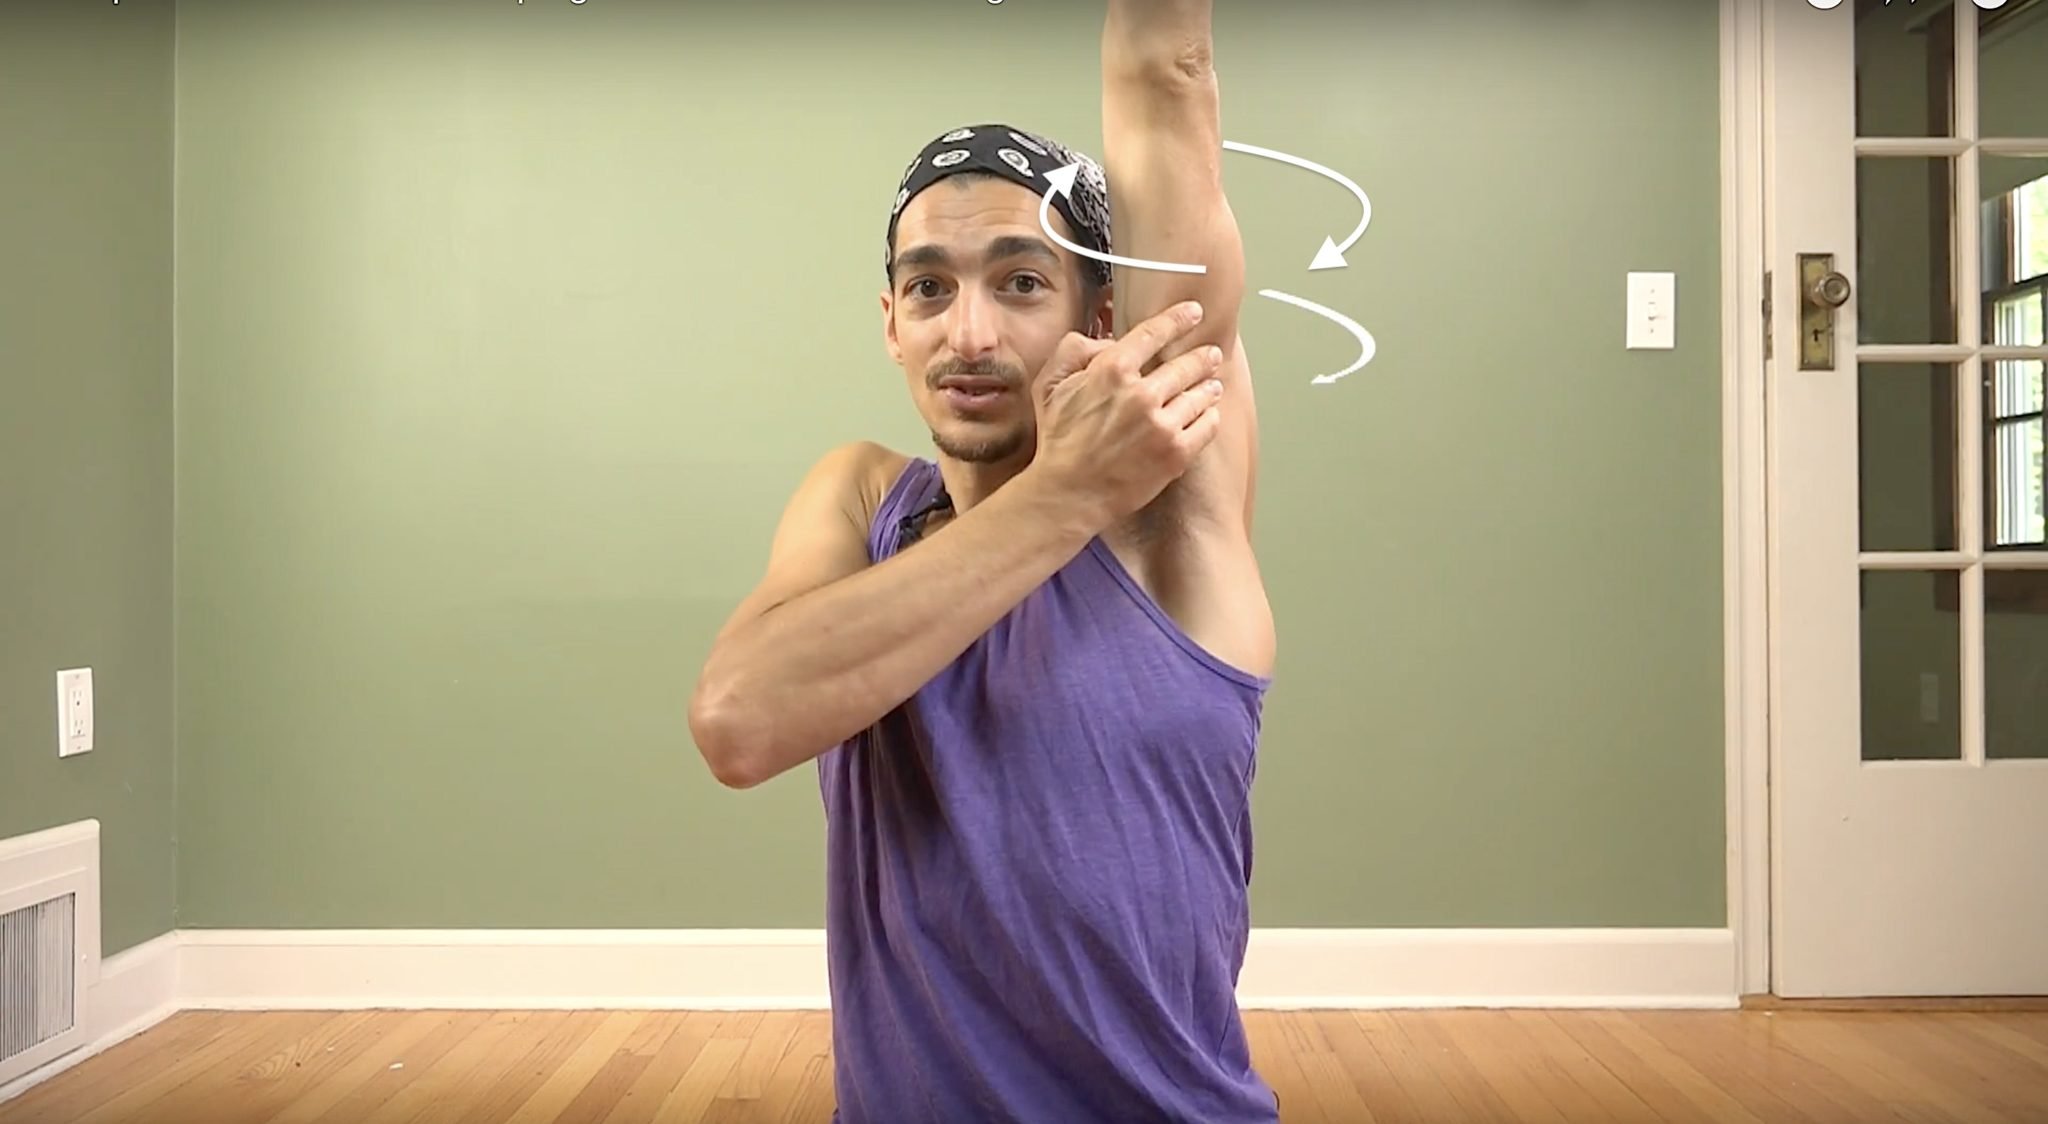
This cue is coming from the basic understanding that the shoulder joint is more stable when the arms are externally rotated. However, hugging the elbows in is overly stabilizing, which is why everyone struggles with mobility when the elbows are tucked in for Wheel Pose. Furthermore, if we take a closer look, hugging the elbows in will likely trigger your pectoral muscles to engage, not your rotator cuff. Rather than bore or lose you with the anatomical details, I will tell you how to find out for yourself by trying out the difference while sitting up.
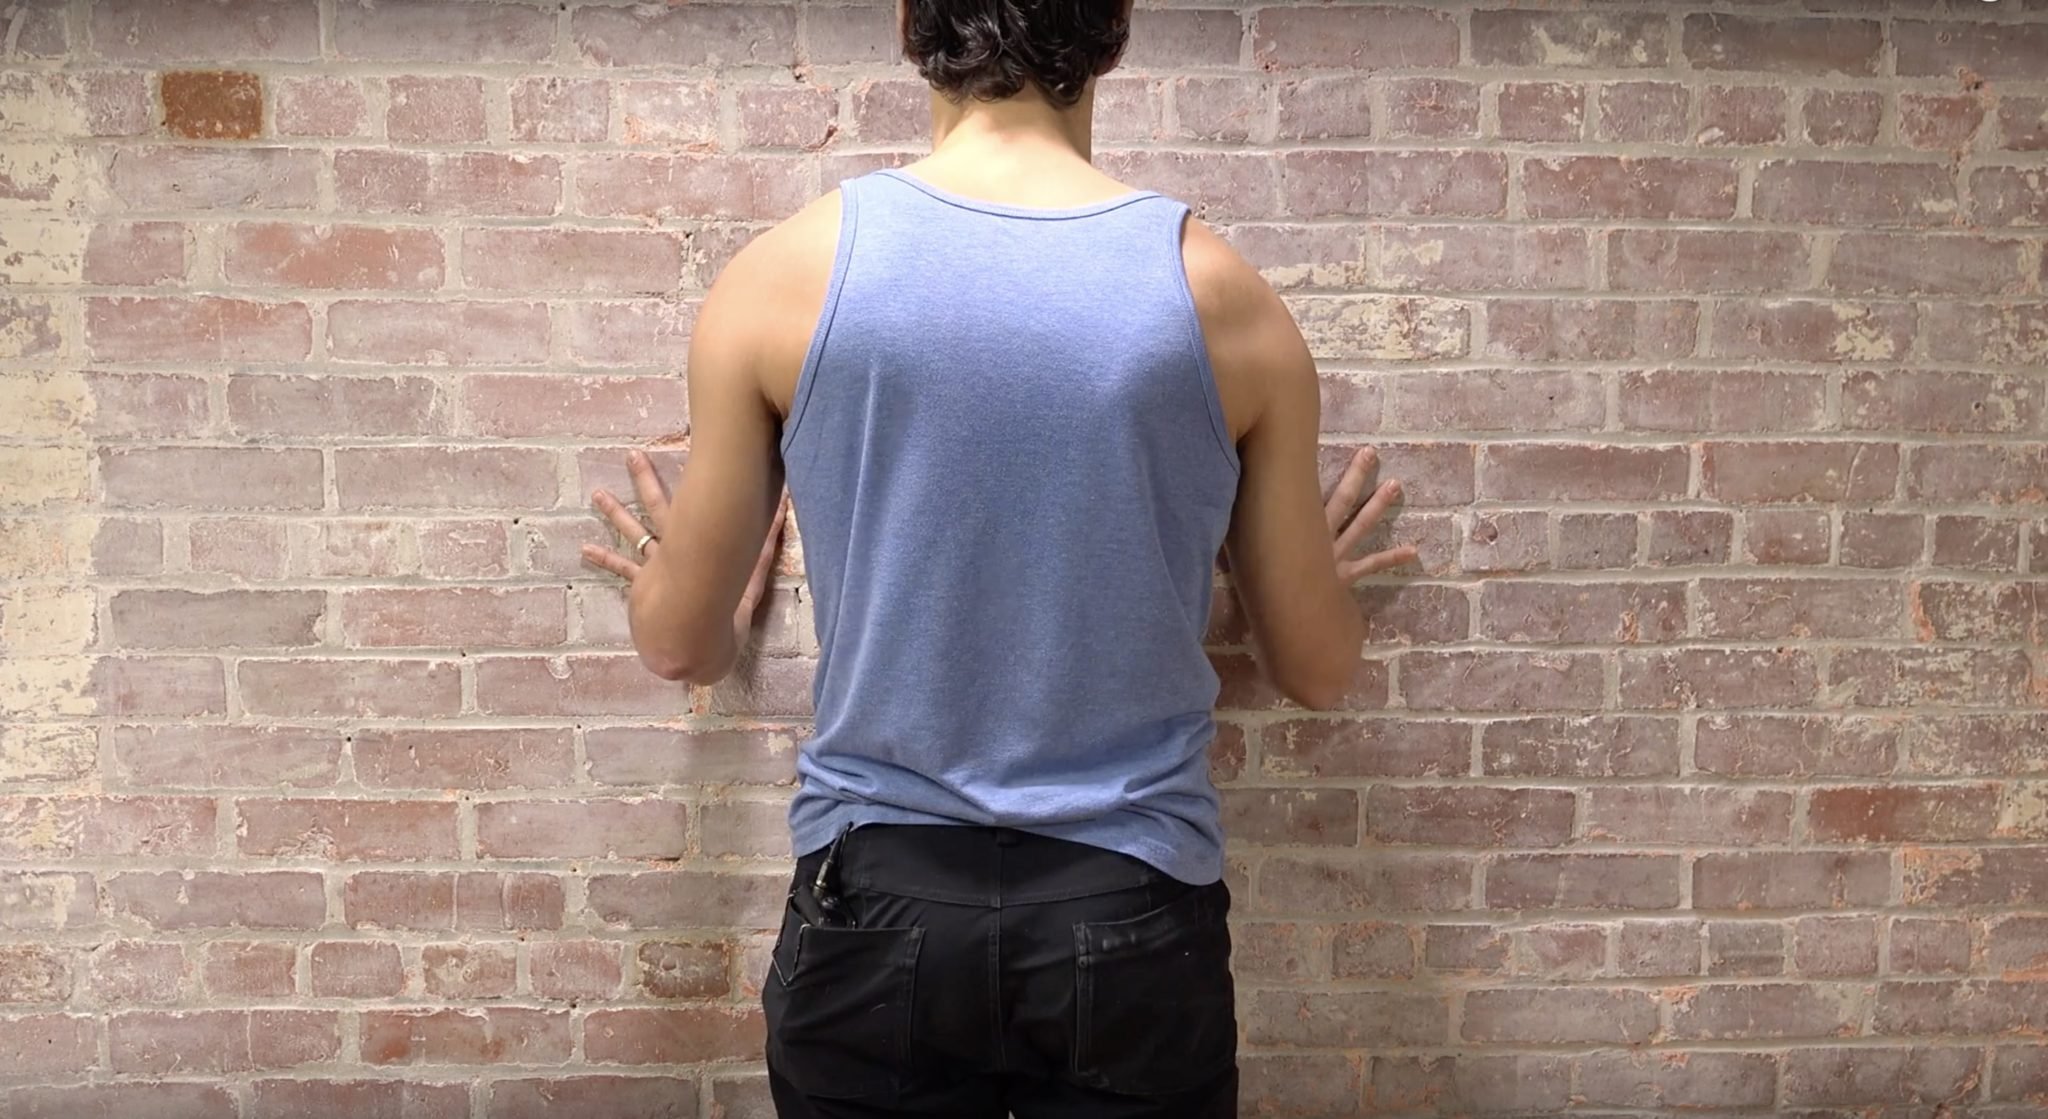
CONTROLLED TEST WITH A STRAP
OLD WAY:
- Bring your arms in front like you’re going to do the Macarena, then bend your elbows, mimicking what most teachers have told you to do in full wheel.
- Loop a strap around both elbows to keep them in — this is often used in alignment-based classes.
- Without letting the elbows go wider than your shoulders, raise your arms up, straightening your elbows while keeping them tucked in, and see how vertical your arms can get.
Most likely, you won’t be able to go too high up without effort. IF you are hypermobile in the shoulders, you may be able to; if Full Wheel is working the way you are doing it, then continue that way. However, if you feel pinching in your shoulders, watch the tutorial below.
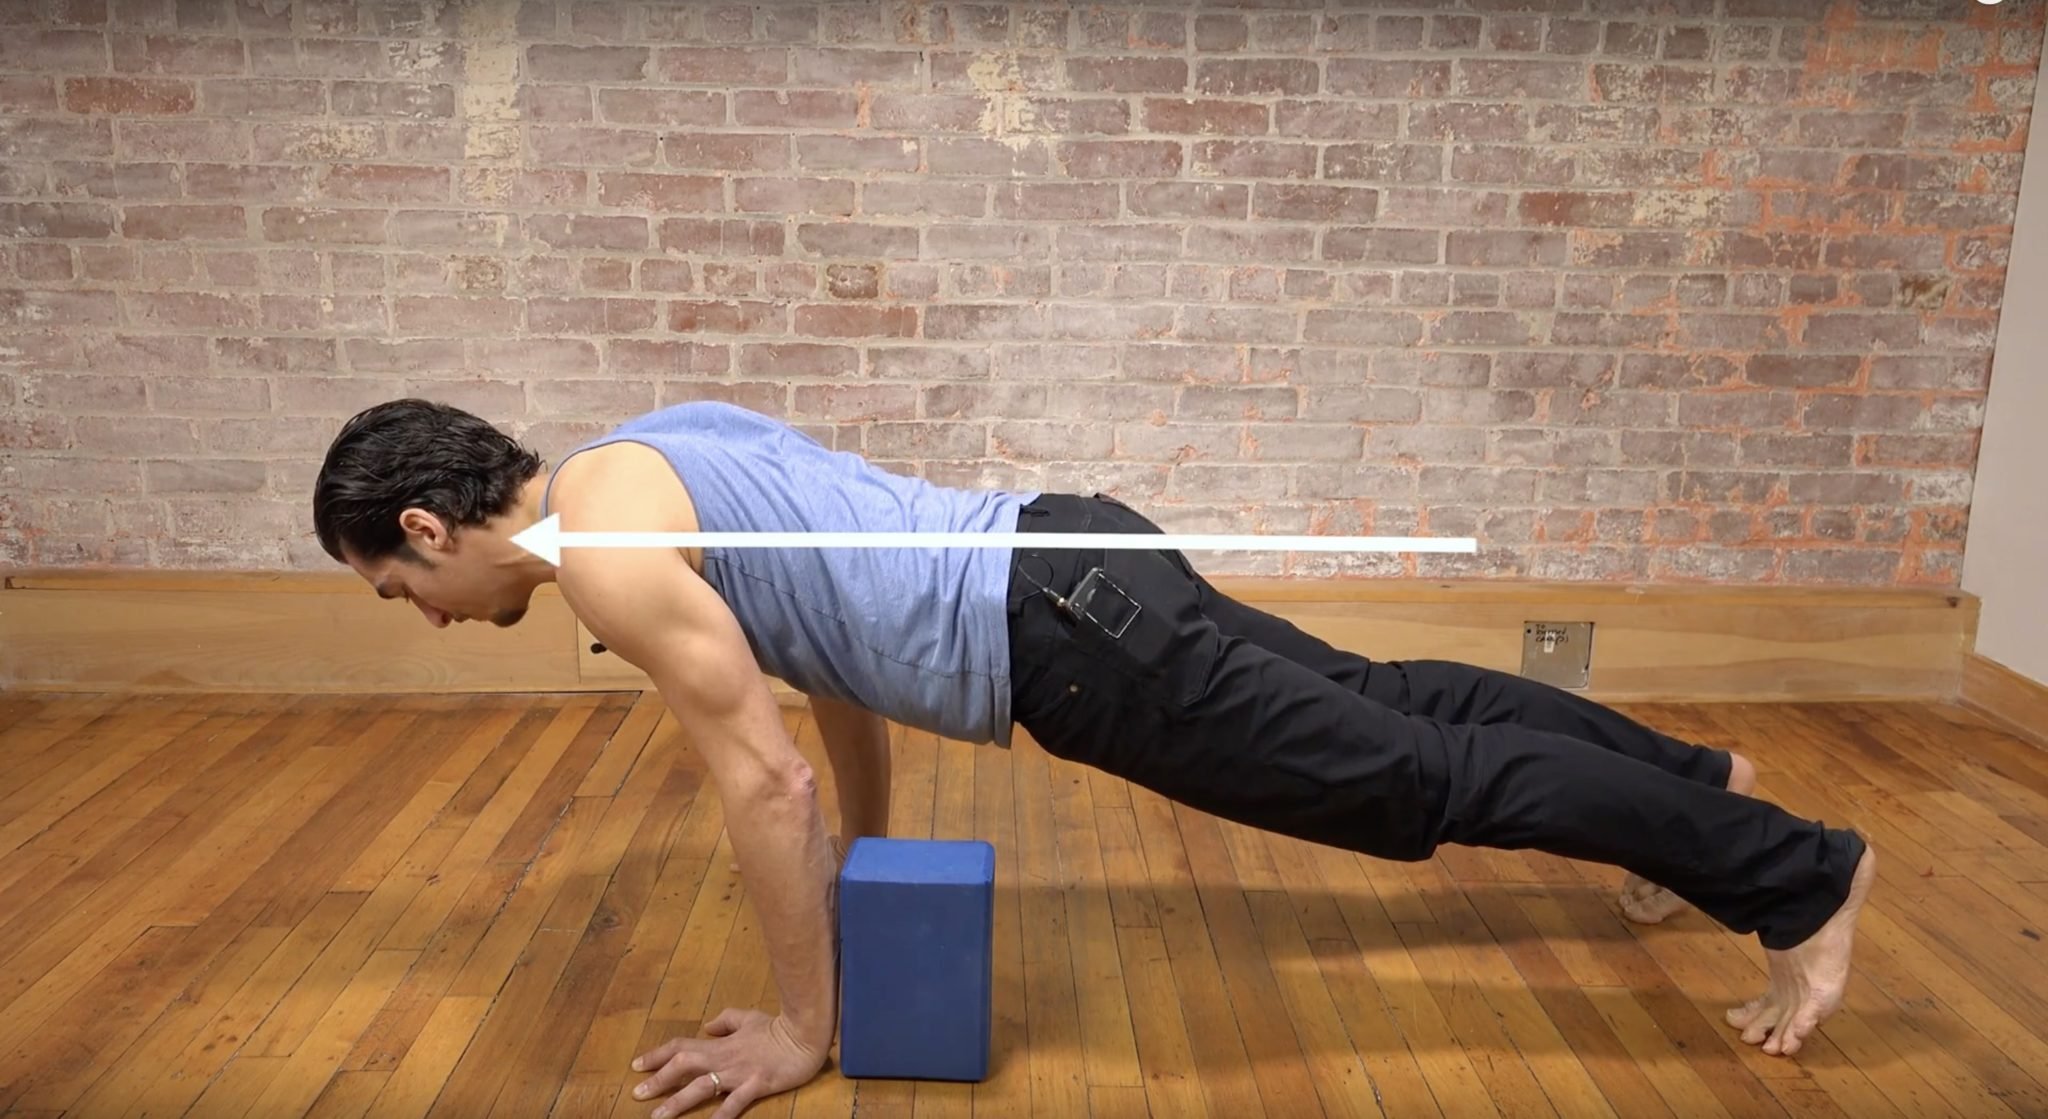
NEW WAY:
- Widen your elbows out to the sides like you are making cactus arms.
- Reach your arms up to the sky like you are celebrating a victory.
You will likely notice that this felt more natural and relatively easy. That’s because it IS NATURAL to lift your arms this way. The best way to approach Full Wheel Pose for maximum flexibility in the shoulder girdle is to allow the elbows to be out.

Shoulder Revelation
The September 2021 Immersion includes a full-length class to Wild Thing Pose as well as 11 additional classes emphasizing shoulder techniques and biomechanics! In this package, you get twelve 75-minute yoga classes to help you gain maximum strength, flexibility, and range of motion of the shoulders. You will also learn how to release neck tension and reduce risk of shoulder and neck injuries.
If you want to feel better in your shoulders, this is THE immersion to practice!
SALE PRICE: $198.00 $138.00
DON’T HUG THE ELBOWS IN, AND ENJOY YOUR LOW BACK
Amazingly enough, when you allow the shoulders to move properly, you will notice that you can shift your weight into your hands and out of your feet, and this will take the pressure off of the low back! This is because the backbend will now be dispersed throughout the whole spine instead of targeted straight into one or two vertebrae in your lumbar spine (typically L4 and L5 for most people).
EASIER SAID THAN DONE?
Ok ok ok, after that demo you might visually or intellectually get it, and perhaps you want to give this a try. Doing the shoulder actions while seated is far easier than trying it upside down and on your head. This is partially because our body can propriocept (know where it is in space) much more easily when right side up, simply because that’s how we exist most of the day. But your nervous system needs to learn where your bones are and how to activate your muscles when everything is flipped upside down. This is just the way it is; the only thing you can do about it is put yourself upside down MORE OFTEN, AND watch this video repetitively to stimulate your “mirror neurons,” which allow you to mimic something more easily through repetitive viewing.
To get these shoulder actions fully integrated into your practice, sign up for the Shoulder Revelation Immersion — 12 classes designed to help you develop mastery of movement within the shoulder girdle.
Thank you for reading and watching! I look forward to sharing more with you in an upcoming training or monthly immersion!
Co-written and edited with 300-hour Chromatic teacher, Donna Morin

200 HOUR ONLINE TRAINING
If you are not a teacher yet but a yogi ready to dive deep into your yoga practice and get certified to share this practice with others, then the 200 hour training is your next step!
Shoulder Revelation
The September 2021 Immersion includes a full-length class to Wild Thing Pose as well as 11 additional classes emphasizing shoulder techniques and biomechanics! In this package, you will get twelve 75-minute yoga classes to help you gain maximum strength, flexibility, and range of motion of the shoulders. You will also learn how to release neck tension and reduce risk of shoulder and neck injuries.
If you want to feel better in your shoulders, this is THE immersion to practice!
SALE PRICE: $198.00 $138.00
Livestream Class Packages

STRENGTH
Yoga For Strength: Strengthen Your Weaknesses • Maximize Your Physical Potential
- 12 classes: Each class targets a specific muscle group
- Strengthen your core, back, hips, shoulders, wrists, ankles, legs, and arms
- Learn creative ways to strength train within the context of a yoga practice
- Increase mobility by balancing your strength with oppositional muscle groups
- Joyful accountability to help you reach your practice goals
SALE PRICE: $138.00 $128.00

SHOULDER REVELATION
Strength•Mobility•Biomechanics
- Increase strength and flexibility
- Decrease risk of injury
- Release shoulder tension
- Learn anatomy and biomechanics
- Access a wider range of postures
- Stabilize the rotator cuff muscles
- Learn binds, heart openers, and arm balances
- 12 all-levels, 75-minute online classes
- Lifetime unlimited access to all

VITALITY
RIGOR & RELEASE
- Get back to feeling energized
- Vinyasa-style approach, accessible to everyone
- Hips, twists, heart openers, shoulders, core, & more
- Guided meditations to de-stress, increase focus, and gain mental & emotional clarity
- Strengthen and lengthen the most essential muscle groups
- 12 all-levels, 75-minute online classes
- Lifetime unlimited access to all

BALANCE
INCREASE & AWAKEN YOUR BALANCE
- Learn over 12 balance postures
- Muscle strength and reactive patterning
- Increase proprioception and deliberate weight shifting
- Tree, Standing Hand-to-Foot variations, Warrior III
- Half Moon variations, Handstand, Side Plank, Headstand
- 12 all-levels, 75-minute online classes
- Lifetime unlimited access to all

Hips & Hamstrings
RECLAIM YOUR ELASTICITY
- Learn over 12 hip openers
- Step-by-step instructionals in every practice
- Techniques, biomechanics and alignment
- Pigeon, Eagle, Fire Log, Lizard
- Lotus, Flying Pigeon, Splits, Straddle
- 12 all-levels, 75-minute online classes
- Lifetime unlimited access to all

ARM BALANCES
FREEDOM OF FLIGHT
- Learn over 12 arm balances
- Step-by-step instructionals in every practice
- Techniques, biomechanics and alignment
- Crow, Side Crow, Titibasana, Ashtavakrasana
- Forearm Stand, Koundinyasana 1 & 2, Handstand
- 12 all-levels, 75-minute online classes
- Lifetime unlimited access to all

HEART OPENERS
DISCOVER THE JOY OF BACKBENDS
- Learn over 12 backbends
- Step-by-step instructionals in every practice
- Techniques, biomechanics and alignment
- Bow Pose, Camel, Dancer, Full Wheel
- King Cobra, King Dancer, King Pigeon
- 12 all-levels, 75-minute online classes
- Lifetime unlimited access to all

MOVE • BREATHE • RELEASE
YOGA • BREATHWORK • MEDITATION
- YOGA: TRANSFORM YOUR BODY
- BREATHWORK: REJUVENATE
- MEDITATION: AWAKEN YOUR MIND
- THE TRIFECTA OF YOGA
- 12 CLASSES: ALL LEVELS

THE DANCE
ALIGN • REFINE • FLOW
- MOVEMENT TRANSFORMATION
- ALIGNED TRANSITIONS
- TARGETED STRENGTH
- DEEP HIP OPENERS
- 12 CLASSES: INTERMEDIATE

THE PULSE
BALANCE • STRENGTH • FLEXIBILITY
- SHOULDER STRENGTH
- HEART OPENERS
- HAMSTRINGS & BUTTOCKS
- INNER THIGHS
- 12 CLASSES: ALL LEVELS
$128.00
2020 IMMERSIONS

HIPS • HEART • HANDSTAND
- HIP OPENERS
- HEART OPENERS
- HANDSTAND TECHNIQUES
- BUILD COURAGE & STRENGTH
- 12 CLASSES: ALL LEVELS
$148.00

boundless freedom
- SHOULDER & NECK RELEASE
- SHOULDER BIOMECHANICS
- BALANCED STRENGTH
- INCREASE RANGE OF MOTION
- 12 CLASSES: ALL LEVELS
$298.00 $128.00

BIRDS OF PARADISE
- FLEXIBILITY OF INNER THIGHS
- 4 GUIDED MEDITATIONS
- LIFETIME ACCCESS TO ALL
- LEADS TO BIRDS OF PARADISE
- COMPARTMENTS OF THE MIND
$298.00 $128.00

BEST STARTER PACKAGE
- 6 YOGA CLASSES
- 2 GUIDED MEDITATIONS
- LIFETIME ACCCESS TO ALL
- 6 PEAK POSTURES
- 6 YOGA SUTRA THEMES
$148.00 $78.00

THE SPINAL RESET
- BACKBENDS & SIDE BENDS
- TWISTS AND FORWARD FOLDS
- SPINAL BIOMECHANICS
- 4 POST-CLASS MEDITATIONS
- 12 CLASSES: ALL LEVELS
$128.00

JOURNEY TO BLISS
- PHYSICAL MEETS SPIRITUAL
- EXPLORE THE KOSHAS
- MIND-BODY TENSION RELEASE
- FOUR GUIDED MEDITATIONS
- 12 YOGA CLASSES: ALL LEVELS
$148.00 $118.00

BACK, NECK, & SHOULDERS
- 12 YOGA CLASSES
- 4 GUIDED MEDITATIONS
- LIFETIME ACCCESS TO ALL
- 12 PEAK POSTURES
- 12 YOGA SUTRA THEMES
$178.00 $128.00

THE BREAKTHROUGH
- HIP OPENERS
- HIP BIOMECHANICS
- EMPHASIS ON ARM BALANCES
- 4 POST-CLASS MEDITATIONS
- 12 CLASSES: ALL LEVELS
$128.00

JOURNEY TO THE HEART
- FULL BODY RESET
- INCREASE BALANCE
- ARM BALANCES
- 4 GUIDED MEDITATIONS
- ELEMENTALLY THEMED
$148.00 $118.00

KING PIGEON & HANUMAN
- FLEXIBILITY OF HIPS
- SHOULDER & SPINE MOBILITY
- 4 GUIDED MEDITATIONS
- 12 INTERMEDIATE CLASSES
- HAMSTRING RANGE OF MOTION
$128.00
Continue Learning
Build Better Joint Support
read more
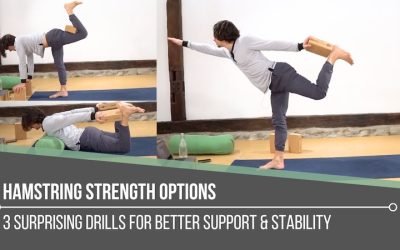
Hamstring Strength Options
Hamstring Strength Optionship extensorsHAMSTRING STRENGTH OPTIONS When we think about hamstrings in yoga, most of us immediately think about stretching. Matt reminds us that this powerful muscle group is rarely celebrated for what it is also designed to do: create...
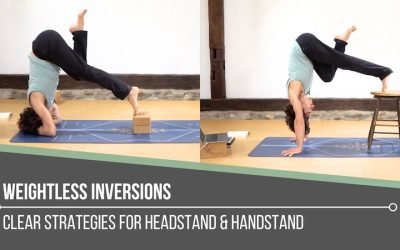
Weightless Inversions
Weightless InversionssirsasanaWEIGHTLESS INVERSIONS Weightless inversions are not about removing effort. They are about redistributing it with awareness. Matt reminds us that when we refine how we place weight through the hands, shoulders, and core, the body begins to...
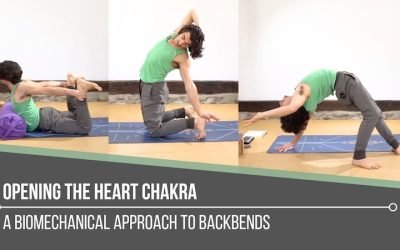
Opening The Heart Chakra
Opening The Heart ChakrabackbendOPENING THE HEART CHAKRA Opening the heart chakra is not simply about reaching deeper into a backbend. Matt reminds us that this space is rooted in love, balance, and connection, both with ourselves and with others. It reflects how we...
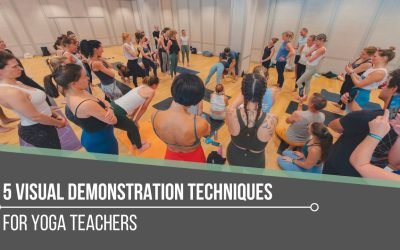
5 Visual Demonstration Techniques for Yoga Teachers
5 Visual Demonstration Techniques for Yoga TeachersYoga TeachersVisual Demonstration This is often confused with “teaching from the mat.” Teaching at the front of the room can be useful at the right time and place, but that is not what we are referring to here. In...
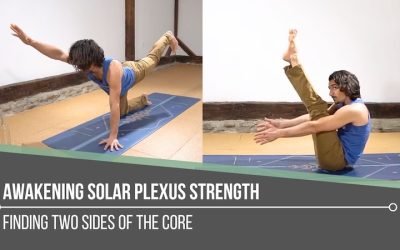
Awakening Solar Plexus Strength
Awakening Solar Plexus Strengththird chakraAWAKENING SOLAR PLEXUS STRENGTH Awakening solar plexus strength invites us into the centre of transformation. Matt reminds us that this third chakra, Manipura, is our fire, our willpower, and our ability to take action. It...
THE FREE TECHNIQUE PACK
When You Subscribe, You Will Get Instant Access to
- the Technique Pack: 15 yoga pose breakdowns
- exclusive online course discounts
- exclusive blogs and videos