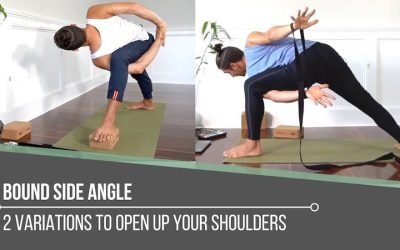
Bound Side Angle 2 Variations To Open Up Your ShouldersexpandBOUND SIDE ANGLE You might either approach Bound Side Angle with excitement or with a sense of fear. If you adopt a certain perspective, it’s possible for the word “bound” to evoke a sense of freedom in the...
Eagle Pose Legs
Eagle Pose Legs
Pelvic Articulations to Find the Bind
garudasana
EAGLE POSE
Eagle is a yoga posture that can really highlight the relationship between your pelvis and your hips. Of course, the more you understand your body and how it works, the more you begin to capitalize on its infinite potential. You can do this by utilizing not only drills to prepare you, but also specific articulations of various joints that help you build on strength, flexibility, and mobility in your physical yoga practice. It’s within this understanding that you begin to grow in your practice. Yoga postures that may seem unattainable actually become more accessible or even possible. Sometimes it’s a simple movement or sequence of movements that revolutionizes your experience. In today’s video, Matt shares a simple drill and also a sequence of movements that primarily involve specific actions of your pelvis and hips. Both will transform your Eagle Pose.

ALIGNMENT
JUNE 2023 Immersion
- 12 Hatha-style practices
- Transformative and informative experience
- Alignment and techniques for the most common asana postures
- Step-by-step, easy-to-follow instruction
- Improve strength, balance, flexibility, and proprioception
- Accessible and empowering modifications
- Appropriate variations a modifications for all levels
$168.00 $138.00
START WITH THIS DRILL
If you know that you are moving in a specific direction within a given yoga practice (e.g., practicing a specific posture), your body requires specific warm-ups to execute the posture as safely as possible. The drill that Matt offers in today’s video focuses on supporting the shape of the legs in Eagle Pose. In the drill, he demonstrates a “straddle and criss-cross” movement in a supine position that works to prepare for the deep crossing of one leg over the other. This deep crossing requires a generous amount of flexibility and mobility. In addition to that, however, a great deal of stability is involved because Eagle Pose is also a balance posture. The drill works to prepare both the adductors and the abductors. As the drill progresses, Matt demonstrates how to pattern the actual wrapping of the legs. Continuing to build is key!
WATCH THE VIDEO
EAGLE POSE LEGS: PELVIC ARTICULATIONS TO FIND THE BIND
ARTICULATIONS TO CONSIDER
You’ll see in the progression of the drill that the wrapping movements prepare you for the internal and external rotation of the legs. However, these movements are only enhanced when you invite in other joint articulations.
As you practice Eagle legs in the supine position, it’s imperative to consider the articulation of the ankle in the top leg. In order to find the bind behind the lower leg, you must create an eversion in the ankle of the top leg. This means that you send your toes out and, as Matt explains it, you “shorten the outer ankle.” This creates a hook or locking to hold the bind in place. Now, remember that nothing works in isolation. How do we enhance this action, or make it more accessible? This is when you can really dive into supine Eagle Pose.

200 HOUR ONLINE TEACHER TRAINING
GET CERTIFIED & DEEPEN YOUR YOGA PRACTICE
- Deepen your yoga practice
- Build confidence speaking in front of groups in person and online
- Learn foundational class structures and templates
- Learn techniques for a wide range of yoga postures
- Get certified and highly qualified to teach yoga
- Yoga Alliance Globally Recognized Certification Program
SUPINE EAGLE POSE
With the aim of increasing the accessibility of the bind, following a sequence of actions is essential. Breaking things down into bits will help you deepen your understanding. It’s like putting the pieces of a puzzle together. As Matt begins to demonstrate more of what’s involved with the legs in supine Eagle Pose, he introduces you to movements in the pelvis, which then inform the legs and feet.
You’ll see in the video that he internally rotates the upper thigh bone, but to really emphasize this, he laterally tilts the pelvis (lifts the hip of the top leg). This will allow your foot to go behind the bottom leg with more ease. Want to go a step further? Lift your hips off of the ground first and then hike the hip while rotating your hips as if to twist.

300 HOUR ONLINE TEACHER TRAINING
GET 500 HOUR CERTIFIED AS A MASTER TEACHER
Master your skill set as a teacher through refined techniques, anatomy, biomechanics, sequencing, philosophy, meditation techniques, theming, yoga business, and much more!
- Get 500 hour certified
- Learn anatomy, biomechanics, asana techniques
- Expand your teaching skills
- Masterful sequencing and verbal delivery
- Learn meditation and breathwork techniques
- Transformative tools: theming, dharma talks, satsang
EAGLE POSE ENTRANCE AT THE WALL
Eagle Pose at the wall may provide even more room to experiment with pelvic articulations and movements of the hip. Matt suggests that this is because you no longer have a surface beneath you that may potentially limit the amount of rotation available to you. What’s nice here is that you can initially take the balance portion of the posture out of the equation. You’ll see that you stand perpendicular to the wall with your hand resting on it for balance as you execute the hip hike. The rotation is much more significant as you turn to face the wall. What’s slightly different here is that in order to get your leg over top, you must first externally rotate your thigh before you internally rotate it to then find the bind. Once you find the bind, you can turn away from the wall and attempt to find balance.
ONE STEP AT A TIME
Practicing these actions in isolation will help you to find the confidence to practice them in the perfect sequence. Following each step helps to unravel the pieces that need more attention alongside the pieces that feel strong. The most exciting part of it all is realizing what’s possible. When you attempt what may seem like a tiny adjustment, you’ll experience just how significant the shift is in a posture and ultimately your practice as a whole.
If you’d like to delve even further, I suggest Matt’s Alignment Immersion, where you’ll really break down each posture one step at a time.
The 200 Hr. Teacher Training: Click Here to See the Next Start Date
The 300 Hr. Advanced Teacher Training: Click Here to See the Next Start Date
Article by Trish Curling
Video Extracted From: Alignment Immersion

The Teachers' Toolkit
- Advance your practice
- Learn masterful teaching techniques
- Acquire business-building skills
- Attract the right students
- Learn about social media, marketing, and business structure
- Catapult your teaching and career
Continue Learning
Bound Side Angle
read more
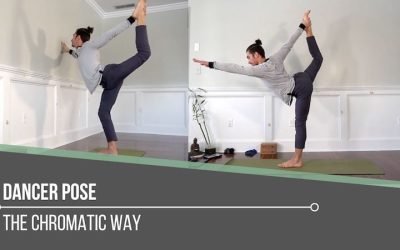
Dancer Pose
Dancer Pose The Chromatic WaynatarajasanaDANCER POSE Dancer Pose is the kind of posture that embodies both grace and strength. In order to integrate these two things into your practice of this posture, there are quite a number of pieces of the puzzle to consider. You...
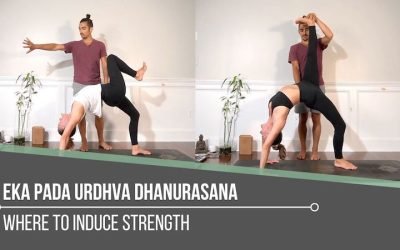
Eka Pada Urdhva Dhanurasana
Eka Pada Urdhva Dhanurasana Where to Induce Strengthback line strengthEKA PADA URDHVA DHANURASANA There’s no doubt that back-line strength (more specifically, strength from the gluteus maximus, hamstrings, and erector spinae) is a requirement to elevate your hips off...
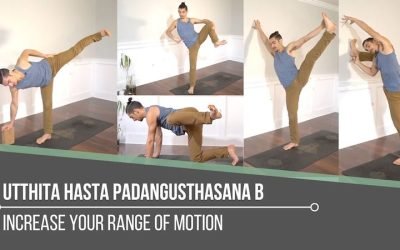
Utthita Hasta Padangusthasana B
Utthita Hasta Padangusthasana B Increase Your Range of MotionFLEXIBILITY BOOSTUTTHITA HASTA PADANGUSTHASANA B In my previous blog, we looked at how Matt prepares you for Standing Nose to Shin (Utthita Hasta Padangusthasana A). Although there are multiple similarities...
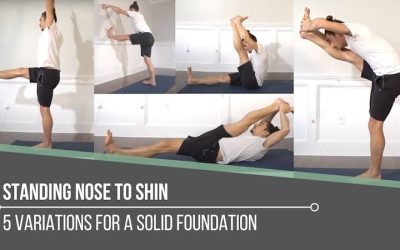
Standing Nose To Shin
Standing Nose to Shin Variations for a Solid FoundationstrengthSTANDING NOSE TO SHIN Standing Nose to Shin is an exceptional preparatory posture for Hanumanasana, or Splits Pose, but it is an equally profound posture on its own. It also requires thoughtful...
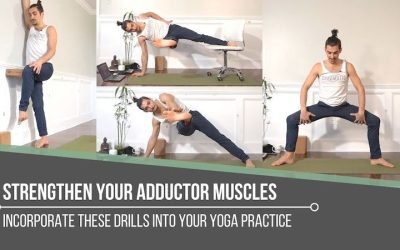
Strengthen Your Adductor Muscles
Strengthen Your Adductor Muscles Incorporate These Drills Into Your Yoga PracticeactivationSTRENGTHEN YOUR ADDUCTOR MUSCLES The adductor muscles are commonly left as a lower priority when it comes to building strength in your yoga practice. It’s not that there aren’t...
THE FREE TECHNIQUE PACK
When You Subscribe, You Will Get Instant Access to
- the Technique Pack: 15 yoga pose breakdowns
- exclusive online course discounts
- exclusive blogs and videos


