by Trisha Curling | Jul 10, 2022 | Main Page Display
CALM THE MIND
GO BENEATH THE SURFACE
“If restraint of the mental modifications is achieved, one has reached the goal of yoga.” This is taken directly from The Yoga Sutras of Patanjali (pg. 3).
“Yoga is the experience we have when all vritti (fluctuations of the mind), the movement arising in our consciousness, is stilled.” This is the breakdown/interpretation from Tantra of The Yoga Sutras by Alan Finger (pg. 21).
Both explanations of Yoga Sutra 1.2 “Yoga citta vritti nirodhah” help us to understand what we seek in our practice and in our lives. What we seek is stillness, the decluttering and calming of the mind in order to exist and take action from a place of steadiness and discernment rather than from a place of reactivity, being steered by our emotions.
THE 5 LAYERS OF THE MIND
The Tantric point of view seems to provide more space for the allowance of our natural human experience, which includes the 5 Layers of the Mind. These are explained in Tantra of the Yoga Sutras as follows:
- Undistorted Knowledge occurs when the mind creates an image from direct perception; for example, what you experience from your senses and/or intuition, deductions form partial information, and/or credible testimony from text, a teacher, or parent
- Misconception happens when the mind directly perceives something through the senses or intuition but creates a distorted image of what it is perceiving.
*This distortion may come from our samskaras, which are our underlying, deep-rooted patterns and beliefs, which are deeply connected to our ego and how we define ourselves by specific identities and experiences.
- Imagination is when we hear about something, and the mind creates an image that is based on anything other than words.
- Sleep—here, the mind experiences inertia. This is its own form of vritti, which helps the mind to reset and recharge. To calm the mind, mastering sleep habits is essential.
- Memory is when a previously perceived object, form, or idea comes back into consciousness.
From the Tantric perspective, these are natural occurrences of which we are not trying to “rid ourselves” but simply (or not so simply) trying to harness. These layers exist, and they are valuable to our human experience in this life. It is my opinion that whatever language we resonate with, both perspectives do offer us the ability to understand that we have the potential and competence to go beneath the surface of these fluctuations. “Going beneath the surface” can essentially be interpreted as calming the mind. When the fluctuations create chaos and/or anxiety, we become off balance, and the mind feels cluttered and busy. This is when and why we go to our yoga practice, meditation, and pranayama: in order to soften these layers.
How is this achieved? This is achieved through focus with intention. This can also be interpreted as well-placed effort, or abhyasa, which means “making your best effort to focus all the vritti on one single point, whether it is an action, object, thought, or image.” Finger, Alan. Tantra of the Yoga Sutras. Pg. 26.
Matt has this ability to effortlessly weave this into every class. Each breath, transition, and biomechanical setup is methodical and very intentionally expressed so that we have no choice but to move in a way that harnesses our attention within. We are focused on not only the movements but the sensations we experience throughout. These are the “aha moments,” if you will. Matt explains that it is when we go deeper, to the level of awareness of the sensations, that we actually experience stillness. This is when we go below the layers of the fluctuations of the mind. This is when we find more calm and presence in the moment.
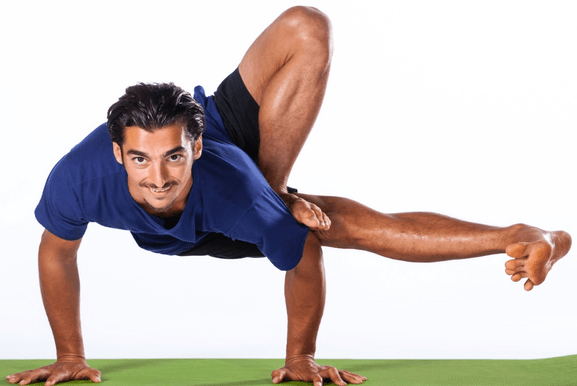
At the end of today’s video, you’ll see how even what may appear to be a “simple movement” is executed with such precision and awareness that we have no choice but to surrender to the sensations and to the release of the “fluttering” of the mind.
In this particular class, Matt is preparing us for Side Crow. He talks about this harnessing of the mind within the movement, and he explains how we focus the body and breath in order to go deeper within. He then proceeds to the next actions in the physical body that will lead us toward what is necessary for Side Crow, but in the moment, we are fully engrossed in the stillness of the mind in the present moment and present actions. Now, as our muscles activate, building heat and tension, the fluctuations may want to rise and fall with more intensity again, but please note that all vritti are motivated by either pain or pleasure; whether the experience is difficult and challenging or easy and delightful, we can still place our efforts in a way that helps us maintain a sense of tranquility. Maybe when the vritti intensify due to challenge, the tranquility can come from an understanding that any particular challenge is ultimately happening for us and not to us and that by letting go of the outcomes (vairagya), we will come to see just exactly how they serve us in the end. On the other hand, when there is excitement, joy, and happiness, and the mind is wild with elation, we can enjoy it for what it is and yet recognize that these are the energies of life—the ups and the downs don’t determine our value; they simply reveal an opportunity to stay present.
WATCH THE VIDEO
“Calm the Mind with Meditation”
The 5 KOSHAS OF OUR EXISTENCE
But, what are these deeper layers? What lies beneath the surface of the vrittis? Where do we actually find/experience stillness? How do we find more calm in the mind?
In Eastern philosophy we come to understand the Koshas (or the energetic layers of our body that encapsulate one another).
In the context of the yoga practice, the 5 Koshas are:
- Physical – Annamaya Kosha – This is our physical body. This is where we bring awareness to the biomechanics and techniques in our practice. We become more skilled at the awareness of our bodies in space (proprioception). Matt explains that we develop more discernment when it comes to knowing the difference between our mind being uncomfortable and our bodies being uncomfortable. There is a difference between pain and discomfort. We learn to decipher between the two in order to honour our bodies within our practice.
- Energetic – Pranamaya Kosha – This is the vibrancy of our energy (i.e. when we wake up after a good night’s sleep, we feel rested and vibrant. We feel the exact opposite after a poor night’s rest. Also, when we are working on this layer we are working on pranayama.
- Mind – Manamaya Kosha – Here we are getting closer to the awareness of who we are. We are more self aware of our mental and emotional patterns by way of our physical practice. We come to understand the lens through which we look and how we perceive life.
- Awareness – Vijnanamaya Kosha – This is our intuitive body and/or our insight.
- Bliss – Anandamaya Kosha – The inevitable result of becoming more self aware – strengthening connection to the 3 outer layers, our ability to become aware and then the inevitable bliss
Surrendering to the sensations and awareness of the first 3 layers help to unlock the deeper inner layers of awareness and bliss. Matt explains that bliss is the inevitable result of becoming more in tune with our ability to become aware. This is actually the practice of svadhyaya (self-reflection/awareness).
In Chromatic yoga, Matt guides us to understand that this is exactly what is taking place. He provides continued opportunities in our asana practice to become more aware within the first 3 layers and that this is how we access the stillness, we go beneath the fluctuations of the mind and more inward towards awareness and bliss. As described above, we do this by paying attention to techniques and the biomechanics of the body. Matt shows us how to become more aware of how to engage and arrange our joints to feel better in our bodies on and off of the yoga mat. The goal is to become self aware in the asana practice. To then become in all areas of our lives.
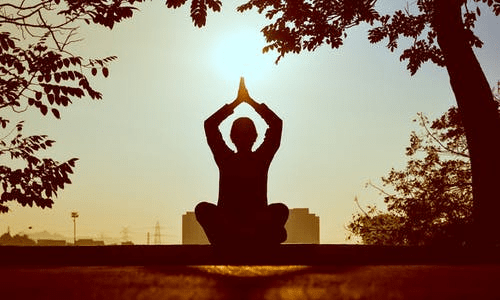
THE ROLE OF MEDITATION TO GO BENEATH THE SURFACE
At the beginning of the Heart Module in Matt’s 300 Hr. Yoga Teacher Training, he describes Meditation as a way to help ourselves to “clean out the dirt and dust” within our minds. Again, it is a process of self-inquiry that helps us understand where the dirt came from and why we didn’t clean it sooner. Meditation keeps the dirt from building, self inquiry inspires us to keep meditating. We also come to understand that meditation is not the removal of our thoughts, but again where we place our attention. This is exactly what the Tantric perspective provides for us. There is the understanding that the 5 layers of the mind are not to be removed (they are natural), but where do we place our attention? Yes, you’re right…beneath the surface.
In the 2015 study, Meditation: Process & Effects, by: Hari Sharma, it explains that:
“During the process of meditation, accumulated stresses are removed, energy is increased, and health is positively affected overall.”
This directly reveals the value of meditation and its ability to settle the fluctuations of the mind. It’s focused attention and the well placed effort (Abhyasa) of our awareness that supports the removal of certain stressors. This supports our ability to quiet and calm the mind. With increased energy, we can go to our mats for asana in order to build on our awareness of the 3 outer layers of the koshas.
The study also says:
“In ancient Vedic texts, it is said that the meditation process takes the mind from the outer realm of the objective world to the inner realm of the inner faculty (which includes the mind, intellect, ego, and Chitta – the storehouse of all memories and impressions of life), and finally goes beyond both the outer and inner realms to reach the deep inner Self.”
Sharma, Hari. “Meditation: Process and effects.” Ayu vol. 36,3 (2015): 233-7. doi:10.4103/0974-8520.182756
This is it, it describes the process of going from the external to the internal and finally going to the inner realm to the deeper self. This is just another way of describing the shift from sitting within the crashing waves of the mind, to going beneath the surface and into the stillness.
There is clearly a lot to uncover and unpack here, but this is the beauty of stepping into our awareness. All we have to do is take the first step.
“Yoga citta vritti nirodhah” can happen at any time you want. You don’t just go to the yoga mat to find this. You go to life to find this. Funneling attention into awareness itself at any time helps you to find more opportunities and moments to remain in the realm of stillness.
The 200 Hr. Teacher Training: Click Here to See The Next Start Date
The 300 Hr. Advanced Teacher Training: Click Here to See The Next Start Date
Article by Trish Curling
Video Extracted From: 300 Hr. Training
NEXT TRAINING BEGINS FEBRUARY 2024 ENROLLMENT NOW OPEN!
NEXT TRAINING BEGINS FEBRUARY 2024 ENROLLMENT NOW OPEN!
When You Subscribe, You Will Get Instant Access to
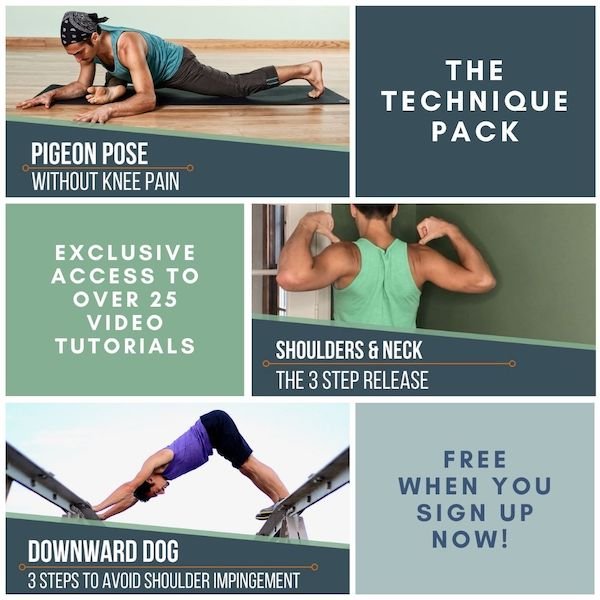
- the Technique Pack: 15 yoga pose breakdowns
- exclusive online course discounts
- exclusive blogs and videos
by Trisha Curling | Jul 5, 2022 | Home Page, Main Page Display
WIDE-LEGGED FORWARD FOLD
INCREASE YOUR FLEXIBILITY WITH RECIPROCAL INHIBITION
a safe approach to increasing flexibility
It’s not unusual to feel “stuck” in our yoga practice at times. We may come to a place in our physical practice where we are not experiencing our full potential. One of the common areas we may feel this way is with our flexibility.
In one of my previous articles, Healthy Hamstrings, I discuss how Matt demonstrates how to create more flexibility utilizing a facilitated stretch technique. There are, however, more ways than one to create more flexibility within our bodies. We can also achieve greater flexibility with reciprocal inhibition.
Reciprocal inhibition does the opposite of what a facilitated stretch asks us to do. It’s true that we are still activating muscles in order to achieve greater flexibility, but we are now activating the muscles that oppose the muscles that are stretching.
EFFECTIVE STRETCH TECHNIQUE
In today’s video, Matt demonstrates how to explore these actions in Prasarita Padottanasana: Wide-Legged Forward Fold.
In Prasarita Padottanasana (an open hip posture), our legs are in abduction while we are flexing at the hip. Placing our bodies in this position requires us to find flexibility in our adductors and hamstrings. There are also key areas both for potential strength in this posture and where we can explore activation at different times. These areas include adductors, abductors, quads (including the rectus femoris, which is also a hip flexor), and hamstrings.
Activating the adductors and hamstrings would support the facilitated stretch technique, while activating the abductors and quadriceps generates the reciprocal inhibition technique. In this segment of the video, Matt demonstrates how and why to activate the quadriceps.
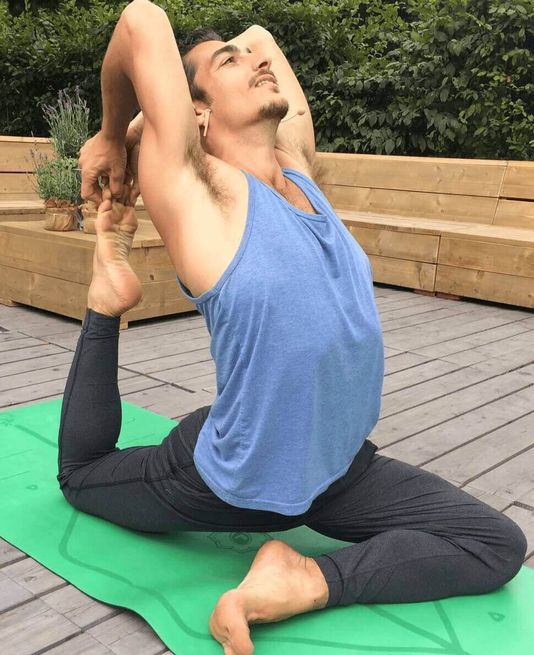
BOW POSE ON A BOLSTER
Doing Bow Pose on a bolster can be very helpful because it relieves much effort in the back muscles, allowing you to focus on the various aspects of the posture without being overwhelmed. The key points are the following:
- Pull your belly inward and lengthen it before placing your low ribs/upper belly on the bolster. This will keep you from getting stuck on the mat when you start to lift.
- Adjust your shoulders by lifting them up first, then retracting them (pulling your shoulder blades toward each other).
- Follow the movement of your breath. On inhales, kick your feet back and up to rise; on exhales, soften and relax some of your effort.
- IMPORTANT: Try to keep the middle of your spine moving forward — press your middle back toward the bolster, especially when you kick your feet back. Otherwise you will feel spinal compression or discomfort.
BREATHING IN OTHER BACKBENDS
While Bow Pose might be more challenging due to the fact that the belly is on the ground, it can be a great posture to work with because you dont have to worry about balance or the host of other challenges presented by something like Full Wheel. That said, I recommend this same type of breathing in all heart openers. There is both a learning curve involved in this type of breathing and repetition that is required until your muscles (transversus abdominis, intercostals, erector spinae) develop the necessary strength, endurance, and flexibility for this approach to yield the best results.
In the Anatomy of the Heart immersion, you will learn breathing exercises and postural drills that will strengthen these muscles and help you become proficient in this breathing technique. Additionally, we will be working on the HEART of heart openers—the emotional correlation and mindset that helps release unnecessary tension and provides you with the freedom and ease that is possible in these postures. Lastly, you will learn energy management in order to upregulate or downregulate your nervous system. This means you will be able to relax or calm your system down if you become too lifted, light-headed, nervous, or anxious, or you can ramp your energy up if you are feeling lethargic, unmotivated, or not attentive enough for heart openers.
See you on the mat!
The 200 Hr. Teacher Training: Click Here to See The Next Start Date
The 300 Hr. Advanced Teacher Training: Click Here to See The Next Start Date
Article by Matt Giordano
Video Extracted From: Anatomy in Motion
When You Subscribe, You Will Get Instant Access to
- the Technique Pack: 15 yoga pose breakdowns
- exclusive online course discounts
- exclusive blogs and videos
by matt | Apr 1, 2022 | Main Page Display
Side Plank Variations
VASHISTASANA • MODIFICATIONS • TUTORIAL
Extended Side plank variations
[Click Below to listen to the Audio Version of “Extended Side Plank”]
There are definitely more ways than one to access a yoga posture. Not only that, but Matt is explicit about technique in order to unlock access. In an all-encompassing pose like Extended Side Plank—Vashistasana—there is a lot going on all at once. There are so many things that need to be digested when breaking it down. Even though this posture may be a physically challenging one, Matt breaks down how you can approach it both physically and intellectually. He shows you specifically what muscles to activate and what parts of the body to articulate. Extended Side Angle is one of those postures that recruits and demands so much of your effort and attention.
When exploring the various entry points and different ways to execute the posture, it’s important to pay attention to the specifics of each variation. Matt outlines 2 variations in today’s tutorial. You’ll explore Extended Side Plank by utilizing a wall and another variation with a strap.
Within these explorations, you’ll see just how much body awareness is involved and how connected you need to be to your anatomy. Much more than just knowing your muscles and bones, it’s about understanding how to move and articulate each part of your body.
The Actions for Extended Side Plank, Variation at the Wall
As always, it’s imperative to start your awareness from the ground up.
Step 1 – Matt explains that the gripping of your hand into the mat activates the flexors of your wrist. This is important because now you are utilizing technique to activate strength and set a solid base for the posture.
Step 2 – Next, we have spinal extension as a result of the shoulder blade moving into the spine. Matt emphasizes how necessary these actions are so that the rest of the posture can actually be expressed.
Step 3 – This step is really connected to Step 2, as it’s important to take the steps of lifting your shoulder up, back, and around. We also see this in Matt’s Shoulder Alignment Tutorial for Wild Thing.
Step 4 – Move your pelvis and weight in towards the wall.
Step 5 – You can then bend your knee and bring your foot onto the wall.
Step 6 – This step can take you to another level.
Grab your knee and pull it in as tightly towards the chest as possible. If this is the final step in the journey at this time for you, Matt explains that the only thing missing is the extension of the leg, removing the quadricep engagement.
How does this differ from the next variation?
The Actions for Extended Side Plank, Variation with a Strap
This one might actually be a bit more challenging, as the actions for entry are slightly different. You’ll see how Matt turns his body open before actually going into the backbend.
Step 1 – Strap goes around your foot.
Step 2 – Come into Side Plank with kickstand.
Step 3 – Lift your hips up and pull your knee into your chest as you turn
*Here he highlights the difference between the experience of this variation and of choosing to kick your leg out first and then kicking it upwards, which may make the hips feel too heavy.
Step 4 – Once you have completed Step 3, the turn is done with a bent knee, with an option to now extend your leg fully.
This order of entry may be far more accessible.
Matt describes Extended Side Plank as the “full spectrum of body awareness.” This is evident from the actions that are taken in these variations.
Anatomy and actions involved:
- strengthening of the wrists
- rotator cuff muscles engaged due to the external rotation of the upper arm bone
- depression and retraction of the scapula to mobilize the spine (bowing of the spine)
- eversion of the ankle
- gluteus muscles engaged to press the feet down and get the hips lifted
- extension of the knee joint to activate quadriceps
There is the evidence of just how much focus, attention, and awareness is involved.
Learn how to MASTER actions and awareness like this, not to mention the sharpening of your knowledge with anatomy, in Matt’s current immersion:
Anatomy In Motion
See you on the mat!
When You Subscribe, You Will Get Instant Access to
- the Technique Pack: 15 yoga pose breakdowns
- exclusive online course discounts
- exclusive blogs and videos
by matt | Mar 25, 2022 | Main Page Display
KING COBRA POSE
YOGA ANATOMY • BIOMECHANICS • TECHNIQUE
5 Key Actions to Decompress Your Spine in King Cobra Pose
Not all that glitters is gold, and without the right approach, this glorious backbend may not be a shining example of spinal health.
King Cobra is no doubt a visually stunning yoga posture. When we see the outward execution of the pose, we see strength and confidence, and the pose may even appear to express maximum spinal mobility. It’s important, however, to understand that there are key actions to take in order for all of these things to be true.
In this King Cobra tutorial, Matt provides a step-by-step process of these actions in order to emphasize the process and the development of the body to prepare for the posture, rather than emphasizing the “achievement” of the pose purely for the aesthetics.
ANATOMY
The awareness of your anatomy is vital for you to understand each step. Understanding your anatomy helps you more clearly and intentionally connect with the sensations in your body, therefore cultivating a more direct line of communication from your brain to your body and from your body to your brain. The development of these signals will promote a more sophisticated body awareness that will help you activate the appropriate muscles (without overdoing it) and know exactly what directions not only to take but also to maintain in a particular part of your body as you layer on each action.
5 KEY ACTIONS FOR KING COBRA POSE
You might think that it’s all about your spine and how flexible and/or mobile it is. How we involve our entire body is key, and Matt provides the roadmap with the following 5 key actions to set up King Cobra.
- Bring the chest forward. In the first few attempts, it may feel as though not much is happening, but this is where the mind-body connection is developed.
- The second action, which may be overlooked, is pressing back through your heels while the feet are in dorsiflexion (this is also important later). Press your heels away from the direction of the chest. What does this do, and why is it important? This is the first step in both the awareness and the action of decompressing the spine. Creating this length is crucial as Matt guides us through the next steps:
*But let’s pause for a moment and check in with your abdominals–if you are engaging too much here, then this will reduce the amount of expansion in your extension for your backbend, so leaning into a stretch sensation in your front body is helpful.
- Next on board are your hamstrings–once you bend your knees, you’ll be firing up and activating your hamstrings. This is how the dorsiflexion of your feet can be a great action to take as you build a relationship with how much and/or how little your hamstrings do activate. In the video, Matt explains that pointing the feet (plantar flexion) may cramp your hamstrings because you are shortening the posterior chain too much. He also notes that once your body has enough mobility to point your feet, there is absolutely nothing wrong with doing it.
- In this step, we understand why the layering is important. As the knees are bent and you’re potentially trying to get your feet closer to your head, Matt again emphasizes pulling your spine forward. Your body may feel the need to compress here and shorten. You might feel the desire to actually send your chest and head back to “achieve the desired result.” It’s most important here to come back to the development and preparation for the spine.
- This step really goes hand in hand with #4, but pulling your belly up not only makes a significant impact on the experience within you body but also actually brings your head back slightly. (You can see the visual change when Matt layers on this action in the video.) This action is initiated by engaging the deep core muscle called transverse abdominis.
When You Subscribe, You Will Get Instant Access to
- the Technique Pack: 15 yoga pose breakdowns
- exclusive online course discounts
- exclusive blogs and videos
by matt | Mar 22, 2022 | Main Page Display
WILD THING SHOULDER ALIGNMENT
ANATOMY • BIOMECHANICS • TECHNIQUE
WILD THING SHOULDER ALIGNMENT
What is the correct shoulder alignment for the pose we call Wild Thing? To answer this, we would first have to define the guidelines for “right” and “wrong.” The fact is there are many ways you can align the shoulder, and you will be able to find at least one yoga teacher who would validate each alignment as “correct.” We need context and agreed objectives.
For this discussion, the objective is to access greater mobility by utilizing the strength of the rhomboids. Our context for what is correct is based on two questions:
- What will provide us with the greatest access to the pose we call Wild Thing?
- How can we minimize the risk of injury in our pursuits of the posture?
THE BIOMECHANICS
In the video below, you will notice two key points. First is the rotation of the arm bone (external), which pairs with retraction of the shoulder blade. Second, you will see that in Wild Thing, my shoulder is NOT stacked directly above the wrist.
There are two reasons we focus on external rotation. First, it helps stabilize the arm bone in the shoulder socket (glenohumeral joint), which tends to be challenging for most people — it’s safe to say that most humans are chronically internally rotated at the shoulder. The second reason is that external rotation in this position helps to retract and depress the shoulder blade. As a result of these actions, you will feel your spine move into a backbend so long as you don’t do anything to counteract the movement.
Wild Thing shoulder alignment is not just about the shoulder; it also helps to prepare your spine for the deep backbend that Wild Thing requires.
The Risk: If you skip these steps, you will likely wind up with pressure, strain, or pain at the front of the shoulder joint. Additionally, your posture will feel more like a 3-Legged Tabletop than an expansive heart opener.
THE 3 ACTIONS TO ACHIEVE THIS “WILD THING SHOULDER ALIGNMENT”
Essentially, the objective is to get the shoulder back behind you. The primary muscles that will do that are called the rhomboids. The muscles that restrict this movement are called the pectorals. Action 1 helps to unlock the pectorals. The following 3 actions should be done PRIOR to rising up, not after. Additionally, do not stack your shoulder over the wrist.
THE ACTIONS
Action 1: Shoulder elevation
Relax and allow the shoulder to rise up toward your ear. This will turn off your pectoralis major and minor, which will provide greater mobility when you attempt to do Actions 2 and 3.
Action 2: Retract your shoulder blade
With the shoulder up toward the ear, pull your shoulder blade toward your spine, this will move the head of the arm bone back, lengthening your chest muscles.
Action 3: Rotate the arm externally
Rotate the arm bone outward until you feel your rib cage press forward and your spine move into a back bend. This step will also bring the shoulder blade back down your back (away from the ears).
TRANSITIONING FROM THE GROUND TO WILD THING
As you rise up from the ground, you will notice that you will be tempted to undo the shoulder alignment. I suggest filming yourself so you can observe with your eyes, as it can be easy to feel like you are doing one thing while the body is doing another. Rewatch the above video and you will see that as I rise up I am deliberately rotating the arm bone outward and the moving the shoulder blade backward.
KEY POINT: THE SHOULDER IS NOT STACKED OVER THE WRIST
Notice that as I rise up, I keep moving my weight into my legs and using the strength of my legs, buttocks, and back to press my body to the sky. This is to take the stress off of the shoulder and minimize the risk of shoulder injury. Using your legs and back muscles will also help you deepen the posture.
To learn more about the anatomy, biomechanics, and techniques you can apply to advance your asana practice, join the Anatomy in Motion immersion. This immersion is unique in that each class begins with a visual anatomy tutorial, helping you see how your muscles create movements. Following the tutorial, you learn how to incorporate this knowledge into your practice, and most importantly, you learn to FEEL your anatomy.
The 200 Hr. Teacher Training: Click Here to See the Next Start Date
This is for you if you are interested in deepening your yoga practice, building your confidence, learning how to create a class, and sharing this practice with friends, family, or beyond. Yes, it’s for all levels, ages, etc.
The 300 Hr. Advanced Teacher Training: Click Here to See the Next Start Date
This training is definitely for you if you are already certified at the 200 or 500 hour level but want to take your teaching career and practice to the next level. In this training, you will learn Anatomy, Biomechanics, Postural Techniques, Intelligent Sequencing, Breathwork, Meditation, Heart-Centered Philosophy, Theming, Business Structure, Marketing, Social Media, Branding, and how to build a sustainable and successful career!
Article by Matt Giordano
Video Extracted From: Mobility Immersion
When You Subscribe, You Will Get Instant Access to
- the Technique Pack: 15 yoga pose breakdowns
- exclusive online course discounts
- exclusive blogs and videos
by matt | Mar 2, 2022 | Main Page Display
KNEE HYPEREXTENSION
HOW TO SOLVE HYPERMOBILITY IN PYRAMID POSE
KNEE HYPEREXTENSION: PROTECT YOUR KNEES IN PARSVOTTANASANA, PYRAMID POSE
When it comes to our asana practice, more often than not, the subject of our knees is a hot topic. Typically, we’re looking for ways to minimize pain and/or strengthen the knees in order to feel stable when holding certain joint alignments or while bending and straightening our legs during transitions from one posture to the next.
It’s not unusual to utilize props like blankets or an extra roll of a yoga mat under our knees in an effort to minimize painful sensations in postures where our knees are making direct contact with the floor or our yoga mats.
In regard to creating more stability or feeling stronger in a particular posture, we may utilize yoga blocks, a wall, and/or a chair to help us maintain better alignment in order to hold ourselves up for a longer period of time without concern for our balance.
PARSVOTTANASANA/PYRAMID POSE
Pyramid Pose is a single-legged forward fold that requires a reasonable amount of hamstring flexibility. This can affect us in a couple of different ways.
As practitioners, we may fall under two different categories. When exploring a posture like Parsvottanasana, or Pyramid Pose, we may be the type to either hyperextend in the knee (due to overflexibility in the hamstrings), or we may overbend in the knee to compensate for the lack of flexibility we are experiencing in the hamstrings. In both scenarios, be mindful to straighten the leg to the degree that’s possible without overdoing either end of the spectrum. So, what category do you fall under, and how can you support your practice in a way that provides you with the tools you need to stay safe?
In today’s video, Matt provides thorough examples of ways we can take action to level up our capacity for strength and flexibility in Pyramid Pose.
HYPEREXTENSION OF THE KNEE
How does this happen?
Hyperextension of the knee may develop over time for those of us who have spent a great deal of time creating flexibility in our hamstrings and are arguably “overflexible” in this area. This often means we lack strength and/or have neglected to put effort into activating the hamstrings.
Matt explains that if we are hyperextending through the knee joint, we are creating pressure there and that this is the key point. If there is evidence of pressure, this is cause for concern. The pressure comes from overly straightening the knee. It’s actually not about the angle of the knee but about whether or not we are placing pressure there.
ACTIONS TO CREATE STRENGTH
Action 1
In the video, Matt shows us how to press the big toe and pinky toe down while lifting up through the heel, which activates the gastrocnemius (calf muscle that attaches to the back of the femur bone), causing the knee to bend.
Action 2
He adds on the action of activating the hamstring by pulling the ball mound of the foot towards the back of your mat while the heel is lifted. This will contribute greatly to the strength of the hamstrings. Engaging the muscles helps us hold the joints in better alignment, therefore also addressing our need for better stability and balance.
OVERBENDING THE KNEE
While some people struggle with hypermobility, others struggle to straighten the leg. In the latter case, the hamstrings are caught in a shortened holding pattern. Just stretching over and over again will not teach the body to release tension. There is, however, a solution to gain range of motion, and it too involves activating our muscles — in this case, it’s the quadriceps, the 4 muscles of the thigh. Their primary role is to straighten the knee. Matt demonstrates how we can achieve this by pulling the kneecap up. This action of “reciprocal inhibition” contributes to our ability to find better range of motion and improved flexibility in the hamstrings over time.
Understanding our bodies and getting in tune with our tendencies unlocks opportunities for a fuller experience in our postures.
Once we tap in and take the necessary actions, what we uncover is limitless potential.
This potential is waiting for you in Matt’s current 12-class immersion, titled Mobility. You get lifetime access to this immersion, in which Matt takes you on a journey through the major areas of the body, exploring how to increase mobility while simultaneously developing greater muscular strength and integrity. Instead of sacrificing your joints for the sake of achieving a posture, you will learn how to keep your joints safe by developing the necessary strength in each area of the body.
The 200 Hr. Teacher Training: Click Here to See The Next Start Date
This is for you if you are interested in deepening your yoga practice, building your confidence, learning how to create a class, and sharing this practice with friends, family, or beyond. Yes, it’s for all levels, ages, etc.
The 300 Hr. Advanced Teacher Training: Click Here to See The Next Start Date
This training is definitely for you if you are already certified at the 200- or 500-hour level but want to take your teaching career and practice to the next level. In this training, you will learn Anatomy, Biomechanics, Postural Techniques, Intelligent Sequencing, Breathwork, Meditation, Heart-Centered Philosophy, Theming, Business Structure, Marketing, Social Media, Branding, and how to build a sustainable and successful career!
Article by Trish Curling @anioyoga
Video Extracted From: The 200 & 300 Hour Trainings
When You Subscribe, You Will Get Instant Access to
- the Technique Pack: 15 yoga pose breakdowns
- exclusive online course discounts
- exclusive blogs and videos
by matt | Feb 28, 2022 | Home Page, Main Page Display
DEEPER TWISTS
INCREASE SPINAL MOBILITY WITH THE FIRE LINE
DEEPER TWISTS & SPINAL MOBILITY: “FIRE LINE”
Do you correlate strength with twisting postures in your yoga practice, or is it flexibility that comes to mind first? There’s no doubt that both strength and flexibility are required for deeper twists, but let’s shine the spotlight on strength as we take a deeper look into how we can unlock our true potential when it comes to the execution of twisting postures in our asana practice.
YOUR INTENTION FOR THE TWIST
Twisting postures in yoga are known for their multitude of benefits. Let’s understand though that our intentions behind various twisting postures and the ways in which we execute them can benefit vs. harm our bodies to varying degrees. We may also have very different reasons for incorporating twists into our asana practice. If the goal is to create more of a therapeutic experience, then gentler twists may be the appropriate approach to take. If the intent and/or purpose is to work more deeply into a twist, then there are ways to heighten the experience with proper awareness and activation (we’ll see this shortly with Matt’s unique approach). Whether there is some level of vulnerability due to injury or not, doing things like pushing through the arms or trying to force more deeply into a twist can in fact cause harm, and this is never the desired outcome.
Yes, all movements on or off the mat will indeed place varying degrees of pressure on the discs in our spine, and, outside of the body’s natural resilience, there are ways in which we can create more integrity to support these movements. Although simply by twisting, we increase the amount of pressure on the spinal discs, twisting is also the answer to the question of how to increase their health.
Our discs require nourishment, and I love the sponge analogy — the “squeeze and soak effect” — when considering how to stimulate this nourishment. An appropriate twisting action or posture can actually help to equalize the pressure in the discs by supplying them with fluid, which allows them to expand. This creates more space and shock absorption between each vertebra, allowing your spine to react with more resilience to movements that create more weight, pressure, and/or impact in your body.
Now, Matt’s approach to twists is quite unique and extremely effective. His approach asks you to bring your focus and awareness to where you can create activations with more intention in order for your body to respond with greater ease.
WHAT IS THE FIRE LINE?
If you’ve been following Matt and/or practicing with him, then you are familiar with his Chromatic Approach to yoga. Regarding the physical practice, we understand this approach as systemic with a deep awareness of how we move our bodies and progress to a “peak posture.” Something Matt created is the idea of the “Fire Line,” which he describes as a kinesthetic chain of muscle activation, or a co-activated line of muscle, or a co-ordinated engagement of several muscles in order to gain greater access to balance, strength, stability, and flexibility.
MUSCLE ACTIVATION IN THE FIRE LINE
Matt starts off by explaining that we first bring our attention and awareness to the serratus anterior on one side of the body, which funnels into the external obliques through the linea alba, then traveling underneath the external obliques on the other side of the body to the internal obliques, which then go down to the opposite hip bone.
The Fire Line branches off “like a river” in 2 directions. The 1st branch goes to the outside of the gluteus maximus down through the IT band and connects to the outer shin. The 2nd branch goes from the inside of the hip—the iliacus and/or psoas muscle, which is on the inside of the bowl of your pelvis and attaches right at the inner thigh, where it meets the pelvis inside of the femoral head (inside of thigh bone). This all travels in the same direction, where we find the adductor group, which runs at the inside of your leg; some of the muscles in this group attach down at the shin.
We draw a thread of connection all the way through. Through Matt’s dedication to practice and his experience with his own body and with teaching and observing his students, he realized that activating this line allows the yoga practitioner to execute a variety of different twisting postures with great integrity and ability.
He highlights that the “center of the fire” is right at the core. We must recognize that the fire goes inward and creates a rounding through the back of the body. The key is to bring awareness to this rounding by exaggerating a pulling back of the ribcage.
With all of this in mind, we can see why strength plays a key role. Instead of just “dumping,” or forcing our bodies into a twist, we very thoughtfully engage the muscles in this Fire Line to more safely and deeply experience a variety of twisting postures.
REVOLVED CHAIR POSE
Take a close look at Matt’s deliberate actions in today’s video. What we see is not only the chromatic approach, the build, the preparation; but we see the activation of the fire line in order to avoid the collapse into Revolved Chair Pose.
When we approach twisting postures with strength as the anchor, not only do we execute twists with more purpose, but overall we feel more empowered in our bodies and our practice. What a beautiful outcome.
Imagine getting this type of insight on your practice on a regular basis, and being able to integrate it into your mind and body. Online Immersions with Matt are the perfect way to get techniques like the fire line into your practice. Each immersion consists of 12 all levels classes so you can advance your body awareness and deepen your practice.
If you have been practicing with the immersions than you know exactly how powerful and effective they are.
But what if you want to share this knowledge with others? Take advantage of the opportunity to study with Matt in his upcoming teacher trainings. His 200 and 300 Hr trainings are open for enrollment.
The 200 Hr. Teacher Training: Click Here to See The Next Start Date
This is for you if you are interested in deepening your yoga practice, building your confidence, learning how to create a class, sharing this practice with friends, family or beyond. Yes it’s for all levels, ages, etc.
The 300 Hr. Advanced Teacher Training: Click Here to See The Next Start Date
This training is definitely for you if you are already certified at the 200 or 500 hour level but want to take your teaching career and practice to the next level. In this training you will learn Anatomy, Bio-mechanics, Postural Techniques, Intelligent Sequencing, Breathwork, Meditation, Heart Centered Philosophy, Theming, Business Structure, Marketing, Social Media, Branding and how to build a sustainable and successful career!
Article by Trish Curling @anioyoga
Video Extracted From: The 200 & 300 Hour Trainings and April 2020 Immersion “The Greatest Hits”
When You Subscribe, You Will Get Instant Access to
- the Technique Pack: 15 yoga pose breakdowns
- exclusive online course discounts
- exclusive blogs and videos
by matt | Nov 17, 2021 | Main Page Display
REVERSE WARRIOR
INCREASE BACK FLEXIBILITY WITH THIS PARTICULAR ALIGNMENT
REVERSE WARRIOR: PREPARE FOR BACKBENDS
Full expansion, widespread freedom, release, and openness — this might describe what we feel as yogis when it comes to the shape of a backbend or heart-opening posture in our yoga practice. We might see ourselves floating easily into this posture and enjoying the lengthening in our front body along with the confidence and strength we embody in our upper and back body (depending on the posture).
Alternatively, we might think about pain, tension, injury, constriction, fear, limitation, even inadequacy if we can’t “achieve” the posture. These are all real experiences, thoughts, and emotions we may have when it comes to backbends. We must always consider, however, what our intent is when it comes to our practice and how we can still find enjoyment and expansion within our bodies, hearts, and mind.
Backbends are also referred to as heart openers because they are associated with doing just that: opening your heart from what may be closed off, such as buried energy and/or emotions like fear, mistrust, sadness, or frustration and anger. We may go to backbends in our practice to shift this energy, to release it. Through this idea, we can create more space between ourselves and our pain. If we can’t make these shapes with our bodies for various reasons, do we not have the ability to shift these energies? The answer: Of course we do.
If it’s not an injury or condition that is preventing you from creating these shapes, you can approach a backbend through preparation. (This is not to say you can’t experience release in other ways, like using pranayama to unlock freedom, but that is for another discussion.) Begin by stepping back from what you envision as the end result and looking at placing your attention on areas that focus your mind, prepare your body, and allow you to let go of outcomes.
I’ll show you how we can do this with Reverse Warrior. If we place our awareness specifically on how we execute lateral flexion with the torso in this posture, it offers solid preparation for backbends. It takes our focus into the process. We are investing “well-placed effort” in how we deconstruct the appropriate actions. We can then experience and feel more expansion, opening, freedom, and release with this “preparatory posture.”
The required flexibility in this posture is directly parallel to the flexibility required in a backbend. I’ll discuss this further. Let’s talk about this well-placed effort first.
Abhyasa and Vairagya in Our Asana Practice
In Tantra of the Yoga Sutras, Alan Finger eloquently explains the ideas of abhyasa and vairagya, “the forces of effort and surrender” [Sutras 1.12 – 1.16], in our asana practice:
“Abhyasa means making your best effort to focus all the vritti* on one single point, whether it is an action, object, thought, or image … Vairagya is the second part of the recipe. Vairagya is the ability to let go of any desire for the fruits of our efforts to focus the mind. This allows our consciousness to take action in the world without attachment.”
*Vritti is the Sanskrit word for all the images, thoughts, emotions, reactions, and belief patterns that are the activity of the mind.
Finger, Alan. Tantra of the Yoga Sutras Pg.22 – 27 )
With this understanding of abhyasa, we can place our attention on how we execute Reverse Warrior for better preparation for heart openers.
Required Flexibility For Backbends
Wheel Pose (Urdva Dhanurasana) and Camel Pose (Ustrasana)
Just by simply looking at the shapes below, we can see the similarities.
Both of these postures require flexibility in the pectorals, front deltoids, abdominals, and hip flexors.
How does this compare to Reverse Warrior?
Reverse Warrior requires lateral flexion of the spine, opening the internal and external oblique muscles because of the side bend. It requires flexibility of the latissimus dorsi, rectus abdominis, and the lower fibers of the pectoralis major for greater extension of the spine.
In the video, Matt demonstrates the added “lift of the heart more forward and up.” This is in fact that well-placed effort (abhyasa). Lifting and turning the heart may seem like a small action, but it is actually how we prepare with much more intent for the backbend. Matt describes how with this action, we open the obliques, crossing the whole mid-section into the linea alba, opening up the side body muscles. Adding the turn, we stretch the rectus abdominis to provide us with greater extension of the spine. Greater extension also means more access to a particular backbend.
Bringing It All Together
What is our intention? We must ask ourselves this question. Is it the outcome or the experience? If we can settle and focus the mind with well-placed effort (abhyasa) at the same time as releasing expectation for the outcome (vairagya), we can let go of the mind attachments and just experience. Abhyasa and vairagya, when practiced together, help us to release, even dissolve our attachments. Is it not then arguable that in this state, we are experiencing the freedom, openness, vulnerability, and expansion we desire from backbends?
Let’s actualize this state of being in our practice as a whole. Let’s step into this in Matt’s current immersion, Spinal Awakening, where he explores movements of the spine, always through the lens of abhyasa and vairagya.
The focus in this immersion is on heart openers, twists, side bends, and forward folds.
Matt’s intention and emphasis is always about you getting to know your body in order for you to tap into your own individual highest potential. This looks like and is expressed in many different ways. Matt invites you to let go of defining yourself as a specific kind of practitioner and encourages you to delve into your own path without any burden of what the outcomes may look like.
Let’s meet with open hearts on the mat in Spinal Awakening.
It’s never too late to join in. Click here to gain lifetime access to the immersion and to yourself!
Written By Trish Curling @anioyoga
When You Subscribe, You Will Get Instant Access to
- the Technique Pack: 15 yoga pose breakdowns
- exclusive online course discounts
- exclusive blogs and videos
by matt | Nov 11, 2021 | Main Page Display
TECHNIQUE FOR DEEPER FORWARD FOLDS
ACTIVATE TFL & RECTUS FEMORIS TO INCREASE HAMSTRING FLEXIBILITY
DEEPER FORWARD FOLDS: PRASARITA PADOTTANASANA
It’s not unusual to feel “stuck” in our yoga practice at times. We may come to a place in our physical practice where we are not experiencing our full potential. One of the common areas we may feel “stuck” is with our flexibility.
In my previous article, Healthy Hamstrings, I discussed a technique Matt shows us to create more flexibility in our bodies: facilitated stretching. There is yet another technique to encourage a flexible body, which I want to discuss more here. That’s reciprocal inhibition.
Reciprocal inhibition is doing the opposite of what a facilitated stretch asks us to do. It’s true that we are still activating muscles in order to achieve greater flexibility, but we are now activating the muscles that oppose the muscles that are stretching.
In today’s video, Matt demonstrates how to explore these actions in Prasarita Padottanasana: Wide-Legged Forward Fold.
PRASARITA PADOTTANASA: WIDE-LEGGED FORWARD FOLD
In Prasarita Padottanasana (an open-hip posture), our legs are in abduction, while we also flex at the hip. This position requires flexibility in our hips, adductors, and hamstrings, and there are also key areas to explore activation of potential strength. These areas include adductors, abductors, quads (including the rectus femoris, which is also a hip flexor), and hamstrings.
Activating the adductors and hamstrings supports the facilitated stretch technique because those muscle groups are already being actively stretched. On the other hand, activating the abductors and quadriceps generates the reciprocal inhibition technique, because those muscles oppose the adductors and hamstrings. In this video segment, Matt demonstrates why and how to activate the quadriceps and one of the abductors, called tensor fasciae latae, or TFL for short.
PREPARE THE POSTURE
With your feet spread wide on your mat, turn your thighs slightly inward. This will allow your toes to also turn slightly towards one another.
With your hands on your hips, initiate an anterior tilt of your pelvis as you tip your torso forward.
Hands come to the floor or blocks in front of you to support. If your hamstrings feel tight in this position, reciprocal inhibition is about to help with that.
How to Activate Your Quadriceps: Reciprocal Inhibition Technique
Activate your quads by energetically lifting your thighs away from your knee caps.
Feel as though you are drawing your upper thigh bones up into your hip socket. Matt describes this as almost “suction-cupping” your thigh bones upward, which will help turn on hip flexors and quads.
You activate reciprocal inhibition the moment you engage your quads, because when these muscles are activated, the opposing muscles release (in this case, the hamstrings), and you’re able to relax more deeply into the pose.
TENSOR FASCIAE LATAE (TFL) ENGAGEMENT FOR DEEPER FORWARD FOLDS
Just as activation of your quad muscles, in particular the rectus femoris, will help you deepen into your forward fold, Matt explains that activating the TFL (tensor fasciae latae) will also deepen forward folds. Like the rectus femoris, the TFL is also a hip flexor but can be easier to engage because of its additional functions as an abductor and internal rotator. By isometrically pressing your heels away from each other, you will trigger TFL to engage. Pushing the heels or backs of the legs away from each other is both abduction and initiates internal rotation. If you don’t know these anatomy terms, do not worry; just apply the action of pressing the backs of the legs apart and you will feel your outer hips engage, supporting you in tipping your pelvis forward.
Why take this approach?
Aside from achieving deeper forward folds, is there a reason to apply this approach? We must, in a sense, be a “professor in our postures.” What does this mean?
It means that there is infinite space for inquiry in our practice. Each time we step onto the mat, we have an opportunity to examine and reflect on how we approach our practice. Equipped with this kind of knowledge, our practice becomes more informed and supports our ability to realize our potential and create resilient and healthy tissues. Then we really start tapping into what is available to us in our bodies by using fundamental actions that our bodies are so brilliantly designed to perform.
Matt’s November 2021 Immersion, Spinal Awakening, includes the following:
- Twists • side bends • forward folds • heart openers
- Techniques to strengthen and mobilize the spine
- Releasing back tension and discomfort
- Twelve 75-minute classes, all levels appropriate
- Advancing your postural practice
- Lifetime unlimited access to all
Take advantage of this opportunity to awaken both mind and body.
Already have Spinal Awakening and want another immersion to support you in deeper forward folds? We suggest the Hips & Hamstrings Immersion!
Written By Trish Curling
When You Subscribe, You Will Get Instant Access to
- the Technique Pack: 15 yoga pose breakdowns
- exclusive online course discounts
- exclusive blogs and videos
by matt | Nov 1, 2021 | Main Page Display
SIDE CROW: POSE TUTORIAL
UNLOCK YOUR ARM BALANCE PRACTICE
Side Crow is a challenging yoga posture, but it is more accessible than most people think. There are ways of “cheating” in the posture that can make the shape more attainable, such as placing your hip on your elbow. In this tutorial, we won’t be going over that version. The intent here is not to help you attain a shape but rather for you to gain both a greater awareness of how your body works and ways in which you can strengthen it. As a result of increased strength and body awareness, postural attainment is inevitable, but the process is far more fulfilling and long-lasting.
WRIST STRENGTH TO BREAK THE FEAR
Side Crow is a yoga pose that requires a twist of the spine, and like all other arm balances, upper body strength and technique are a must. The most important muscle group to strengthen is the flexors of your wrists. These are the muscles that stop you from falling, and since fear of falling often holds people back, you will want to make sure these muscles are ready for the job. The easiest way to strengthen the flexors of the wrists is to start gripping your fingers into the ground. Of the muscles in this muscle group, 2 are in charge of finger flexion as well. Finger flexion is like making a fist or grabbing something. Grip the ground in postures like All 4s, Down Dog, Plank Pose, and Chaturanga, and with repetition, you will get stronger and stronger.
UPPER BODY STRENGTH FOR ARM BALANCES
The second important muscle group to focus on when working toward Side Crow are the shoulder muscles, namely the serratus anterior, rotator cuff, anterior deltoids, and pectoralis muscles. For the purpose of this article, we don’t need to get into what each of these muscles does; just know that they form the structure for your arm balances. Mostly, what you need to do is try and maintain Plank Pose with a rounded, full upper back, where your shoulder blades are apart from each other. Minimize the elbow bend — most people bend their elbows too much and lose stability in the upper body, making the foundation spongy. A microbend at the elbows is all you need. See the video below to get an idea of how much to bend.
THE PRIMARY AND SECONDARY FOUNDATIONS
Now let’s get to the good stuff! All arm balances have what I call “2 foundations.” You have the primary foundation, which is the hands — this is most important. Then the second foundation is where the leg(s) rests upon the arm. With all foundations, we want to dig downward like a tree rooting into the soil. The fingers gripping the earth is a downward dig. For Side Crow, our second foundation is where the thigh connects to the arm. If you press the thigh down into the arm, your hips magically lift. It’s not magic actually; that’s just the mechanics and science. In this case, the muscles that do the pressing down are called the abductors (gluteus medius, gluteus minimus, gluteus maximus, and tensor fasciae latae). To get these stronger, follow along with the video below.
THE CORE: WHY ARE THE LEGS APART?
The last point of discussion is what connects the upper body and lower body: the obliques. Because this posture is a twist, the major core muscles that we need to activate are the external obliques. These muscles will help us to twist, and in the case of Side Crow, we can actually use them to untwist. This is confusing, but once you are in the shape of Side Crow, you are working to untwist along with the abductors, which will keep your buttocks up high and make the posture feel light instead of heavy. In the video, I go over some oblique warm-ups. When you are in Side Crow, it is quite hard to think about untwisting, which is why I show you a technique hack. By abducting the legs away from each other in Side Crow, you will automatically untwist the spine, and your hips will have to lift upward. The abductors of the hips and the obliques work together in this action, and you won’t have to waste brainpower trying to make it happen.
When You Subscribe, You Will Get Instant Access to
- the Technique Pack: 15 yoga pose breakdowns
- exclusive online course discounts
- exclusive blogs and videos
by matt | Oct 13, 2021 | Main Page Display
HEALTHY HAMSTRINGS
FACILITATED STRETCH TECHNIQUE
Hip And Hamstring Flexibility
Why Is Hip Mobility Important?
Tight hamstrings are a common complaint. This may be because it’s one of the most noticeable things to show up in our yoga practice and in our daily lives. How many times have you heard someone say, “I can’t even touch my toes anymore!” Or maybe you have said this yourself. Now, touching our toes does not define our worth; the awareness of this limitation and tension in this area of the body simply provides opportunities for us to investigate. Too often, this investigation leads to repeatedly stretching the area in order to lengthen and hopefully release the tightness. However, continuously stretching hamstrings will not likely provide us with the flexibility we desire and may actually cause further tension, pain, or injury to hamstrings and other areas in our bodies. In order to increase flexibility while maintaining the health of the muscles, we must incorporate a technique called facilitated stretching.
WHAT EXACTLY IS MUSCLE TIGHTNESS?
First, let’s discuss why muscles become tight. Muscle tightness results from an increase in tension through active or passive mechanisms. Passively, muscles can become shortened through postural adaptation — think sitting, or walking in high heels all day — or through injury and scarring. Actively, muscles can become shorter due to spasm or contraction. Regardless of the cause, tightness limits range of motion and may create a muscle imbalance.
Page, Phil. “Current concepts in muscle stretching for exercise and rehabilitation.” International journal of sports physical therapy vol. 7,1 (2012)
What is facilitated stretching, and how can we utilize it to increase flexibility in our hamstrings?
What Is a Facilitated Stretch?
This occurs when we activate, or contract, the same muscle(s) we are stretching. There are two types of muscle contractions — isotonic and isometric: “An isotonic contraction is a voluntary muscle contraction that causes movement … An isometric contraction is a voluntary contraction in which no movement occurs.”
Charland, Jeff & McAtee, Robert E., Facilitated Stretching Fourth Edition, 2014
The latter is the action we adopt in a facilitated stretch. Knowing this is important because it is how we maintain the health and integrity of the muscle. If we don’t engage our muscles, eventually they might lose their ability to contract. Losing this ability can lead to imbalances in our bodies; when these imbalances are significant, we can experience a decrease in range of motion. This decrease can lead to injury or chronic pain.
IMPLEMENT FACILITATED STRETCHING
How can we cultivate this in our practice?
One of the best ways to incorporate facilitated stretching into our practice is to go slowly and to utilize props that will support the process. In the video below, Matt demonstrates the use of a facilitated stretch in forward fold, using a chair. He breaks it down into 4 digestible actions.
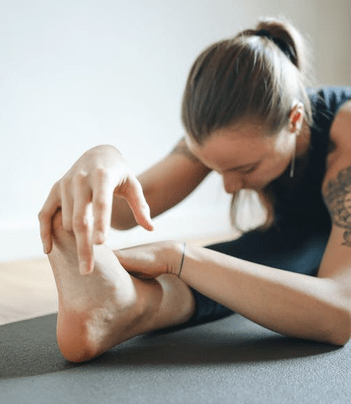
Four Actions to Utilize Facilitated Stretch in Forward Fold
- Lean forward into the big toes.
- Press the back of the hamstrings apart.
- Move the sit bones up to the sky (will pull up on the hamstring and start to straighten the knees).
- Move the sit bones down toward the heels, but don’t move your pelvis.
STRATEGY FOR HEALTHY HAMSTRING FLEXIBILITY
You may also enjoy the original blog paired with this video, “Avoid the Yoga Butt”
Suggested Immersion: Hips and Hamstrings: 12-Class Immersion
WHAT IS PNF?
Facilitating these actions may also be referred to as proprioceptive neuromuscular facilitation (PNF).
“Multiple studies have shown that PNF stretching is superior to traditional static stretching in terms of improving active and passive range of motion. It can be used to supplement daily, static stretching and has been shown to help athletes improve performance and make speedy gains in range of motion. Not only does it increase flexibility, but it can also improve muscular strength. What’s more, PNF stretching is believed to repair the microscopic damage that typically follows a high-intensity workout.”
Wicke J, Gainey K, and Figueroa M. A comparison of self-administered proprioceptive neuromuscular facilitation to static stretching on range of motion and flexibility. Journal of Strength and Conditioning Research. 2014; 28(1): 168–172.
Sharman MJ, Cresswell AG, Riek S. Proprioceptive neuromuscular facilitation stretching: Mechanisms and clinical implications. Sports Medicine. 2006; 36(11): 929-39.
All that being said, it’s important to also consider the amount of activation we utilize. It’s recommended that we only engage roughly between 15% – 20%. We want to stay on the side of a more conservative amount of force so as not to channel too much force to the joints, thus minimizing injury.
To more fully understand this, click here for Matt’s 12-class immersion
Hips & Hamstrings, which took place in June 2021. To help you explore and uncover the strength in your own body, Matt’s new 12-class immersion, Strength, starts in October. Sign up today for lifetime access.
Written by Trish Curling
Handstand Training
Learn the techniques that make Handstand fun, easy and accessible! This 2 part course consists of the top most effective exercises will increase your strength and technique so you can easefully balance a handstand.
View Details
SHOULDER REVELATION
In this 12 class immersion you will practice specific techniques to strengthen and unlock your shoulders. Each class focuses on a specific joint articulation and muscle group so you gain mastery in the shoulders.
View Details
HEART OPENERS
Finally, a 12 class immersion designed specifically to help you discover the freedom of heart openers. Learn how to avoid uncomfortable compression, and awaken your true range of motion in a step by step manner.
View Details
When You Subscribe, You Will Get Instant Access to
- the Technique Pack: 15 yoga pose breakdowns
- exclusive online course discounts
- exclusive blogs and videos
by matt | Oct 1, 2021 | Main Page Display
YOGA JUMP BACKS & JUMP FORWARDS
THE DREAMY, MYSTICAL FLOAT
dreamy yoga jump backs and jump forwards
We’ve all seen those yoga teachers and/or practitioners who float through the transitions of jumping back from Uttanasana to Chaturanga and/or jumping forward from Downward Facing Dog to Uttanasana. They seem to have hang time like Michael Jordan going in for a dunk. It can be absolutely mesmerizing to watch the ease with which they execute these transitions. There’s no magic pill to take when it comes to building these transitions into your practice. It is also important to note that it absolutely does not have to be a goal to build the “end result” into your practice, but the drill we see in today’s video (“The Slide Back”) can be done simply with the intention of building strength and awareness in our practice overall.
Like anything else, it’s revisiting drills like these repeatedly over time that helps us to see transformation in our bodies and in our practice as a whole. What we ultimately gain is a deeper awareness of our bodies. This awareness shows us what we need to strengthen and where we need to place our bodies in space.
WHAT DO WE NEED TO STRENGTHEN?
When jumping back into Chaturanga, it’s true that we must cultivate strength throughout the body as a whole unit, but there are some key areas where we need to bring our focus and attention.
Wrists
We’re required to bring our wrists into extension in order to stack our bodies above our hands and to bear the weight of our bodies. We also grip our fingers into the floor in order to recruit and strengthen the forearm muscles.
Serratus Anterior
Pushing the floor away and creating fullness in your back creates protraction of the scapulae. The activation of the serratus anterior slows the descent of the body into Chaturanga, where the scapulae will then find retraction.
Pectoral Muscles
Placing our hands wider than shoulder width apart and turning the hands out as if turning two knobs away from one another (along with the protraction of the scapulae) helps to turn on (contract) the major pectoral muscles. This happens when we find external rotation of the humerus while the elbows rotate in. This helps to draw the energy in towards the midline of the body.
Triceps
The triceps also play a role in stopping you from bending too soon. The triceps help to oppose the action of the joints (i.e., elbows bending too much and too soon).
5 STEPS TO FOLLOW
“Slide Backs”
For this drill, you can use a blanket or towel on a hardwood floor. Alternatively, you might wear socks or use sliders on a carpeted floor.
- Place hands on the ground wherever they go (might be far out)
- Turn hands out
- Lean forward with chest and grip the fingers
- Grip the ground and slowly slide the blanket back to a plank position
- Slowly pull it forward: “Jump Forward”
SLIDE BACKS LEAD TO JUMP BACKS
The slide back drill is great preparation for the “dreamy jump back” because of all of the pieces we have to put together in order to execute. But it’s in this process of self awareness, reflection, and inquiry into the body where we build a deeper relationship with our own individual yoga practice.
You can continue to explore strength and the ways to slowly cultivate it in Matt’s October 2021 Immersion, Strength
Practice with Matt live and get lifetime access to:
- 12 classes: Each class targets a specific muscle group
- Strengthen your core, back, hips, shoulders, wrists, ankles, legs, and arms
- Learn creative ways to strength train within the context of a yoga practice
- Increase mobility by balancing your strength with oppositional muscle groups
- Joyful accountability to help you reach your practice goals
See you on the mat!
~Written and Edited by Trish Curling
Livestream Class Packages
When You Subscribe, You Will Get Instant Access to
- the Technique Pack: 15 yoga pose breakdowns
- exclusive online course discounts
- exclusive blogs and videos
by matt | Sep 28, 2021 | Home Page, Main Page Display
SELF ADJUSTMENT IN SIDE ANGLE POSE
ACTIVATE YOUR GLUTES FOR GREATER GAINS
SELF ADJUSTMENT IN SIDE ANGLE POSE — ACTIVATE YOUR GLUTES FOR GREATER GAINS
Glute gains! Who doesn’t want those, right? When we think about glute gains though, our minds may go directly to the aesthetic appearance, when in reality, what we really need is the health and strength of that group of muscles (gluteus minimus, medius, and maximus) in order to have functional strength, balance, and endurance. We have the ability to create this reality within our bodies by way of adjustments and focused muscle activation in our physical yoga practice.
When we think about adjustments in a yoga context, it can be quite a lengthy discussion with many layers. Receiving adjustments from our yoga teachers can be a wonderfully supportive experience, while for some, it may be the complete opposite. There may be an aversion to touch for many reasons; no matter what the reasons are, they are to be 100% respected.
The Power of Self Adjustments
Now, we happen to be in a time where so many of us are still not practicing in studios or in person with our private teachers. We are participating in virtual classes more than ever. If you weren’t utilizing self adjustments before, this unique time provides an opportunity to incorporate them. This can be a transformative addition to your physical practice, whether in the studio or at home. Self adjustments offer more than you may think they do. They can be a really great way to connect with our own bodies. When we maintain awareness of the breath and connect with the specific action in the self adjustment, we can truly transform the experience we are having on the mat.
Incorporating adjustments is more than just placing our bodies into a specific alignment. Taking gradual steps through the process helps us to feel safe, therefore helping us to progress.
3 STEPS TO TAKE BEFORE SETTING UP YOUR SELF ADJUSTMENT
- Pay attention to your breath, maintain a rhythm that sends a signal to your brain that you are safe and that you are ready to sync the next action with your breath.
- Find stability first. If you need additional support in the posture, then gather the props you may need. Utilizing blocks, a chair, and/or a wall may be just the thing that helps you to find the sensation or connection to the muscle activation.
- Go for it! Perform the self adjustment. First, find the appropriate alignment in your body and then apply the action/contraction in the muscle with your own assist.
In today’s video, we can see Matt take all of these steps for glute activation in Side Angle Pose. In his preparation for the posture, he has set himself up on a chair, making himself more stable, and then he presses the knee of the front leg out into his bicep in order to turn on the abductors and gluteus muscles. He adds the action of pressing down through the heel in the front foot to turn on the gluteus maximus. These actions completely change the experience in the posture.
WHAT ARE THE BENEFITS?
The 3 Main Benefits of Self Adjustments
- Gain a sense of awareness of where we are in space (proprioception)
- Develop muscular strength
- Gain access to increase range of motion
With better proprioception (body awareness), we have a better chance of activating our targeted muscles. In the example of Side Angle from the video, the act of pressing into the bicep provides feedback into the brain and body to activate the abductors. We can understand the sensation of this activation so much more. This feedback shows us how to come back to this activation with more confidence whenever we revisit this posture in our practice. The act of that isometric contraction in the targeted muscles builds integrity and strength in the muscles and surrounding tissues. With more strength, we find an opportunity to increase more active range of motion. With better active range of motion, we in turn unleash our access to new postures. We can truly see that self adjustments provide so much more than stacking bones and joints. We are changing our experience on the mat and in our bodies as a whole.
If you want to develop more strength in your yoga practice, check out Matt’s October 2021 Immersion, titled “Strength“
If you’re ready to unleash your true potential and develop greater strength in your yoga practice, then Matt’s new Immersion Strength for the month of October is perfect for you.
In this immersion, you will gain access to:
- 12 Classes: Each class targets a specific muscle group
- Strengthen your core, back, hips, shoulders, wrists, ankles, legs, and arms
- Learn creative ways to strength train within the context of a yoga practice.
- Increase mobility by balancing your strength with oppositional muscle groups
- Joyful accountability to reach your practice goals.
~Written and Edited by Trish Curling
Livestream Class Packages
When You Subscribe, You Will Get Instant Access to
- the Technique Pack: 15 yoga pose breakdowns
- exclusive online course discounts
- exclusive blogs and videos
by matt | Sep 14, 2021 | Main Page Display
DEEPEN YOUR YOGA PRACTICE
WHAT DOES IT MEAN TO DEEPEN YOUR YOGA PRACTICE, AND HOW TO DO IT?
What Does it Mean to Deepen Your Yoga Practice?
Have you ever seen a yoga event advertising, “This will deepen your practice”? Of course you have. Every teacher training, retreat, and immersion uses this descriptor. I say this about both my 200-hour and 300-hour teacher trainings. The question is, what does that actually mean?
What Is “Your Practice”?
In order for us to discuss what deepening your practice means, we have to define what yoga practice is. This is important. There is debate about this among modern practitioners around the world because most practitioners and teachers are not actually educated on what the purpose behind yoga actually is. So let’s break it down in a way that is easy to comprehend but also maintains accuracy.
According to the lineage of Tantra yoga, we have five layers to our being, and yoga practice is the cleansing or awakening of each of these layers.
The Five Layers:
- Body: all things physical — muscles, bones, fascia, ligaments, organs, etc.
- Life Force or Energy: the energy that animates the body, allowing the heart to beat and air to flow through our lungs
- Mind: our experiential digestive system. Thoughts and emotions that help us process, express, and participate in life through this human body
- Bliss: the deeper knowing that life is a gift, and while it’s filled with pain and challenges, it is still worth waking up each day and participating in it
- Awareness/Consciousness: The core of our being, the infinite intelligence that lives within, the observer or witness. The part of us that does not judge right or wrong but simply notices what is
Most humans are very familiar with their own body and mind, or at least they are aware of their existence. However, many of us have never done the practices that connect us to ALL the layers, and as a result, we remain disconnected or unfamiliar with them.
For example, while we all know we have a body, EVERYONE has body blindspots — muscles that are weak, or joints that we don’t have full control of. Your physical practice of yoga (asana) will help illuminate your blind spots, paving the way for you to physically deepen your yoga practice.
In the same way, we can become aware of our mind layer by observing our thoughts, emotions, and behavioral patterns. Through practices of meditation, contemplation, self-inquiry, and guided discussions with a teacher (satsang), it is possible to become more awake to our inner experience and eventually make changes to our mindset and behaviors. This is how to deepen your yoga practice at the mind level.
The same is true for life force. Through practices of breathwork (pranayama) and other forms of energy observance and deliberate action, we can gain awareness and control over our energetic system.
By appropriately utilizing these practices of asana, meditation, and pranayama, we naturally peel back the layers that otherwise veil our inner self: Bliss and Awareness. AWARENESS is at the core of our being, and for us to “deepen” our practice, it’s imperative that all practices are infused with becoming more aware — more aware of body, breath, mind, bliss, and awareness of awareness.
BE DELIBERATE
It is not enough to practice routinely; we must be deliberate with our practice. You walk every single day, but when was the last time you really got any better or more aware of the way you walk? Unless you have spent time deliberately assessing your strengths, weaknesses, and walking patterns, you likely have not deepened your walking practice. The same is true on all levels of yoga practice. To deepen it, you cannot expect that just showing up for the same yoga practice every day will get you anywhere. YES, the initial year or two of doing so will bring about rapid change, but you will plateau if your practice isn’t asking you to seek out your blind spots physically, mentally or emotionally.
Do You Want to Deepen Your Practice?
If the answer is yes, then I have three ways you can do so:
- Monthly Immersions: Join one of the monthly immersions focusing on an area of your practice that challenges you.
- 200 Hour Teacher Training: This is designed to transform your physical practice and kickstart your breathwork and meditation practices while providing you with the skill set to share that with others.
- 300 Hour Teacher Training: For those already certified to teach and who want to take their practice and teaching to the next level, this will certify you at 500 hours of training.
Co-written and edited by 300-Hour Chromatic Yoga Teacher, Donna Morin.
When You Subscribe, You Will Get Instant Access to
- the Technique Pack: 15 yoga pose breakdowns
- exclusive online course discounts
- exclusive blogs and videos
Still Have Questions? Email Matt Directly
by matt | Sep 9, 2021 | Main Page Display
IMPROVE BALANCE IN STANDING POSES
FOCAL POINTS OF THE FEET
You Might Be Missing These 3 Key Components in the Feet
Standing balance postures can sometimes be a source of frustration in our physical yoga practice. We all have moments like this on the mat, and awareness of the difference between each side of the body often develops into a narrative that we have a “good side” and a “bad side.” Being aware of these differences, however, actually creates opportunity. Awareness deepens our understanding of where we need to focus our attention, so that we can develop and transform the experience we have in our bodies and shift the narrative. Over time and with consistent practice, we build strength and, eventually, better balance.
When it comes to the biomechanics of any posture, the magic lies in the most subtle movements. In my experience, there are 3 key components for building confidence and ease in standing balance postures. In this tutorial video, we will look at how these components apply to the Ardha Chandrasana set-up.
Doing The Groundwork
Doing the groundwork means exactly that. The foundation of our postures is built from the ground up. Once we understand this, we can slowly build upon this foundation. When it comes to finding steadiness in our standing balance postures, we must look at what’s happening with our feet. The position of our feet, strength of the ankles, and recruitment of the buttock muscles translates to stability in the hips. But how can we do this, and what does it look like?
LET’S SET IT UP
With your shin bone vertical to your ankle, lift all your toes up and away from your mat; this will help to activate and strengthen your tibialis anterior (the muscles in front of your shin bone). While doing this, be mindful not to send unequal weight into either side of your foot. Send equal weight into the earth. This is the first step in creating awareness and an imprint of this action into your body.
3 Key Components You Might Be Missing
- Pressing down through the big toe (and big toe mound) creates eversion of the foot. This builds sensation in the fibularis group of muscles (muscles in the outer shin).
- Pressing down through the pinky toe (and pinky toe mound) creates inversion of the foot, which helps to create a “fanning” of the three middle toes. Lifting these 3 toes helps to activate the tibialis anterior. When these actions are put into place, we will find that the tibialis posterior muscles also activate (muscles inside of the shin).
- Pushing down through the heel recruits the calf and buttock muscles.
All of these actions together create maximum support around all four sides of the ankle joint, unlocking our ability to transform our balance experience.
These are the foundations we can build upon. It’s also important to understand that we come to our physical yoga practice with an awareness that not all pieces of the puzzle always fall into place right away. Visualizing the process is a powerful first step that helps to build a neurological pathway. Then we take action, and we can even help ourselves by applying our own assists. We can get curious about parts of the body not responding to the signal from the brain quite yet. It doesn’t mean that it will never happen; it just means that it may require more patience, consistency, and time.
How do we put this into practice with standing balance postures? We lift the 3 middle toes up with one hand while pressing the big and pinky toes down. We visualize the middle toes remaining lifted off the mat, even if they’re not quite ready to do that on their own. You can practice this part of the process alone and slowly build it into other postures like Anjaneyasana or Virabhadrasana II before exploring postures like Digasana or Ardha Chandrasana.
If you want to dive deeper and you’re ready to transform the way you feel in your balance postures, you can sign up for Matt’s BALANCE Hands & Feet – July 2021 Immersion by clicking here https://www.theyogimatt.com/shop/july-2021/
Matt’s ability to guide you into the freedom of your own practice in his 12-class immersions is beyond what you’ve ever experienced. Sign up today to get lifetime access.
Written & Edited By Trish Curling
Livestream Class Packages
When You Subscribe, You Will Get Instant Access to
- the Technique Pack: 15 yoga pose breakdowns
- exclusive online course discounts
- exclusive blogs and videos
by matt | Sep 2, 2021 | Main Page Display
Crow Pose Tutorial
UPGRADE YOUR CROW POSE
SHOULDER ACTIONS FOR OPTIMIZING STRENGTH
CROW POSE TUTORIAL: FIND FULLNESS TO FIND STABILITY
Finding fullness in our yoga practice usually starts with our connection to breath. It’s not uncommon to take our time at the beginning of class to ground ourselves in the breath first. Finding fullness means creating space and expansion in the body and mind. In this tutorial, we find this fullness first in the breath and then in action in the shoulders, more specifically with the shoulder blades (scapulae), called protraction, while setting up for Bakasana (Crow Pose).
It’s through movement of the scapulae that we begin to understand what is available to us, not only in Bakasana, but in so many other yoga postures, including more advanced arm balances and, more importantly, in everyday functional movement.
THE ANATOMY OF CROW POSE
The scapula is a sturdy bone that is flat in shape. “Flat bones provide protection and a place for broad muscles to attach.” (Long, Raymond A. MD, FRSC, The Key Muscles of Yoga, Bandha Yoga Publications LLC, 2006, pg. 11)
This is where we find our rotator cuff muscles (subscapularis, supraspinatus, infraspinatus, and teres minor). The rotator cuff muscles are responsible for stabilizing the head of the humerus (upper arm bone) within the shoulder (glenohumeral joint).
The shoulder, like the hip, is a ball-and-socket joint allowing for a great deal of range of motion. It allows for an even greater range of motion than the hip because of the upper arm bone’s shallow placement in the shoulder joint. This extra range of motion comes with a price — it leaves our shoulders vulnerable, with limited stability. That doesn’t mean “game over.” With awareness of this area and activation of the stability within other parts of the body, we can create a more balanced relationship between mobility and stability in the shoulder.
The scapula, on the other hand, is stabilized by the muscles of the serratus anterior and the rhomboids.
There are 4 main movements of the scapula:
- Retraction — through the actions of trapezius, rhomboids, and latissimus dorsi muscles
- Protraction — through the actions of serratus anterior, pectoralis major, and pectoralis minor muscles
- Elevation — through the trapezius, levator scapulae, and rhomboid muscles
- Depression — through the force of gravity and actions of the latissimus dorsi, serratus anterior, pectoralis major and minor, and trapezius muscles
Cowan PT, Mudreac A, Varacallo M. Anatomy, Back, Scapula. [Updated 2021 Aug 11]. In: StatPearls [Internet]. Treasure Island (FL): StatPearls Publishing; 2021 Jan-. Available from: https://www.ncbi.nlm.nih.gov/books/NBK531475/
(There are other movements of the scapula, but in this tutorial, we focus on protraction.)
CROW POSE ACTIONS
As Matt is setting up Bakasana, we see how important it is to find this fullness when we go into protraction of the scapulae. This fullness extends beyond the shoulders, all the way into the arms and even into the fingers. Here, our breath body meets the actions of our physical body through the fullness and expansion at the back and into our fingers, strengthening not only the posture but the serratus anterior muscles and the shoulder girdle.
With increased stability and strength, we actually find a lightness that Matt talks about and demonstrates so that we can find the elevation required to sustain Crow Pose.
If you are yearning to broaden your understanding of the mechanics of the shoulder, you won’t want to miss out on Shoulder Revelation! Here, you’ll find 12 all-levels, technique-based yoga practices to develop great awareness, strength, range of motion and capability in the shoulder girdle. In these live practices with Matt, you will work through the mechanics of bound postures, heart openers, and arm balances as well as some imperative drills to maintain healthy muscles and joints.
When You Subscribe, You Will Get Instant Access to
- the Technique Pack: 15 yoga pose breakdowns
- exclusive online course discounts
- exclusive blogs and videos
by matt | Aug 23, 2021 | Home Page, Main Page Display
FULL WHEEL POSE
STOP HUGGING THE ELBOWS IN
SHOULDER ACTIONS FOR MAXIMUM FLEXIBILITY
SHOULDER FLEXIBILITY IN FULL WHEEL POSE
You may have noticed that Full Wheel Pose is quite challenging, and you might think the issue is your back, core, or shoulder strength. Sure, each of these plays a role, but not nearly as much as the simple technique of retracting the shoulder blades and widening the elbows. For whatever reason, there is a myth that the elbows need to be hugged in for safety. This is simply not true. Have you ever seen a weight lifter press a tremendous amount of weight above their head? If yes, then you know their elbows are not tucked in, and considering the amount of weight they are lifting, it’s pretty obvious that there is nothing wrong with this biomechanically. In my opinion, it’s not only okay to widen the elbows; it’s a much better physiological decision.
WHY DOES MY TEACHER ALWAYS SAY TO HUG THEM IN?
This cue is coming from the basic understanding that the shoulder joint is more stable when the arms are externally rotated. However, hugging the elbows in is overly stabilizing, which is why everyone struggles with mobility when the elbows are tucked in for Wheel Pose. Furthermore, if we take a closer look, hugging the elbows in will likely trigger your pectoral muscles to engage, not your rotator cuff. Rather than bore or lose you with the anatomical details, I will tell you how to find out for yourself by trying out the difference while sitting up.
CONTROLLED TEST WITH A STRAP
OLD WAY:
- Bring your arms in front like you’re going to do the Macarena, then bend your elbows, mimicking what most teachers have told you to do in full wheel.
- Loop a strap around both elbows to keep them in — this is often used in alignment-based classes.
- Without letting the elbows go wider than your shoulders, raise your arms up, straightening your elbows while keeping them tucked in, and see how vertical your arms can get.
Most likely, you won’t be able to go too high up without effort. IF you are hypermobile in the shoulders, you may be able to; if Full Wheel is working the way you are doing it, then continue that way. However, if you feel pinching in your shoulders, watch the tutorial below.
NEW WAY:
- Widen your elbows out to the sides like you are making cactus arms.
- Reach your arms up to the sky like you are celebrating a victory.
You will likely notice that this felt more natural and relatively easy. That’s because it IS NATURAL to lift your arms this way. The best way to approach Full Wheel Pose for maximum flexibility in the shoulder girdle is to allow the elbows to be out.
DON’T HUG THE ELBOWS IN, AND ENJOY YOUR LOW BACK
Amazingly enough, when you allow the shoulders to move properly, you will notice that you can shift your weight into your hands and out of your feet, and this will take the pressure off of the low back! This is because the backbend will now be dispersed throughout the whole spine instead of targeted straight into one or two vertebrae in your lumbar spine (typically L4 and L5 for most people).
EASIER SAID THAN DONE?
Ok ok ok, after that demo you might visually or intellectually get it, and perhaps you want to give this a try. Doing the shoulder actions while seated is far easier than trying it upside down and on your head. This is partially because our body can propriocept (know where it is in space) much more easily when right side up, simply because that’s how we exist most of the day. But your nervous system needs to learn where your bones are and how to activate your muscles when everything is flipped upside down. This is just the way it is; the only thing you can do about it is put yourself upside down MORE OFTEN, AND watch this video repetitively to stimulate your “mirror neurons,” which allow you to mimic something more easily through repetitive viewing.
To get these shoulder actions fully integrated into your practice, sign up for the Shoulder Revelation Immersion — 12 classes designed to help you develop mastery of movement within the shoulder girdle.
Thank you for reading and watching! I look forward to sharing more with you in an upcoming training or monthly immersion!
Co-written and edited with 300-hour Chromatic teacher, Donna Morin
Livestream Class Packages
When You Subscribe, You Will Get Instant Access to
- the Technique Pack: 15 yoga pose breakdowns
- exclusive online course discounts
- exclusive blogs and videos
by matt | Jul 23, 2021 | Main Page Display
FULL SIDE PLANK WITH MODIFICATIONS
STEP-BY-STEP VASHISTHASANA BREAKDOWN
FULL SIDE PLANK AND MODIFICATIONS: VASHISTHASANA
USING THE WALL AS A PROP
Full Side Plank (Vashisthasana) has many modification options and variations to help make it more accessible or more challenging. I love teaching this posture with a foot on the wall to increase stability and provide a frame of reference for shifting the weight out of the hand and into the foot.
Some people avoid props, thinking of them as a “crutch.” For sure, they can be used as a way to avoid challenges if that is your intention, but they can also be used to increase body awareness and help you develop technique. Props are neither good nor bad; it’s just a matter of how and why you are using them. Is it that you want to avoid challenge or that you want to face challenge intelligently and appropriately?
In the video tutorial below, I show how to modify side plank by placing your top foot on the wall. This reduces the required balance and will allow you to focus on the foundations of the posture, like the strength of your hand and wrist. Press your thumb and pinky fingers into the ground. Then focus on your bottom foot, pressing the instep of your foot into the wall. Eventually, you will be able to place the whole standing foot on the ground, which will give you strength and the power to lift the hips up. Lastly, keep your shoulder externally rotating, as indicated in the video.
Full Side Plank & Modifications • Vashisthasana at the Wall
This Side Plank tutorial footage is taken from the July 2021 Immersion, titled BALANCE
Full Side Plank Setup
What I don’t discuss in this particular clip is how the setup of this posture is exactly like Wild Thing. This means your pelvis is more open toward the sky, while in standard Side Plank, your feet are stacked. The spine is in a backbend as well, unlike the standard variation, where the spine is neutral.
There are other alignments you could explore, but these will tend to give you the greatest access to the full Side Plank variation where you grab the top foot and extend the leg. If you want to practice the full class, be sure to check out Class #9 of the July 2021 Immersion, called Balance
Three Full Side Plank Modifications and Variations
- Foot on the Wall: Once you rise up into Wild Thing, place the back foot on the wall and push your weight toward the wall, even if it means both knees are bent. This is not only okay but an indication that you are doing it properly.
- Tree Pose: The next step is infinitely more challenging because it requires greater balance and flexibility. Take the foot off the wall, similar to Tree Pose but without placing the foot on your inner thigh (though that is also another variation). I suggest pushing your knee into your hand to get your hip flexors active. Hip flexor strength becomes key when you attempt to straighten the leg. Often the tension of the hamstrings is too much and people have to let go of the foot. If your hip flexors are strong and used to engaging in this position, then they can help out by keeping the top leg closer to your upper body, lessening the chances that you’ll have to let go of the foot when extending the leg up to the sky.
- Full Side Plank or “Extended Vashisthasana”: Pull your knee in as tight as possible in order to grab your foot. Either stay as a modification or begin to kick the foot to the sky, straightening the top leg. Pro tip: It’s helpful to keep the bottom, weight-bearing leg bent while extending the top leg upward.
When You Subscribe, You Will Get Instant Access to
- the Technique Pack: 15 yoga pose breakdowns
- exclusive online course discounts
- exclusive blogs and videos
by matt | Jun 10, 2021 | Home Page, Main Page Display
GARUDASANA – EAGLE POSE
How to Double Wrap the Legs
GARUDASANA – EAGLE POSE
Why is it hard to double wrap the leg?
Garudasana, known as Eagle Pose, is a challenging hip opener and hip strengthener. It’s useful in developing balance, but for many people, double wrapping the leg is not accessible. For sure, some people have no trouble at all, but others are completely perplexed.
There are three reasons why it would be challenging for you or your students to double wrap:
- Lack of flexibility of the abductor muscles (outer hip muscles). These are the muscles that are lengthened when we cross our legs.
- Lack of strength of the standing hip abductor muscles. This is a bit confusing unless you watch the video below. The standing hip abductors help to elevate the opposite side of the pelvis, making it more possible to cross the top leg over the bottom leg.
- Lack of technique and timing. In most cases, if you are not applying deliberate technique while moving into a pose, you will be entering the pose the hard way, which means you will only be able to do the postures that match your set of physical muscular patterns. This is a disservice, not because you will miss out on the poses but because you will miss out on the opportunity to change your muscle patterns. In the video below, you will see the timing and techniques for getting into Eagle Pose with double-wrapped legs.
How to Increase Flexibility of the Abductors — Outer Hips
If flexibility is inhibiting you from accessing Garudasana and you want to find ways to access your greater range of motion of the outer hip muscles, there are a couple postures you can work with. Any posture that includes crisscrossed legs will be useful and effective in increasing abductor flexibility. Although there aren’t many traditional postures, aside from Eagle Pose itself, one that comes to mind is Gomukhasana, Cow-Faced Pose. However, I would say that Eagle Pose should usually precede Gomukhasana because Eagle Pose requires less flexibility. The posture that I use in the Hips and Hamstrings immersion to prepare for Eagle is a straight single-leg forward fold with crisscrossed legs.
How to Get into the Straight-Leg Crisscrossed Forward Fold
- Start in Lunge Pose with your right foot forward.
- Heel-toe (move) your right foot to the left side of the mat.
- Step your back left foot to the right side of the mat so that both legs are crisscrossed.
- I suggest using block under both hands prior to the last step.
- Straighten your legs to a degree where you are stretching without strain.
IMPORTANT KEY ACTION: Wag your tail bone to the left to increase the stretch along the outer hip and IT band. If that’s too intense, wag your tail to the right to decrease the outer-hip stretch.
WHY LACK OF ABDUCTOR STRENGTH HOLDS YOU BACK IN EAGLE POSE
Strength of the abductor group (outer hip muscles) is super important for two reasons. First, the standing hip abductors are what lift the opposite side of your pelvis, which allows you to cross your top leg over. Second, without outer hip strength on the standing leg, you would struggle to balance the pose! Outer hip muscles play a major role in balancing any single leg pose. If you find it challenging to balance Garudasana, then you will want to start with a strength-training routine for the abductors. We focus in on strengthening these muscles in the Hips and Hamstrings Immersion
FREE VIDEO TUTORIAL: HOW TO DOUBLE WRAP LEGS IN GARUDASANA, EAGLE POSE
This video clip was taken from Class #3 in the Hips and Hamstrings: 12 Class Immersion
HOW TO DOUBLE WRAP THE LEGS
Notice in the video that I am focused on squeezing the outer standing hip inward and lifting the opposite side of the pelvis upward as a result. This allows the thigh bone to more easily cross the midline of the body. You will also notice that my thighs are significantly rotated inward; this helps to access the wrapping of the legs as well. In the class leading up to this tutorial, we used a wall to eliminate the necessity to balance while working with these actions. In this video, I joke about the use of a wall, but I highly recommend you try it that way.
HOW DO I INCREASE FLEXIBILITY OF MY HIPS FOR OTHER YOGA POSTURES?
The easy answer to this is to practice in such a way that you are deliberately strengthening each muscle group around the hips. To learn more about what muscle groups are involved in hip opening, check out the article I wrote on The 4 Quadrants of The Hips, where I share my methodology and approach for my personal practice and in my teaching. Once you understand which muscles surround the hip joints, the next step is to begin strengthening each muscle group. Strengthening one muscle group through range of motion will increase the flexibility of the opposing muscle group. This is the magic of an educated and deliberate practice — we take the guesswork out, and efforts are more effective in achieving intended results.
To increase your strength and flexibility of the hips, you can join the Hips and Hamstrings Immersion,which will take you through twelve 75-minute online yoga classes, each focused on a different pose and the relevant muscle group(s). I take you through creative ways of strengthening, then I provide you with effective techniques for stretching and accessing various yoga postures.
When You Subscribe, You Will Get Instant Access to
- the Technique Pack: 15 yoga pose breakdowns
- exclusive online course discounts
- exclusive blogs and videos
by matt | Jun 2, 2021 | Home Page, Main Page Display
HIP AND HAMSTRING FLEXIBILITY
“The 4 Quadrants of the Hips”
Hip And Hamstring Flexibility
Why Is Hip Mobility Important?
If you practice yoga, you are sure to increase the flexibility of the hips and hamstrings. However, that doesn’t mean you will gain greater mobility and functionality, or even be able to access the myriad of hip opening postures, because most of us don’t realize how many muscles surround the hips. Since hips are ball-and-socket joints, there are ample available movements, yet most of us only utilize two daily — flexion and extension — when we walk, sit, and stand.
Because we only make use of two movements, we tend to be overdeveloped in one or two muscle groups and underdeveloped in the others. The problem with this is limited range of motion and, more importantly, imbalanced hip alignment that could lead to hip pain or increased friction in the hip joint over time, potentially damaging soft tissue. Bottom line: it’s important to work toward evenly balanced strength and flexibility in all the muscles that surround the hips.
Before we dive in, let me be clear: there is no magic place of health and balance where everything is perfect and no pain ever exists. We can, however, find a place where our body feels consistently good and we have the awareness to recognize when one muscle group is too tight, strong, weak, flexible, or inflexible. In other words, we can build a relationship with our body, learn what it needs, and be able to catch an issue before it becomes a long-term problem.
THE BENEFITS GO BEYOND PAIN RELIEF. Developing awareness of your hips can allow you to move better on a daily basis AND access more postures within the context of yoga.
The 4 Quadrants of the Hips
To simplify the development of your hip and hamstring flexibility, we can break down muscle groups into 4 basic categories: front, back, inside, outside. There are muscles in each of these areas that create movements.
- Front: hip flexors and quadriceps
- Back: buttock muscles such as gluteus maximus and piriformis
- Inside: adductors such as longus, brevis, magnus
- Outside: abductors such as gluteus minimus, medius, and TFL
This is, of course, a simplified way of looking at the hips. Some muscles cross over from the outside to the inside, such as the sartorius, or from the back side to the inside, such as the adductor magnus. But the simplification is helpful if you aren’t an anatomy nerd and just want to feel better in your hips.
WHAT ARE “THE 4 QUADRANTS OF THE HIPS”?
THE #1 BACKBEND TECHNIQUE TO RELIEVE BACK PAIN AND INCREASE SPINAL FLEXIBILITY
“Bowing the Spine” is a technique that combines a few key elements that I go over in detail in the video below. The dominant action is sliding your intervertebral discs forward, which requires a deliberate shifting of your rib cage. The secondary action is lengthening the distance between the upper and lower body.
If you want to try this technique in your practice and learn how to develop greater strength, range of motion, and body awareness with backbends, join me for this 12-class immersion: Heart Openers: Discover the Joy of Backbending
FREE VIDEO PODCAST: STRATEGY FOR HIP AND HAMSTRING FLEXIBILITY
To implement this technique and access your flexibility
Hips and Hamstrings: 12 Class Immersion
WHAT ARE THE ACTIONS AT THE HIPS?
Each quadrant of muscle groups has actions, meaning movements that we are capable of when we engage one or more muscles.
- Front: hip flexion & anterior tilt of the pelvis
- Back: hip extension & posterior tilt of the pelvis
- Inside: adduction — moving thighbones toward each other
- Outside: abduction — moving thighbones away from one another
How do we apply the “4 Quadrants” to develop greater hip and hamstring flexibility?
The easiest way to develop your flexibility is to strengthen each muscle group until it can perform to its potential. The rule of thumb is to pick a side that you want to increase flexibility on and strengthen the opposite. That means if you want to increase hamstring flexibility (back quadrant), you would strengthen the front quadrant (hip flexors and quads). It’s actually simple, but we make it super complicated. Instead of just trying to stretch a muscle, hoping that gravity will do the work for you, strengthen the muscle that does the action you are intending, and flexibility will be the inevitable result. In this way, you gain flexibility AND build strength. It’s a win-win!
In the video above, I also explain facilitated stretching as another technique. Be sure to watch the video for more details on this method, and if you want to develop flexibility, access more postures, and release nagging pain, then join me for the Hips and Hamstrings Immersion. I will see you on the mat!
Co-written and edited by 300-hour Chromatic yoga teacher, Donna Morin.
When You Subscribe, You Will Get Instant Access to
- the Technique Pack: 15 yoga pose breakdowns
- exclusive online course discounts
- exclusive blogs and videos
by matt | May 14, 2021 | Home Page, Main Page Display
INTELLIGENT YOGA SEQUENCE TECHNIQUE
REVERSE ENGINEERING
HOW TO DESIGN AN INTELLIGENT YOGA SEQUENCE
REVERSE ENGINEERING
Designing an intelligent yoga sequence for your at-home practice or for your students can create a massive lifelong impact. Whether you are an an aspiring yoga teacher, an at-home practitioner looking to build your personal practice, or a seasoned teacher looking to increase the efficacy of your classes, this is for you.
Because most of the 200 hour yoga trainings in the West have so much material to cover in a relatively short amount of time, the element most often neglected is anatomy, especially in designing yoga sequences that help your students get the most from their time with you.
So today I want to share a yoga technique with you that I teach in my 200- and 300-hour trainings.
Designing a class is much like a puzzle; there is a clear destination in mind, but we need to put one piece together at a time. Or consider sequencing as an instruction manual, a step-by-step, action-oriented guide for what to do and when to do it. In order to design an intelligent yoga sequence, we can use a technique I call “reverse engineering.” What does that mean?
First you want to know what your peak posture is.
A peak posture is a yoga pose that is challenging to your student. That challenge may present itself as requiring one of 4 anatomical elements.
- Strength
- Flexibility
- Balance
- Proprioception (knowing where your body is in space)
Balance and proprioception can overlap, but they each present their own challenges, so I count those as separate features.
So choose a peak posture. For today, let’s work with Dancer Pose (Natarajasana), because it requires a few different anatomical elements.
After you choose your peak pose, assess the anatomy of the pose.
In my 200 hour and 300 hour trainings, we go into much more specificity of many yoga poses — covering anatomy, biomechanics, and technique. To clarify, the 200 hour training is designed for yogis looking to deepen their practice and learn the skill sets for teaching yoga. The 300 hour training, on the other hand, is for certified yoga teachers looking to certify at the 500 hour level. In this training, you wish to both develop a masterful understanding of the body as it relates to the yoga practice and attain highest-level skill sets as a teacher (200 hour + 300 hour = 500 hour certified).
You don’t have to be an anatomy expert to design a yoga sequence that will help your students get the most from your classes and come to know their bodies better. Anatomy is really just a language — names for bones, muscles, joints, etc. These are important, of course, but communication and connection with your students is arguably even more important.
A surgeon might be incredible at her craft, but if she doesn’t have a good bedside manner, she won’t make her patient feel comfortable, and that can impact how well the surgery goes. A yoga teacher might know a lot about anatomy, but if they aren’t connecting with their students, the students may not return, and a valuable opportunity is missed.
So let’s think about Dancer Pose. If you’re an anatomy geek like me, you may already be thinking about what makes this posture challenging for some and accessible for others. To assess this, we need to look at which muscles are lengthening and which will require flexibility. If you are a yoga teacher already, this will likely be familiar: Typically, you learn this at the 200 hour level. In my 300 hour training, we go a step further and consider the required strength as well as actions, techniques, and biomechanics. To keep things simple, I won’t be diving into all these avenues here. My intention is to convey the structure of an intelligent yoga sequence. Once you understand the structure, it can be applied to all aspects of the physical practice.
Assessing the Peak Pose
What is a peak pose?
Many people get worked up when I mention a “peak pose,” because they feel yoga shouldn’t be destination-oriented. This is not actually what yoga teaches; yoga has a very clear goal, or destination, in every ancient text. No sacred teaching instructs us to eliminate the destination. Rather, the teachings reveal that focused attention on actions, thoughts, breath, etc. cultivate awareness. Some would call this ultimate awareness Samadhi, or Consiousness, Being, Union, Stillness, Mindfuless … The list goes on. Point is, these are all goals.
So asana practices are what help us move toward the ultimate awareness, BUT there is a caveat. If you are focused solely on that goal while you practice, you will not be aware of the elements of your practice and will miss out on important nuances. Ironically, keeping your focus only on the goal means you’re less likely to achieve it. This applies to a peak pose as well. If you are focused only on the peak pose and rush through the preparatory poses and techniques, you miss necessary learning and will be less likely to access the peak pose in the most efficient, functional, and even life-changing way.
As a teacher, you use a peak posture as a destination and work backwards. Think of it like using a GPS in your car: you enter the destination from your original point and it delivers step-by-step instructions. If you don’t pay attention to the steps, you don’t arrive.
Let’s assess Dancer Pose and develop a road map for your students so they can step into presence and action. With you as their guide, your students do not necessarily need to know the destination. In this way, you can keep calling their attention to “the now” every step of the way. This method is for you, the designer of an intelligent yoga sequence.
Let’s think about the shape. You know that in Dancer Pose, you will need to reach your arm back. So what could you do with your students that would prepare their bodies to reach back?
Here’s the question:
What muscles are limiting the ability to reach back?
Answer: pectoralis major (chest), front deltoids (shoulder)
Do you need to know that? NO. Another easy way to assess is to reach back with your arm and feel what area of your body is stretching. To prepare yourself for this action, you would simply do other poses that stretch the same area.
Dancer Pose also requires balance. What pose could you offer that would require balance AND reach arms back?
If you said Airplane Pose (Dekasana), we’re on the same flight 😉
Dancer Pose also requires a backbend, so you’d want to prepare your students by including yoga poses that extend the spine, like Cobra Pose (Bhujangasana).
Bonus: Stretch the front thighs and hip flexors. You could prepare students for this in a low lunge (Anjaneyasana), perhaps with bound hands, or reaching for the back foot. (This might be too intense for some with tight quads. Use a strap to make it more accessible.)
All these poses that prepare your students for the peak pose are what I call “layering poses.” In my trainings, I teach my students to prepare 5-7 of these poses. These are the real substance of a good sequence. You can still include other poses to help warm up the body and get your students connecting their movements to breath, but layering poses are the ones you’ve put the most thought into. They are the poses that will transform your time with your students from a class to an experience.
So let’s review. Here are the steps to design a powerful and effective yoga sequence for your yoga students.
1. Choose a peak posture.
2. Assess the anatomy of that peak pose, or look at the shape.
3. Teach 5-7 poses that mimic that shape and prepare your students for the peak pose.
FREE VIDEO PODCAST ON CREATING AN INTELLIGENT YOGA SEQUENCE USING THE TECHNIQUE OF “REVERSE ENGINEERING”
LOOKING TO DEVELOP YOUR BACKBENDING PRACTICE? CHECK OUT
Heart Openers: Discover the Joy of Backbending
MISTAKES TO AVOID
It’s pretty common for a teacher to think of a peak pose like Dancer Pose and think hmm … shoulder openers; I need shoulder openers. Then they offer poses like Eagle Pose (Garudasana). True, Eagle opens the shoulder muscles, but the exact opposite shoulder muscles needed for Dancer. If you were using this as a way to shorten opposing muscles before lengthening them, then that could be an intelligent decision. But in terms of preparatory lengthening, Eagle is not the right layering pose for Dancer. Accuracy is key, which is why the 200 Hour and 300 Hour are so focused on developing refined skills and understanding of the body.
With the right sequencing, your classes will be more supportive, and your students will leave feeling like they’ve learned something. That learning will stay with them throughout their lives. This is what it means to create an impact.
Follow the structure laid out in the video:
1. Choose a peak posture.
2. Assess the challenges: flexibility, strength, balance, proprioception. I suggest starting with flexibility to keep it simple.
3. Choose 5-7 layering postures.
4. Weave these poses through your class.
Ready to go deeper into anatomy, biomechanics, and sequencing? In my 200 and 300 hour trainings, we not only cover those topics, but you will also learn techniques for meditation, pranayama, yoga philosophy, and developing your yoga business. The 200 hour training is suitable for all levels. If you have a burning curiosity to learn and develop your practice, then the 200 hour training is perfect for you. The 300 hour training is only suitable for yoga teachers at the 200 or 500 hour level looking to become more masterful as professional yoga teachers.
Not sure if the training is right for you at this time? Send me an email and we can set up a time to chat.
Co-written and edited by 300-hour Chromatic yoga teacher, Donna Morin
When You Subscribe, You Will Get Instant Access to
- the Technique Pack: 15 yoga pose breakdowns
- exclusive online course discounts
- exclusive blogs and videos
by matt giordano | May 10, 2021 | Guest Posts
by matt | May 5, 2021 | Home Page, Main Page Display
BACKBEND TECHNIQUE TO RELIEVE BACK PAIN
“BOWING THE SPINE”
Why are backbends uncomfortable for many people?
Can we do anything to change this?
Let’s dive into my #1 backbend technique to relieve back pain and provide you with maximum range of motion. Before we do, though, we need to first acknowledge that backbends are not something most of us do every day. Quite the opposite. When was the last time you bent over backwards to type on your computer, eat a meal, or scroll through Instagram? It’s not a typical functional movement, but that doesn’t mean it doesn’t serve our health and well-being.
A healthy spine has the capability to move forward and back. The easiest starting point to relieve pain is always to figure out what your dominant movement or posture is, and slowly work to reverse it. Simply put, strengthening the back muscles and lengthening the front body muscles is the first step toward feeling great in your back. HOW to do this is the challenge.
Intuitively, we know how to move our bodies, but that gets lost due to conditioned, repetitive patterning. Think of babies just about to crawl — they push themselves up into a back-bending low Cobra first and then eventually learn how to coordinate the knees. Somehow they figure out what needs to happen to be able to move. Before your yoga practice, when was the last time your peeled yourself off the floor and did something like that Cobra? So give yourself a break. If backbends are uncomfortable, it’s not because you aren’t capable; your adult body just needs to learn it again.
RECONNECT TO YOUR BODY WISDOM
Make no mistake — you have the same inner wisdom that you did as a child, but it takes some retraining. What’s more, your body develops muscle memory from all the physical and emotional contracting you do during the day. Soon, shoulders slump forward, bringing your neck and head along with them. Arms move closer together and your chest caves in.
Yoga brings awareness to the felt sense of your physical potential beyond just basic needs. Backbending is beyond your basic, functional needs, but backbends can be enriching and healing.
Learning anything new requires focused effort, routine, repetitive practice, and failure. The process is no different when it comes to learning postures in your body, except for one important distinction: Failing body postures can lead to short- or long-term injury.
To minimize risk, we have to apply smart techniques and step-by-step actions informed by contemporary anatomy education. Rather than repeating the same uncomfortable backbends over and over, hoping for change, you learn and apply new techniques. With time and repetition, you can develop the appropriate strength and flexibility that can lead to joyful backbends.
WHAT IS “BOWING THE SPINE”?
THE #1 BACKBEND TECHNIQUE TO RELIEVE BACK PAIN AND INCREASE SPINAL FLEXIBILITY
“Bowing the spine” is a technique that combines a few key elements that I go over in detail in the video below. The dominant action is sliding your intervertebral discs forward, which requires a deliberate shifting of your rib cage. The secondary action is lengthening the distance between the upper and lower body.
If you want to try this technique in your practice and learn how to develop greater strength, range of motion, and body awareness with backbends, join me for May’s 12-class immersion: Heart Openers: Discover the Joy of Backbending
FREE VIDEO PODCAST ON BOWING THE SPINE WITH PROFESSOR MATT
To implement this technique and access your spinal potential, check out
Heart Openers: Discover the Joy of Backbending
WILL THIS WORK FOR EVERYONE?
I personally don’t believe there is a practice, pose, or technique that is “one size fits all“. Everybody is different, and some techniques will be more appropriate for one body than another. I came to yoga with scoliosis, a super tight psoas, and daily back pain. Doing any backbend was torture for me. Today, backbends are my go-to pose to reset my spine and get back to feeling great in my body. Did that happen overnight? Absolutely not. It took years of practice and refinement. Bowing the spine is a backbend technique to relieve back pain and help you gain greater range of motion in your spine, but the technique itself cannot do it for you. Remember, you are the one doing the pose; the pose doesn’t do you. In other words, never try to fit yourself into a shape. Allow your body to find its own posture. That said, like any great challenge, we must learn the skills necessary to gracefully dance through it.
When You Subscribe, You Will Get Instant Access to
- the Technique Pack: 15 yoga pose breakdowns
- exclusive online course discounts
- exclusive blogs and videos
by matt giordano | May 3, 2021 | Guest Posts
Research and studies show that yoga can help improve your overall health. Let’s find out how yoga really works.
Fighting Obesity
Obesity is one of the leading cases of deaths in the United States. Over the years, studies have proven that yoga can be beneficial for those who wish to lose weight and get in their desired shape. From shaping your body to burning excessive fats, yoga can help you with all of it. When used in combination with healthy diet and workouts, yoga can help you achieve your weight goals.
Mental Health
Numerous research and psychological studies prove that engaging in yoga helps in relaxing your mind and helping you feel better. Mindful exercising and stretching can reduce stress symptoms, while focusing on the moment can help in letting go of fear and worries.Those who incorporate yoga are likely to stay calm and focused even during stressful situations. They also have greater endurance to pain and show more patience.
Cardiovascular Diseases
Yoga might also help in reducing the risk of developing heart and blood related issues. Research shows that yoga poses are effectivein improving blood circulation and calming the nerves. Doing yoga regularly can help regulate blood pressure. The overall practice offers a relaxed response via channeled-breathing that can improve blood circulation.
Muscular Health
Yoga can also help in improving your muscular system by enhancing flexibility of your joints, thereby helping you with your back pain. In fact, doctors encourage arthritis patients to make yoga a part of their everyday routine as it improves muscle strength, flexibility, and balance.
If you’re also dealing with body aches, or you have a family history of arthritis, incorporating yoga in everyday routine can help.
Reach out to TheYogiMatt for the best advice and yoga practices from anywhere in the world.
Matt Giordano is a world renowned yoga teacher, and the creator & founder of the global school called Chromatic Yoga. He is most known for his skillful ability to guide students into postures to awaken their full potential. Matt provides top level teacher trainings in both the 200 and 300 Hour formats. Visit www.TheYogiMatt.com to learn more about his online classes, immersions and teacher trainings.
by matt giordano | May 1, 2021 | Guest Posts
Many Americans, including young ones, are often found complaining about back pain and other similar body aches. While some pains are temporary, others are classified as chronic. People try different medicines and therapies to deal with their pain. However, many people are unaware of the benefit of yoga in alleviating the symptoms of body aches, and that’s what we’ll focus on in this blog post.
Chronic Pain
Some researches have shown the benefits of yoga for people suffering from arthritis, migraine, fibromyalgia, low back pain, and similar chronic pain complaints. According to a study published in Annals of Internal Medicine, people with weekly yoga classes experienced increased mobility and comfort. Similarly, a meta-analysis of 17 studies suggested that yoga might can help you deal with fibromyalgia osteoporosis-related curvature of the spine.
How Does Yoga Help?
During Yoga sessions, you are typically required to practice certain moves and sit in specific positions for 45 to 90 minutes. It’s best to perform under the guidance of an expert, either in person or online. Most yogis begin their session with breathing exercises and focus on relaxing the body and mind. It’s similar to meditation and some spiritual practices. Different positions and techniques might be effective for different parts of the body. Expert yogis are aware of which parts to focus on and how.
Yogis modify Asanas based on various factors such as the purpose of yoga and the strength and experience of the one who’s practicing it.
Reach out to TheYogiMatt for the best advice and yoga practices from anywhere in the world.
Matt Giordano, TheYogiMatt, is a world renowned yoga teacher, and the creator & founder of the global school called Chromatic Yoga. He is most known for his skillful ability to guide students into postures to awaken their full potential. Matt provides top level teacher trainings in both the 200 and 300 Hour formats. Visit www.theyogimatt.comto learn more about online classes, immersions and teacher trainings.
by matt giordano | Apr 30, 2021 | Guest Posts
Yoga is gaining popularity because there’s a lot of research and evidence that supports its benefits on an individual’s lifestyle, mental, and physical health. It has now become a widely popular practice for cultivating a better mind-body connection.
As a result, many people have started pursuing yoga as a career. In other words, people aren’t learning yoga just to practice it alone in their room. Instead, they’re making efforts to excel as yogis in their circle. This blog post will highlight some benefits of becoming a yoga expert.
Self-Care
Yoga experts master the art of mindful living and know how to deal with many physical and mental health issues. From controlling weight to keeping heart health in check and reducing stress, learning yoga can help you with a lot of things.
Family Care
When you become a yoga expert, your family, friends, and close relatives automatically reach out to you for their health and fitness concerns. It’s going to give you the opportunity to help your loved ones with your knowledge and skills.
Fame and Money
Being a yogi is one of the most lucrative careers in the U. S at the moment. Experienced yogis aren’t many in number, and people are constantly in search of expert yogis for their health and fitness concerns.
You can reach out to TheYogiMatt for the best advice and yoga practices from anywhere in the world.
Matt Giordano, TheYogiMatt, is a world renowned yoga teacher, and the creator & founder of the global school called Chromatic Yoga. He is most known for his skillful ability to guide students into postures to awaken their full potential. Matt provides top level teacher trainings in both the 200 and 300 Hour formats. Visit www.theyogimatt.comto learn more about online classes, immersions and teacher trainings.
by matt giordano | Apr 30, 2021 | Guest Posts
Medical science and research has shown that yoga can potentially help improve overall health, which directly affects the progression of different diseases. While people of all ages and backgrounds can benefit from yoga, there are some great benefits for the aging population in particular. This blog post will highlight some of the benefits of yoga for an aging population.
Appearance
As we grow older, we develop signs of aging. However, research shows that people who engage in yoga regularly experience these changes at a slower rate. There’s sufficient evidence suggesting that yoga can help you age gracefully.
Strength
Aging also affects our bones, muscular and skeletal systems, thereby impacting our fitness and agility. While these changes are inevitable, you can minimize their impact on your body by adopting healthy practices such as yoga. Research shows that people who engage in yoga are relatively stronger and have greater endurance.
Flexibility
Another impact of aging is loss of mobility and flexibility. When we grow older, our bones and joints tend to get stiffer. By enhancing balance and grit, yoga practices can help make you feel more flexible and at ease when performing routine tasks.
Weight Loss
With age, it gets difficult for older individuals to burn fat and get in shape because of slowed metabolism. However, certain types of yoga can help you regulate your appetite, boost your metabolism, and may contribute in controlling geriatric weight gain.
Overall Health
Since yoga revolves around mindful breathing and meditation, it can help in improving digestion, regulating blood flow, resting pulsating heartbeat, and gaining mental clarity.
You can reach out to TheYogiMatt for the best advice and yoga practices from anywhere in the world.
Matt Giordano, TheYogiMatt, is a world renowned yoga teacher, and the creator & founder of the global school called Chromatic Yoga. He is most known for his skillful ability to guide students into postures to awaken their full potential. Matt provides top level teacher trainings in both the 200 and 300 Hour formats. Visit www.theyogimatt.com to learn more about online classes, immersions and teacher trainings.
by matt giordano | Apr 29, 2021 | Guest Posts
Yoga is an ancient practice that historians attribute to Indus Valley civilization. Regardless of its origins, it’s becoming increasingly popular today. It’s not only a retreat from our chaotic lifestyles, but also brings with it many great health benefits. This blog post will highlight some of the ways in which Yoga can transform your life.
Weight Loss
Obesity is one of the biggest concerns in the United States as we find more and more people falling victim to it. Apart from damaging your body image, obesity is also responsible for many serious health issues. While there are many diet plans and workout routines that claim to help you lose weight, yoga’s ability to do so is often underestimated. Research shows that yoga can facilitate weight loss by making you a more mindful eater. This automatically translates into better control of certain cravings which can also help you achieve the calorie deficit you’ve been looking for.
Fitness
Yoga can help you lose weight and keep it from coming back. In other words, this spiritual art of stretching relaxes your mind and body and can help tone your muscles. According to research, young adults who engaged in yoga for at least 30 minutes every week for four years experienced slower weight gain than those who didn’t.
The same research also reveals that yoga practitioners have balanced lower body mass indexes (BMIs) . Researchers carefully studied a small group of sedentary individuals who had never engaged in yoga or any similar practices before. These participants then practiced yoga at least twice a week for around 3 hours, and the results showed a significant improvement in their fitness and strength levels.
Cardiovascular Health
Apart from keeping you in shape, there are many purported health benefits as well of yoga. Studies show that elevated mind and body connection can help lower blood pressure and restore “baroreceptor sensitivity.” Stats also suggest that people who practice yoga regularly are able to maintain better lipid profiles and overall heart health.
It’s because of these benefits that many doctors have start including yoga in their cardiac rehabilitation programs.
Reach out to TheYogiMatt for best advice and yoga practices.
Matt Giordano, TheYogiMatt, is a world renowned yoga teacher, and the creator & founder of the global school called Chromatic Yoga. He is most known for his skillful ability to guide students into postures to awaken their full potential. Matt provides top level teacher trainings in both the 200 and 300 Hour formats. Visit www.theyogimatt.com to learn more about online classes, immersions and teacher trainings.
by matt giordano | Apr 27, 2021 | Guest Posts
by matt giordano | Apr 22, 2021 | teacher training
Since the benefits of yoga aren’t hidden anymore, you’ll find many people searching for expert yogis to guide and train them. While some people wish to just learn the art of yoga for their own sake, others wish to excel and become a yogi themselves. Regardless of whatever your plans are, there are certain things you must take into account before you choose a yoga expert.
Knowledge and Skills
Like any other field, yoga also requires knowledge and skills. You can’t just read some books or watch YouTube videos and become a yogi. It takes patience, effort, and years of learning before one excels in this field. Moreover, it also matters how and from whom you’ve learned your yoga expertise. The best yogis have traveled to different places and gathered knowledge and skills from many different teachers. Keep these things in mind when you lookout for a yoga expert.
Yoga Type
There are many different types of yoga, and hence it’s very important to decide what yoga you’re planning to learn. The best yogis have expertise in and knowledge of multiple types of yoga because they can use multiple methods in combination with the best results.
Experience
Once the yogi has completed their basic education and skills, it’s also important for them to practice it themselves before teaching others. When you’re choosing a yoga expert, experience matters more than anything else. Make sure you choose the most experienced and knowledgeable one.
Sincerity
There are good guys and bad guys in every field, and the same is true for yoga. You might come across some yogis who exaggerate their experiences and make mystical claims. Stay away from such yogis and look for the most honest and sincere ones you can find. Those who’re dedicated to the field will never brag too much about themselves or make any non-sensical claims. They’ll tell you what’s true and guide you wherever necessary.
Medical Knowledge
If your yogi also has some basic knowledge of medical science, then that’s a bonus and can come out very handy. Yogis with a medical background can combine their yoga skills with medical knowledge to give you the best results.
You can also reach out to TheYogiMatt for the best advice and yoga practices from anywhere in the world.
Matt Giordano, TheYogiMatt, is a world renowned yoga teacher, and the creator & founder of the global school called Chromatic Yoga. He is most known for his skillful ability to guide students into postures to awaken their full potential. Matt provides top level teacher trainings in both the 200 and 300 Hour formats. Visit www.theyogimatt.com to learn more about online classes, immersions and teacher trainings.
by matt | Mar 30, 2021 | Home Page, Main Page Display
FIREFLY POSE, TITIBHASANA
STEP-BY-STEP TUTORIAL: LEARN TO FLY
FIREFLY POSE, TITIBHASANA
STEP-BY-STEP TUTORIAL: 4 KEY ACTIONS
Firefly Pose (Titibhasana) might have you thinking, “There is no way I’ll ever be able to do THAT pose!” Yes, for sure it requires strength and flexibility, but with the right application of techniques, you will surprise yourself.
Firefly is a pose I teach in many of my workshops and online immersion classes because it brings a lot of laughter and a lot of those “Aha!” moments with it. Just have a couple of yoga blocks (or books) and a nice big couch cushion, because you are probably going to find yourself accidentally seated a few times while learning. It’s part of the fun factor!
In the video below, I collected a few clips from online classes & immersions so you could see how I come into Firefly from different angles. Try this with me, and together we will unlock Firefly Pose, Titibhasana.
There are 4 key actions you can apply to your Firefly Pose right now. With consistent practice, your Firefly could take flight.
Firefly Pose • Titibhasana
The following tutorial footage in this video snippet of Firefly Pose (Titibhasana) is taken from the March 2021 Immersion titled MOVE•BREATHE•RELEASE
Prep for Firefly Pose, or Titibhasana
To set up for Firefly Pose, Titibhasana, you first want to separate your feet so that they’re wider than your hips. Then bring a set of yoga blocks behind your feet.
Now, bring your arms to the inside of each leg, fingers facing forward. Bend generously into your knees, as if coming into a squat. Move your hands back behind your legs. Place the palms of your hands firmly on each block with hands wide. Fingers/hands turned outward a bit usually provides more ease on the wrists.
The final prep step is to bend your elbows, creating a sort of table for you to sit on. Be sure to keep your arms wide.
Now you’re ready for Firefly Pose, Titibhasana!
4 KEY ACTIONS TO MOVE INTO FIREFLY POSE, TITBHASANA
- Push into your hands and round your back, protracting your shoulder blades. That will activate your serratus anterior (shoulder blade muscles) and your core. You will instantly feel lighter as a result.
- Lift your heels and come onto your toes. Squeeze your legs toward each other. Miss this step and you’re likely to fall back.
- Now, keep that squeeze and TURN your legs in. Better yet, try this step one leg at a time to get the feel for the squeeze. This is a really important step! Teachers — here is a key tip if you are demonstrating this for your students: If you’re demonstrating this pose, emphasize the thighs rolling in (if the knees are bent that means the feet will actually go outward, so keep their attention on what your upper thighs are doing to avoid confusion).
- Lastly, and least importantly, straighten your legs (your knee joints) by activating your quadriceps.
Can’t straighten your legs?
Many people tell me their hamstrings are too tight, so they can’t straighten their legs. That may be the case, OR it may be that the quadriceps are too weak against the tightness of the hamstrings. To be honest, approaching from the perspective of what to strengthen is usually far safer and more effective than just stretching.
Sit in a straddle position (don’t worry about how wide). Activate your quads by pulling your knee caps toward your hips and straightening your knees. Now, keep your right knee straight and lift your right thigh off the ground. Crazy how much of a challenge just this can be! You can lean back at first; that might help. Try each side. Even if you can’t get each leg off the ground, you will be developing your quad strength by trying to do this. Over time, you will get it! By strengthening your quads, eventually strength will win over inflexibility.
Want to support the continuation of these blogs? The best way to do so is to share them on social media or with friends via email! Thank you for stopping by!
TOP RELEVANT RECOMMENDATIONS
1. MOVE•BREATHE•RELEASE (footage in above video), 12-class immersion
2. Arm Balance Immersion: 12 Classes — 12 Arm Balances
MORE WAYS TO DEVELOP YOUR PRACTICE
- Live Immersions: 3 Classes Per Week
- 200 hour training: Get Certified
- 300 Hour Online Training: Get 500 Hour Certified
When You Subscribe, You Will Get Instant Access to
- the Technique Pack: 15 yoga pose breakdowns
- exclusive online course discounts
- exclusive blogs and videos


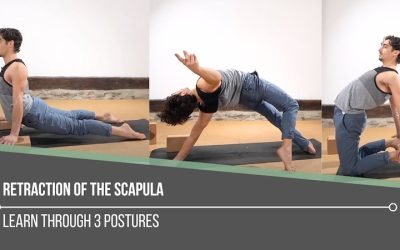
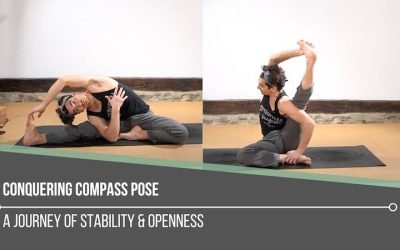
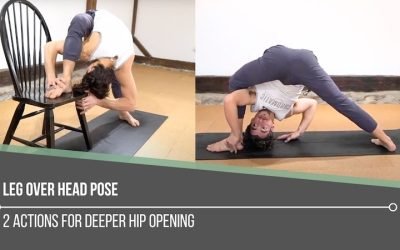
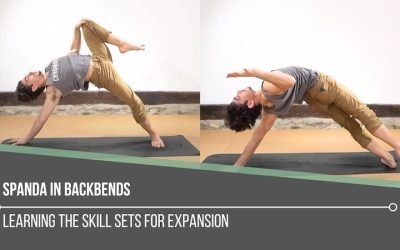
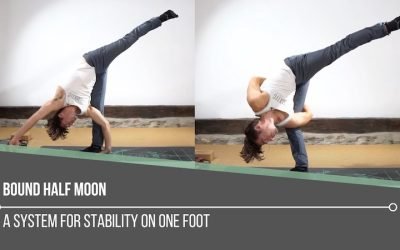
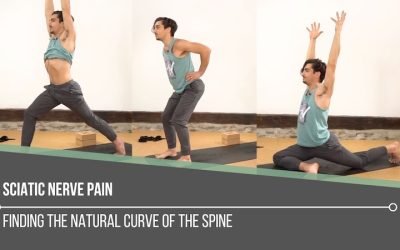
![yoga backbend techniques: 12 classes [backbend technique to relieve back pain "bowing the spine']](https://www.theyogimatt.com/wp-content/uploads/2021/10/Archna-Mohan-chromatic-5.jpg "Archna Mohan chromatic")


![yoga backbend techniques: 12 classes [backbend technique to relieve back pain "bowing the spine']](https://www.theyogimatt.com/wp-content/uploads/2020/09/200-hour-horizontal.jpg "200 hour horizontal")
![yoga backbend techniques: 12 classes [backbend technique to relieve back pain "bowing the spine']](https://www.theyogimatt.com/wp-content/uploads/2020/07/10.jpeg "10")